Showing posts with label Greens N Fruits Recipes. Show all posts

Wednesday, October 16, 2013

Apple & Peach Salsa

While I was making some pork carnitas yesterday for my taco, I realized I forgot all about some kind of salsa to go with taco. Since the pork is kinda rich and heavy, I knew I needed something light to cut down the richness of the pork. Not wanting to make traditional salsa, I opted to incorporate the 2 fruits I had in my fridge; apple and peach into the salsa.

I like the combination; a little crunch, a little sweetness, a little tanginess and a little heat in a bite (especially when you bite in that tiny tiny piece of serrano pepper). Adding it to some taco carnitas, I feel like I'm eating "quite" healthy! A little taste of pork carnitas and fresh salsa in one bite, YUMS! I really like the combination when I take a bite into the taco; I get the savoriness and richness from the carnitas and the freshness and lightness from the apple and peach salsa. I'm sure it will go great with some grilled pork chops or even some grilled fish. Here's the salsa recipe:


APPLE & PEACH SALSA RECIPE
**Serves 4-6

Ingredients:
  • 1/4 Medium Onion, Finely Chopped
  • 1 Medium Green Apple, Peeled, Cored & Finely Chopped
  • 1 Medium Peach, Peeled, Deseeded & Finely Chopped 
  • 1 Small Serrano Pepper, Deseeded & Very Finely Minced **
  • Handful of Cilantro, Chopped (About 1 Tbsp packed)
  • 1/2 Tsp Salt
  • 1 Tsp Sugar
  • Juice of 1 Lime
Method:

In a bowl, mix all the ingredients above. Taste and if you need more salt, sugar or lime juice, feel free to adjust. Set aside in the fridge for about 30 minutes until ready for use. Serve with your favorite pork carnitas or your choice of meat! 

**Reminder: Do not rub/touch your face or eyes after you cut the chili!


June's comments: Depending on how much heat you like or can take, add a little of the serrano pepper first, mix and taste. Add more if you like more heat to the salsa. You can also sprinkle a dash or two of cayenne pepper for more heat. But I like to keep this salsa a little more refreshing and therefore restrained from adding too much heat to it. 

Enjoy! 

Simply June 

Tuesday, October 1, 2013

Chilled Spicy Tofu

For 2 days in a row, I've been craving for something simple, a little bit spicy but yet refreshing for lunch. And I knew exactly what I needed to make; a chilled tofu dish! Again, this was something I've never had before until about 2-3 weeks ago when my friend made this for dinner. I like the simplicity  of the dish and decided to mimic it with my own twist.

In a typical Asian (Chinese) household, no cooking is required when preparing this dish as we always have some fried garlic oil and fried shallots in the pantry. As I just used my last batch of garlic oil yesterday, I had to make some for this dish. Using the microwave to make the garlic oil is probably the easiest way to make it; you don't have to stand over the stove top to stir and prevent the garlic from burning!

Anyway, the chilled tofu dish my friend made was slightly simpler without the use of the black vinegar and chili crisp, but I was in a mood of a little bit of kick in the dish!  If you don't want the dish to be spicy or do not have black vinegar and/or the chili crisp in your pantry, feel free to omit it. However, you'll probably need to increase the amount of the soy sauce and oyster sauce to 1-1/2 Tbsp to make up for the sauce. Here's the recipe:


CHILLED SPICY TOFU RECIPE
*Serves 3-4

Ingredients
  • 1 Package Soft Tofu
  • 1 Tbsp Soy Sauce
  • 1 Tbsp Oyster Sauce
  • 1 Tbsp (Chin Kiang) Black Vinegar
  • 1/2 Tbsp (Lao Gan Ma) Chili Crisp Sauce
  • 1 Tbsp Vegetable Oil
  • 2-3 Cloves Garlic, Minced
  • 1 Stalk Green Onion, Chopped
  • 1 Handful Cilantro, Chopped
  • 1 Tbsp Fried Shallots (Optional)
Method
Combine minced garlic and oil in a microwavable bowl and ensure that the garlic is submerged in the oil. Microwave this mixture for 1 minute, stir and continue for another 30 second to 1 minute until the garlic are golden brown. Carefully remove the (warm) bowl from the microwave and stir in the soy sauce, oyster sauce, black vinegar and chili crisp sauce. Set the sauce aside.

Drain all the water from the soft tofu, and invert the tofu onto a shallow bowl. Slice the tofu into 10-12 pieces if you prefer. Drizzle the sauce, sprinkle the green onion, cilantro and fried shallots. Serve immediately with some steam rice. Enjoy! 

June's notes: If you do not want it to be too cold, microwave the tofu for about 1 minute after you have inverted it onto a (microwavable) bowl. If you like a little more spiciness, add up to 1 tbsp of the Lao Gan Ma Chili Crisp Sauce; but do be very careful......it can get too spicy!! 


Simply June 

Thursday, August 29, 2013

Citrus Salad

I pinned this refreshing citrus salad a while back but never gotten a chance to try it. The addition of lemongrass in the syrup was very intriguing that I just had to try when I have the chance! So, with some girl friends coming over for lunch, it was a great time to attempt this recipe and see how they like it. A nice cool refreshing salad would be a perfect dish for a hot summer day. The verdict........everyone asked for the recipe.. Score! Even my friend who I just found out do not like grapefruit enjoyed the dish and requested for the recipe. 

I made very little tweak to the recipe overall. The recipe was pretty simple, although segmenting the citruses was a little messy. If you do not know how to segment a citrus, check out this video. Click HERE for the original recipe. The colors of my citrus salad (I blame the ruby grapefruit which wasn't that ruby/pink looking) wasn't as gorgeous as the one posted by the originator of the recipe but rest assured, it's still yummy! =) Here's my tweaked version of the citrus salad. You can also serve this as a dessert....I would! 


CITRUS SALAD RECIPE
*Serves 3-4

Ingredients
  • 1 Ruby Grapefruit, Segmented, Juice Reserved
  • 1 Regular Grapefruit, Segmented, Juice Reserved
  • 2 Naval Oranges, Segmented, Juice Reserved
  • 1 Tangelo, Segmented, Juice Reserved
  • 1/2 Cup Honey
  • 2 Tbsp Sugar
  • 2 Stalks Lemongrass, White part only, Cut into 1" pieces
  • 1/2 Vanilla Bean, Split & Scraped
  • Zest of 1/2 Lemon
  • Zest of 1 Lime
  • Mint Leaves for Garnish
Method
Mix the citrus segments in a bow to combine. Cover and chill. In a small saucepan, mix 1 Cup reserved citrus juice with honey, sugar, lemon zest and vanilla pod and seeds. Bring to a boil, stirring occasionally until honey and sugar is dissolved. Remove from heat and let stand 30 minutes. Strain and set aside to let it chill. 

Divide citrus segments into 4 serving cups. Drizzle about 1-2 tbsp of the syrup and garnish with lime zest and mint leaves. Let the salad chill until ready to serve. Enjoy! 


June's Notes: I used about 1/4 tsp of vanilla bean powder since that was what I had. If you do not have vanilla pods, feel free to use about 1/4 tsp of vanilla extract in the mixture. There will be plenty of leftover syrup which you can use for cocktails, drinks or more citrus salad!

Simply June 

Saturday, May 18, 2013

Quick Pickle Japanese Cucumber Salad

I'm not sure if this dish is of Japanese or Korean origin. I first had this salad at a sushi restaurant and it was delicious. When I was searching for a recipe to replicate the dish I had, I came across this recipe HERE which called it Korean cucumber salad.

Since I first tasted this at a Japanese restaurant, and I'm slightly tweaking the recipe I found on Koreanfood.com, I'm going to just call it (Quick Pickle) Japanese Cucumber Salad. I hope you will enjoy this quick pickle cucumber salad as much as I do. Here's the super easy recipe with my slight changes.


JAPANESE CUCUMBER SALAD RECIPE
*Serves 3-4

Ingredients
  • 4-5 Persian Cucumbers
  • 3 Tbsp Sugar
  • About 1 Tbsp Salt 
  • 1/4 Cup White Vinegar
  • 1/4 Tsp - 1/2 Tsp Toasted Sesame Seeds
Method
Thinly slice cucumbers (skin on) with a mandoline (watch those fingers!) and place in a glass or porcelain bowl. Sprinkle cucumber slices with salt and sugar and gently toss to combine. Add vinegar and stir to coat all the cucumber slices. Cover and refrigerate the cucumbers for about 30 minutes. Sprinkle with sesame seed before serving.

June's Notes: You can let the cucumbers marinate 2-3 hours before serving. You can also let it sit overnight, although I think the crunchiness is slightly lost due to the long pickling. Do not keep the cucumbers more than 24 hours as it's no longer as tasty. =)

Don't worry if it looks like there's not enough liquid in the pickling. The cucumber will release more liquid as it "marinates". If you can't find Persian cucumbers (which are smaller), English cucumbers are ok too. 1 English cucumber should suffice.

Enjoy!

Simply June 

Monday, May 13, 2013

Korean Seasoned Spinach Banchan / Sigumchi Namul

With a little Korean bbq party planned at our patio, we needed to shop for some meat to cook and some banchan (Korean side dish) to accompany all that meat. I knew I needed a variety of spicy and non spicy banchan and decided to make some non spicy one myself. That way, we can control what goes into the dish and yes, save a bit of money while at it.

I had recalled eating a spinach side dish (Sigumchi Namul) at Korean restaurants and loving it. I also vaguely remember my mom saying it's quite easy to make. I think! After searching for different versions recipe, I decided to roughly do it my way, without garlic and green onion like some recipes required. I don't know if it's as authentic anymore, but it's surely is delicious and healthy! This dish can be eaten immediately or kept for a couple days. I made this a day ahead so that the spinach can absorb as much flavor as possible and so that I don't have too much things to do the day of the bbq. Here's the recipe!


KOREAN SEASONED SPINACH SIDE DISH RECIPE
*Serves 4-6

Ingredients
  • 2 Bunches Spinach (About 1-1/2 lbs total)
  • 1-1/2 Tbsp Soy Sauce (Low Sodium)
  • 3 Tsp Sesame Seed Oil
  • 1 Tsp Toasted Sesame Seeds
Method
Trim the ends of the spinach, remove any wilted leaves and then wash the spinach thoroughly. Prepare an ice bath; a bowl of water with a lot of ice. Boil a large pot of water (large enough to fit the spinach) over high heat. 

Once the water is boiling, blanch the spinach for about 30 seconds. Then, quickly remove and place in the ice bath immediately to stop the cooking and cool the spinach. This will also help retain the beautiful green. Drain and squeeze it gently to remove as much water as possible.

Cut the spinach a few times and set it in a bowl. Add soy sauce, sesame oil and sesame seeds. Using a chopstick, toss and mix well. Transfer onto a serving plate and serve immediately with some rice and your favorite meat dish. Alternatively, keep it covered and refrigerated (you can keep up to 3 days) until ready to consume.

June's Notes: You can definitely add more soy sauce and sesame seed oil to your preference. Start with the amount in the recipe first, taste then add more if you want a little more salt in your dish. 

Enjoy!

Simply June 

Wednesday, March 6, 2013

BAGNA CAUDA.........Love It!


We've been blessed to have friends from different parts of the world and generous to share their culture with us. Often, sharing their culture/tradition involves eating.... and the husband and I cannot say no to food! =)  A couple months ago, our Italian friends C&A invited us over for a traditional Italian meal; Bagna Cauda which originates from their town. According to C & A, their family always have it over winter and share the meal with family and friends. After I tried this delicious dip/meal, I was totally hooked!!

According to Wikipedia, Bagna Cauda is a warm dip typical of Piedmont, Italy and is served and consumed in a manner similar to fondue. The dip is made with garlic, anchovies, olive oil, butter and sometimes cream. Therefore, you must like fish or in this case anchovies to enjoy this dip. The dish is eaten by dipping raw, boiled or roasted vegetables and even bread. Traditional, the Bagna Cauda is placed in a big pan in the center of the table for communal sharing. Now, it is usually served in individual pots.

C & A was generous to haul 2 (or 3) large cans of anchovies back from Italy during their last trip. It took them several days to clean the salt cured anchovies and prepare some of the vegetables for dipping. We were greeted with a melange of steamed, boiled, and raw vegetables (raw beets, boiled cabbage, boiled potatoes, raw radish, steamed cauliflower, steamed asparagus, raw fennel, steamed carrots, boiled mini onions, etc) C prepared the quick yet delicious anchovy dip in front of us, so I had a first hand look of how it's being made. Super easy, just make sure you have some canned anchovies at home. Since I could not find salt cured anchovies, I used anchovies soaked in oil instead. The result is still as good.  It's definitely a good way to load up on a lot of vegetables. Some vegetables was surely an excellent match for the dip, some was just ok... but overall it's a personal preference thing as there's no one vegetable that I dislike after dipping it in the bagna cauda! Here's the recipe!


BAGNA CAUDA RECIPE
*Serves 1-2

Ingredients
  • 1 Small (2 Oz) Can Anchovies (in oil), Drained
  • 3 Tbsp Olive Oil
  • 4-5 Cloves Garlic, Grated
  • 2 Tbsp Heavy Cream
  • Dash of Ground Black Pepper, Optional
Method
In a small pot, heat oil over medium heat. Then, add grated garlic and anchovies and let the mixture cook over medium low heat until the anchovies melt. Stir occasionally to help melt the anchovies. Finally, add in heavy cream and let the mixture warm up. Transfer bagna cauda to a small porcelain bowl and add some fresh cracked black pepper. Serve the warm dip with your favorite steamed or raw vegetables. Bread also goes well with this dip.

June's Notes: With the bagna cauda sauce I made, I decided to steam some asparagus till slightly tender and poached and egg. I poured about 2 tbsp of the bagna cause sauce over the asparagus and poached egg platter and loved the combination of the runny yolks and the bagna cauda sauce! 


To learn how to poach an egg, check out Alton Brown's tips

Simply June 

Friday, November 9, 2012

Cabbage & Straw Mushroom Stir Fry

Very often, I try to make sure we have some vegetables in our meal. Sometimes, it's incorporated in the meat dish, other times it's a simple vegetable stir fry. 

Here's a recipe for a easy cabbage stir fry. If you are not a big fan of mushrooms, feel free to omit it. 


CABBAGE & STRAW MUSHROOM STIR FRY RECIPE
*Serves 3-4

Ingredients

  • 1/2 Small Cabbage (About 9 Oz), Shredded
  • 4 Oz Canned Straw Mushrooms, Quartered
  • 1 Clove Garlic, Minced
  • 1 Shallot, Minced
  • 2 Tsp Oyster Sauce
  • 2 Tsp Oil
  • 2 Tbsp Water
Method
In a wok, heat oil over medium high heat. Stir fry garlic and shallot until slightly brown. Add mushroom and stir fry for about 30 seconds. Add cabbage and oyster sauce. Stir fry for about 1 minute, add water and let cabbage cook until tender. Serve immediately with warm rice.

Enjoy!

Simply June 

Friday, October 26, 2012

Curried Pumpkin Soup

I bought a can of pureed pumpkin from the grocery store recently to make Pumpkin Cake but then, I had a craving for some kind of curried pumpkin soup and decided to forgo the idea of making a pumpkin cake. I can just head to the store to get another can of pumpkin or perhaps try to use the squash my neighbor gave me and tweak the pumpkin cake recipe instead!

Anyway, armed with a can of pumpkin puree and a hungry tummy....I whipped up some spiced pumpkin soup. Of course fresh garlic and onion would taste better but I used garlic and onion powder instead as I did not want to make a big mess in the kitchen, and use my kitchen blender to puree my soup.  I used some (no salt/sodium) chicken broth in the soup but if you want to make the soup vegetarian friendly, use vegetable broth/stock. For this recipe, I used a Jamaican style curry powder and added some ground cumin. I'm sure any style (mild?) of curry powder will work with this recipe as well.


CURRIED PUMPKIN SOUP
*Serves 2-3

Ingredients
  • 1 15 Oz Can Pumpkin
  • 1-1/2 Tbsp Butter
  • 1 Tbsp All Purpose Flour
  • 1-1/2 Tsp Curry Powder
  • 1-1/2 Tsp Ground Cumin
  • 1 Tsp Garlic Powder
  • 1 Tsp Onion Powder
  • 1-1/3 Cup Chicken Broth 
  • 1/2 Cup Coconut Milk
  • 1/4 Cup Heavy Cream (Plus more, if desired)
  • Salt (Season to taste)
  • Ground black pepper (Optional, season to taste)
Method
In a saucepan over medium heat, add butter, curry powder, ground cumin, garlic powder and heat until spices are fragrant. Then stir in flour and mix well. Then pour in chicken stock and coconut milk and let the mixture simmer. Stir in pumpkin and let mixture simmer. Finally stir in cream, season to taste and serve! If you find the soup too thick for your preference, dilute the soup with optional 1-2 tbsp of heavy cream.


Simply June 

Tuesday, October 23, 2012

Avocado Egg Salad

I've not been a big fan of avocado (or tomatoes) and will never eat it as is like some of my friends would. A couple months ago I fell in love with a sandwich combination at my previous work place. I forgot how I came across the combination of avocado in my chicken salad sandwich (with either croissant or baguette, extra mayo, bacon, provolone cheese and lettuce..and toasted!); perhaps it was one of the specials they had one day... or.. I saw someone ordering that combination. Since the first time I had it, it had been my go to option for sandwiches and it's the only way I'll eat avocados!

For the reason of being not a big fan of avocados, I don't buy them. However, I found one in my fridge the other day; leftover from when the husband's family was visiting. I think my SIL got some to feed her kids. I used a bit of it as a condiment for my pork burger and it was surely a delicious combination! I guess from now on, I will eat more avocados..... only if they were snuck into my sandwiches/burgers.

With almost one avocado left (since I only used a small slice for my burger), I decided to make some healthy(?) salad out of one of the half I cut into. I kept the other half for another use, another day. Combining a hard boiled egg and some artificial crab meat with the avocado, this is my attempt to eat a little healthy! Just to make things a little easier, I doubled my original recipe! Here's the recipe.


AVOCADO EGG SALAD RECIPE
*Serves 2

Ingredients
  • 1 Ripe Avocado, Cut into Cubes (Refer HERE)
  • 2 Hard Boiled Eggs, Peeled and Chopped
  • 3-4 Oz Artificial Crab Meat (Chunk Style), Chopped
  • 4 Tsp Ranch Dressing
  • 1 Tsp Lemon Juice
  • 1 Basil Leaf, Julienned 
  • Pinch of Salt
  • Ground Black Pepper (To Taste)
Method
In a medium bowl, mix together all ingredients except basil, salt and black pepper. When all the ingredients are mixed well, toss in basil leaf, pinch of salt and ground pepper. Refrigerate before serving or serve immediately!

Enjoy!

June's Notes: Save the shell of the avocado, and you can use it as a serving "bowl".

Simply June 

Friday, October 19, 2012

Fresh Strawberry Crepe

I love crepe but I've never made them before. I would usually get a dessert crepe or a savory one if I see it on the menu. With a pint of fresh strawberry in the fridge, I decided to look up a crepe recipe online and make some for breakfast. I went with a basic crepe recipe I found on all recipes.com and added some strawberry jam, fresh strawberries and kept it simple. 

The crepe recipe was very easy and turn out pretty good. I had a little hard time trying to mix the batter, so maybe next time I'll blend all the ingredients in a blender. I used a crepe pan I had gotten as a X'mas present and it gave me perfectly cooked crepes. The combination of strawberry jam and fresh strawberries were just perfect; light, simple and not overly sweet. Here's the recipe for Fresh Stawberry Crepe, with the basic crepe recipe adapted from all recipes.com


FRESH STRAWBERRY CREPE RECIPE
*Makes 6-8 crepes

Ingredients
  • 1 Cup All Purpose Flour
  • 2 Large Eggs, Lightly Beaten
  • 1/2 Cup Milk
  • 1/2 Cup Water
  • 1/4 Tsp Salt
  • 2 Tbsp Melted Butter
  • Oil for cooking crepe
  • 2 Tsp Sugar
  • 10-12 Fresh Strawberries, Quartered 
  • Strawberry Jam
Method
In a large mixing bowl, which together the loud and the eggs. Gradually add in the milk and water, stirring to combine. Add the salt and butter and beat until smooth. Sieve the mixture to remove lumps and set aside.

In another bowl, add sugar to the strawberries and let the berries macerate. Heat a lightly oiled griddle or frying pan over medium high heat. Pour about 1/4 - 1/3 cup of batter for each crepe. Tilt the pan in a circular motion so that the batter coasts the surface evenly.

Cook the crepe for about 2 minutes, until the bottle is light brown. Loosen with a spatula. Turn and cook the other side for a couple seconds.

Spread a thin layer of strawberry jam onto the crepes, and fold them into quarters. Arrange them onto the plates and top with the fresh strawberries. Enjoy immediately!


Simply June 

Wednesday, October 17, 2012

Baked Eggs & Roti Canai = Pretty Awesome Combination!

I was in the mood for baked eggs a couple days ago after I saw a recipe from a cookbook I bought from Williams Sonoma. I made a couple changes to the recipe including adding more eggs coz I used a pretty huge ramekin. Those extra eggs was probably one of the mistake of the day, as it took longer to bake. I got impatient (mistake number 2) and hungry (since Hubby's simple 3 eggs sunny side up was already done), and decided to pull the eggs out of the oven. The eggs were quite uncooked overall, so I decided to stick them in the microwave (mistake number 3). I forgot how long I stuck it in for (probably a couple seconds), but it was a couple second too long for the fragile eggs. My baked eggs were very over done. I was anticipating luscious runny yolks, and was left staring at overly done yolks and a extremely messy looking ramekin. The baked eggs were still good..... but it was not what I had anticipated good. I ate it all up anyway as I liked the different elements I pulled together.


With this runny yolk craving that I've been having, I decided to make bake eggs again. Learning from the mistakes I made a few days ago, I scaled down a little by using 2 eggs instead of one, waited patiently and let the oven work it's magic. This time, I got delicious runny eggs and absolute satisfaction. The baked eggs was delicious! As I don't have bread at home, I decided to reheat a frozen roti canai/roti prata and dip my "roti" into the runny yolk, catching pieces of spinach and sausages in between dips. Mmmm..... this combination is pretty awesome!!! I paired my lunch with a Vietnamese Ice Coffee and for a couple seconds, it felt like I was transported to somewhere exotic and not my living room. You could certainly pair with with some toast, baguettes or whatever bread you have!

Here's the recipe for baked eggs, adapted from Georgeann Brennan's Brunch cookbook with my changes.


FRENCH BAKED EGGS WITH SPINACH AND SAUSAGE RECIPE
*Serves 2

Ingredients
  • 4 Large Eggs
  • 1 Fresh Bratwurst (or fresh sausage of choice), casing removed
  • 2 Cups Fresh (Young) Spinach Leaves, Packed
  • 2 Tsp Heavy Cream
  • 1 Tsp Oil
  • 1-1/2 Tsp Butter
  • Ground Black Pepper
Method
Preheat oven to 350F. Grease 2 (4 oz) ramekins with butter. Prepare a ice bath; bowl of cold water with ice. Boil a pot of water and once the water starts to boil, add spinach leaves. Blanch the leaves for about 1 minute and quickly remove and place into the ice bath for about 1 minute. Remove blanched spinach leaves from ice bath, squeeze the spinach firmly to remove water. Coarsely chop the spinach and divide the chop spinach into the 2 ramekins. Spread the chop spinach evenly. 

Heat 1 Tsp of oil in the frying pan over medium heat. Add the fresh bratwurst and cook it while breaking it into pieces. Continue to cook the bratwurst until they are slightly brown. Remove cooked bratwurst and evenly divide them into the ramekins over the chopped spinach. 

Break 2 eggs into each ramekin and drizzle with 1 tsp of heavy cream each. Place ramekins onto a baking sheet and bake the eggs for about 15-17 minutes or until the egg whites are firm and the egg yolks are still runny. Remove the ramekins from the oven, crack some black pepper onto the eggs and serve immediately with your favorite toast.

Enjoy!


Simply June 

Thursday, September 6, 2012

Sambal Lady Fingers

The MIL and I were discussing what vegetable dish to make for dinner. After going through the vegetables I had in my fridge, we decided to cook okra / lady fingers. I usually cook my okra/lady fingers the only way I know it's yummy.....in fish curry.  MIL was thinking about a stir fry... However, we ended up making the sambal okra / lady fingers after seeing a mouthwatering picture of sambal lady fingers in one of my nonya cookbook. We used that picture and recipe as an inspiration to make this dish!

My MIL was kind enough to cook us a big batch of "Dried Shrimp Sambal" or more fondly known in Hokkien as "Sambal Hae Bee. We used that as part of the ingredients for this recipe; instead of using regular dried shrimp. So, if you happen to have some delicious homemade (or store-bought) "sambal hae bee", give this recipe a try!!!  Mixing all the ingredients needed for the sambal, I couldn't wait to dig in... The sambal tasted sooo good!!!! The amount of sugar and lime in the recipe is totally up to your personal preference. The hint of minced kaffir lime leaves and roasted belacan powder gives it a nice aroma. The spicy, sweet, sour and fragrant sambal reminded me of tom yam! I had plenty of rice that day... and happily cleaned the plate of leftover sambal. It's so addictive and appetizing, I could eat another plate of it! Here's the recipe..... I hope you like it as much as I do! Nom..Nom..Nom..!

SAMBAL OKRA / LADY FINGERS RECIPE
Ingredients
  • 15-16 Lady Fingers / Okra, Top and Tip Trimmed
  • 2 Tsp Oil 
Sauce Ingredients
  • 3 Tbsp Sambal Oelek
  • 2 Tsp Belacan Powder
  • 3 Tbsp Homemade Dried Shrimp Sambal 
  • Juice from 1 Lime
  • 3-4 Kaffir Lime Leaves, Finely Minced
  • 2-3 Cloves Garlic, Finely Minced
  • 3-4 Tsp Sugar (Adjust accordingly)
  • Pinch of Salt
  • 2 Tsp Fried Shallots (Optional) 

Method
In a wok, heat some water over medium high heat and place a rack in the wok. Arrange the okra/lady fingers in a single layer in a shallow bowl and drizzle with some oil. Once, the water in the wok starts to boil, place the bowl of okra / lady fingers and cover the wok. Let the okra / lady fingers steam for about 5-7 minutes until tender. The okra / lady finger will turn a darker shade of green.

While the okra / lady fingers are steaming, mix all the sauce ingredients in a bowl. Adjust the sugar and lime accordingly to get your preferred level of sourness and sweetness. I like my "sambal" to be a little sour, so I use about 3-4 tsp of sugar to mix with the juice from the huge lime I used.

Once the okra / lady fingers are cooked, pour the sambal mixture onto the steamed okra / lady fingers. For optimum flavor, gently cut a small vertical slid in the middle of steamed okra, gently pry it open with a small teaspoon and stuff some of the sambal into the okra / lady fingers. Pour remaining extra samba over the okra / lady fingers and sprinkle with optional fried shallots. Serve with plenty of warm white rice!!Enjoy!

June's Notes: If you do not have "sambal hae bee" at home, I think you could probably use some toasted chopped dried shrimp. The flavors might not be as intense, but shouldn't be too bad. I'll have to try this version and let you know the results! =)
Looking at the picture of sambal lady fingers again, make me really hungry!!! Maybe I'll make another batch today.....Slurp! 

Simply June 

Tuesday, August 21, 2012

Creamy Ranch Mashed Potatoes

Even though boxed mashed potatoes are super convenient, making your own mashed potatoes isn't that difficult. Plus, at least you know it's made from fresh potatoes and there's minimal to no preservative in that big bowl of creamy mashed potatoes.

I am not going to deny that I have used boxed mashed potatoes during my college years but ever since I saw how easy was it to make it on my own.. I never looked back!

For hubby's birthday, I decided to make him some Chicken Marsala and to go along it, some mashed potatoes. I wanted to just make the mash potatoes a little fancy and decided to add some ranch dressing to it. Here's the recipe!


RANCH MASHED POTATOES RECIPE
*Serves 3-4

Ingredients
  • 1.5 lb Red Skin Potatoes (or your choice)
  • 1/2 Cup Half & Half
  • 1/4 Cup Ranch Dressing
  • 2-3 Cloves Garlic, Finely Minced
  • 2 Tbsp Butter
  • 1 Tsp Chopped Parsley
  • Salt 
  • Ground Black Pepper
Method
Peel potatoes, cut them into halves ( or cubes for shorter cooking time) and place them into a medium pot. Fill pot with enough water to cover the potatoes and 2 tsp of salt. Let the potatoes boil over medium high heat and cook until potatoes are soft and fall apart when you stick a fork into it.

Drain potatoes, then add minced garlic, half & half, ranch dressing and butter. Mash the mixture together then add chopped parsley and season with salt and pepper to taste. Serve immediately with your favorite meat.

Enjoy!

June's Notes: If you have some left over mash potatoes (lets say maybe a little over 1/2 cup) like I did, turn them into some potato croquet appetizers the next day! All you need is some panko bread crumbs ( about 1/2 Cup), 1 egg beaten, and oil for shallow frying. All you need to do is to divide the mashed potatoes into 4 portions, roll them into ball and gently flatten them into a disk while making sure the edges are nice and smooth.  Then dip, the potato discs into the egg mixture, and then into the panko bread crumbs. Make sure the potato dics are well coated with the panko breadcrumbs. In a frying pan, heat oil enough for shallow frying over medium heat. Once oil is hot, place the potato croquettes into the pan and fry until golden brown before gently turning over the croquettes over to fry the other side. Remove once both sides are golden brown and serve warm! 


Simply June 

Thursday, August 16, 2012

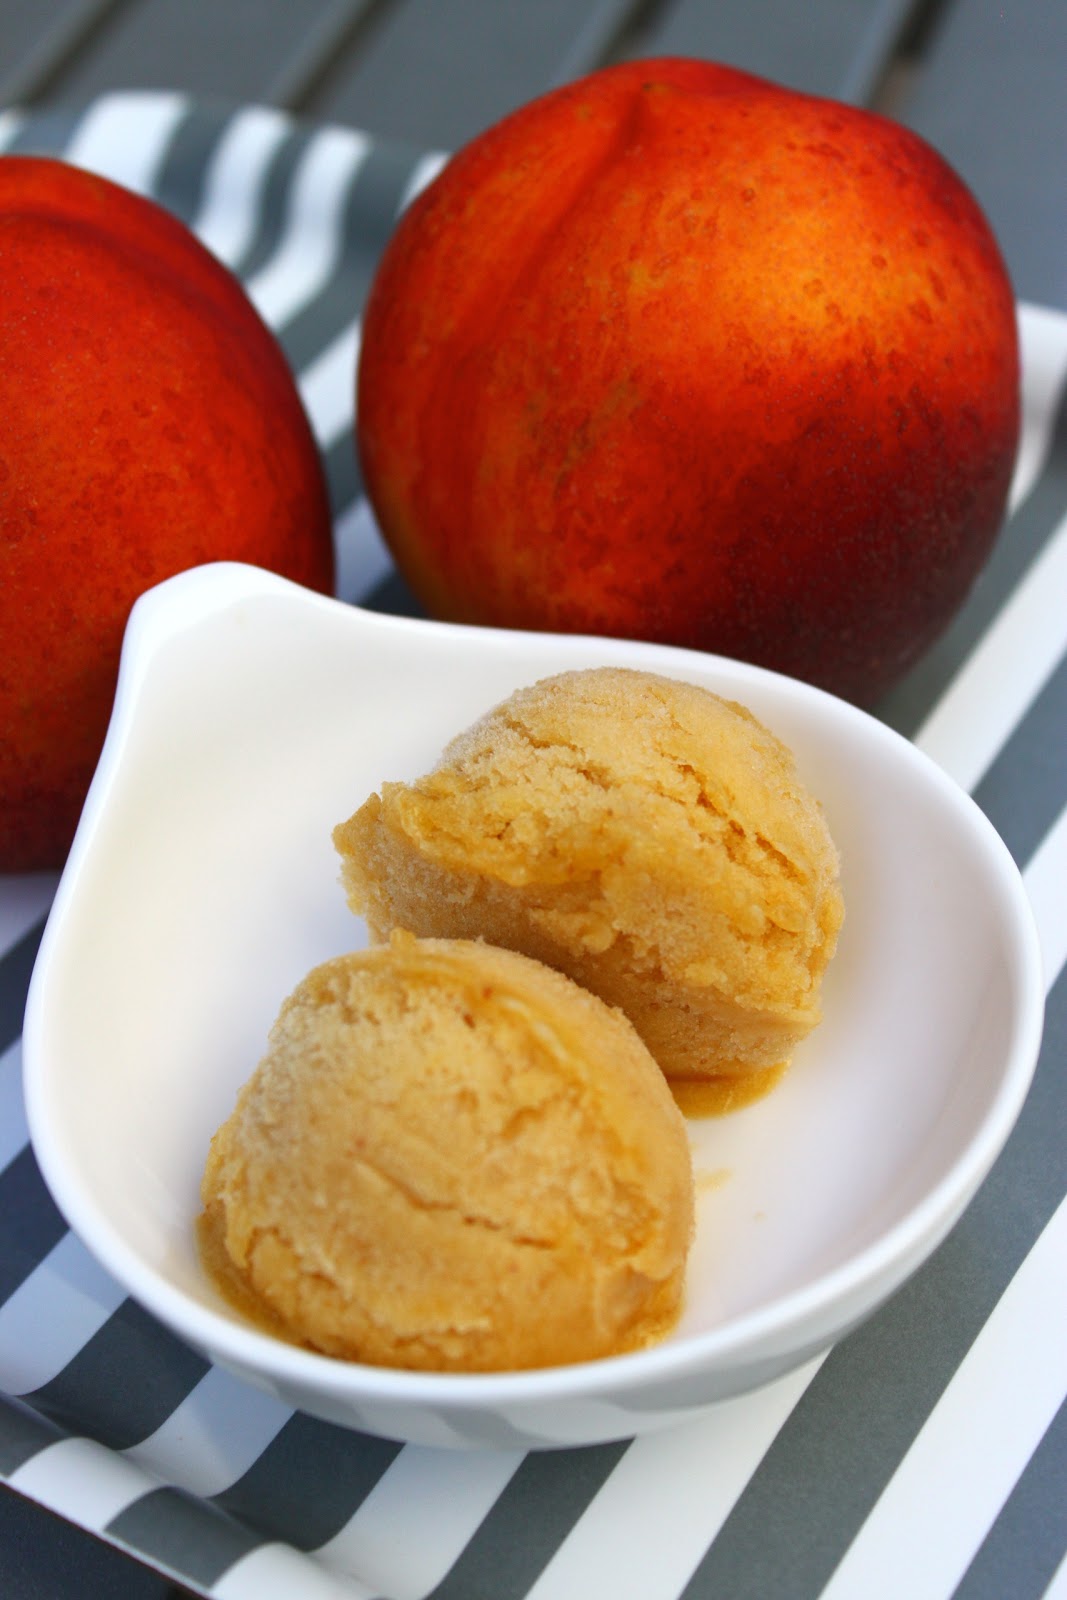
Nectarine Sorbet

From my "cooking" class where I tasted and took home a delicious nectarine galette recipe, I also took home a refreshing nectarine sorbet recipe. Stone fruits are in season now, so this was a perfect time to make something out of the fresh fruits. 

Recipe was simple, but the instructor's recipe was more than my ice cream maker could handle. I had to tweak Robert Wemischner's recipe stone fruit sorbet recipe a little to suit my taste and my ice cream maker. From the class, we were told that it's best to let the ice cream/sorbet base rest overnight before churning it so that you get a more intense flavor. I did the same, but I don't think leaving the base overnight did anything to my sorbet.

Grab some fresh stone fruits from the store and try this recipe out! Feel free to use peaches, apricots, plums, any very ripe stone fruit will do!


NECTARINE SORBET RECIPE
Ingredients
  • 4 Ripe Nectarines (about 2 Lbs)
  • 1 Cup Sugar
  • 1 Cup Water
  • Zest from 1/2 Large Lemon
  • Juice from 1 Large Lemon
Method
In a small pot, bring to boil sugar and water to make simple syrup (This will give you about 1-1/2 Cup and you will only use part of it). Set syrup aside and let it cool. 

Cut nectarines (keep the skin) into wedges and discard pits. Place cut nectarines, 1 cup of simple syrup, lemon zest and juice into a food processor or a blender and let it process until smooth. Slowly pour the blended nectarines through a fine sieve into a clean container. You will need to pour a little at a time, to avoid overflow. You'll need to stir the mixture constantly to get as much liquid through. Discard the remnants in the sieve.

Now, you can either store the sieved puree in the fridge over night before churning it or churn it right away in your ice cream maker per the manufacturer's instruction. I used a cuisinart 1.5 quart ice cream maker and processed the sorbet for about 30-35 minutes.

Transfer the sorbet into a container and freeze for about 2-3 hours before serving! Enjoy!

Simply June 


Tuesday, August 14, 2012

Nectarine Galette

I went to a cooking class recently, well it was more about architectural desserts and some demo I guess. While I didn't really learn much about putting together a decorative dessert that I did not already know how to, I did bring home some awesome recipes and learnt a few tips. The 3 hour class I went was very packed, even though the demo on the recipes were pretty good, I wished it was a hands on class. I guess, I must have misread the class description and went in on different expectations.

Anyway........ the instructor made a delicious yet quite easy to make peach galette. It had some rosemary in the crust, which I thought was very interesting and gives you a little surprising flavor when you bite into the galette. With 2 very ripe nectarines sitting in my kitchen, I knew this was a great time to try out the recipe. The original recipe given to us at the class has a brown sugar crumb topping, I decided to use his online recipe as a reference that omitted the crumb topping.  Original recipe by Robert Wemischner can be found HERE, but here's my slightly tweaked version. The galette is overall not too sweet (all the sweetness will come from your fruit!), and the slightly savory crust makes it an awesome combination. Make it a nectarine galette ala mode or perhaps a drizzle or two of some yummy caramel sauce if you want to increase the level of sweetness.


NECTARINE GALETTE RECIPE

Pastry Crust Ingredients
  • 2-1/2 Oz Unsalted Butter, at room temperature
  • 2-1/2 Oz Cream Cheese, at room temperature
  • 1 Large Egg Yolk, mixed with 1-1/2 Oz Ice Water
  • 1 Tsp Finely Chopped Fresh Rosemary
  • Zest form 1/2 Lemon 
  • 7 Oz All Purpose Flour + Extra for Rolling out dough
  • 3 Tbsp Sugar
  • 1/3 Tsp Salt
Nectarine Filling Ingredients
  • 4 Tbsp Unflavored Finely Ground Bread Crumbs
  • 2-3 Large Ripe Nectarines (or other ripe stone fruit in season)
  • 1 -1/2 Tbsp Lemon Juice, mixed with 1 Tsp Ice Water
  • 1 Tbsp Apricot Jam
  • Egg Wash (1 Egg Yolk, mixed with 1 Tsp Water)

Method

In a large bowl, cream butter and cream until smooth, scraping the sides and the bottom of the bowl occasionally. Add egg yolk mixture into bowl and mix until blended. Add rosemary, lemon zest, flour, sugar and salt, mixing just until dry ingredients disappear. Scrape the sides and bottom of the mixing bowl to be sure that all ingredients are well blended. Remove dough to a lightly floured surface and knead briefly to compress dough. Flatten the dough into a round disk and warp well in a plastic wrap. Chill in the fridge until firm, about one hour.

In the mean time, you can either peel the nectarines or leave it with skin on. Cut the nectarines into halves (pitt removed) and set them (cut side down) on a plate lined with some paper towel to soak extra juice. Gently brush the top of the nectarines with the lemon juice mixture and set the nectarines aside until ready to assemble.

Once the dough is firm, roll out the chilled dough into a sheet, about 1/3" thick on a lightly floured surface. Using a 5-6 inch round cookie cutter or a 5-6" bowl & knife, cut the dough into 4 circles and place on a parchment lined sheet pan. If not ready for use yet, chill the dough in the fridge.

Preheat oven at 375F. Sprinkle bread crumbs in the center of each dough leaving about 1-1/2" margin of dough uncovered. Place each half of the nectarines on top of the bread crumb, in the center of the dough. Fold the edge of the dough towards the nectarines, and pinch the dough at about 1" intervals, making a decorative pleat around the outside of the galette.


If the galette feels soft after pleating, refrigerate the galettes for about 15 minutes. Mix the apricot jam with the remaining lemon juice mixture (for a sweeter glaze, mix the jam with about 2 tsp of water instead of the lemon juice mixture) and brush the jam mixture on each nectarine halves.

Bake in the preheated oven for about 30-40 minutes or until golden brown. Let the galettes cool down a little before serving with your favorite vanilla or caramel ice cream. You can also serve the galettes at room temperature.

Enjoy!

June's Comments: Do not skip using the breadcrumbs, as odd as it sounds, it actually helps to absorb the juices the the fruit and prevent the crust from getting soggy. Also, when pleating the galette, pinch the dough tightly, if not you will end up having something ugly like this... =(


With the extra access of dough, I compiled them and roll it out into about 5-6" circle. With no nectarines left, I placed about 2 tbsp of blueberry jam in the middle of the dough (no need spread the jam, because as the galette cooks, the jam will spread out) leaving about 1-1/2" margin on the edge. Fold the edge of the dough and pinch the dough about 1/2" interval making a decorative pleat. Make a 3/4 inch "well" around the jam, so that the dough can contain the jam when cooking. Refrigerate the blueberry jam galette for about 15 minutes prior to baking. Brush the outer edge of the dough with egg wash and bake for about 30 minutes until the galette is golden brown. 


Not bad for one dough... 2 desserts, huh?


The desserts were so pretty, I couldn't help taking a couple more shots of them....Bon Appetit!


Simply June 

Friday, August 10, 2012

Banana Nut Muffin

I wanted to bake something for my friends and thought that banana nut muffin would be easy, delicious and a pretty healthy for snack. I've made banana crumb muffin from www.allrecipes.com in Massachusetts and the muffin was a big hit with my colleagues. The cinnamon sugar crumb topping on the muffin was absolutely delicious. But since I'm now in the West Coast, and being in California everyone is sort of health conscious, I decided to tweak the recipe and make it a little more "California Friendly" I guess. Substituting some all purpose flour with whole wheat flour, and adding some nuts..little steps to make it semi healthy!

The original recipe with the sinful cinnamon crumb topping is found HERE. Here's my version of healthy banana nut muffin recipe:


BANANA NUT MUFFIN RECIPE
*Makes about 12 standard size muffins

Ingredients

  • 1 Cup All Purpose Flour
  • 1/2 Cup Whole Wheat Flour
  • 1 Tsp Baking Soda
  • 1 Tsp Baking Powder
  • 1/2 Tsp Salt
  • 1/3 Cup Chopped Pecans/Walnuts
  • 4 Large Ripe Bananas, Mashed 
  • 3/4 Cup White Sugar
  • 2 Tbsp Brown Sugar
  • 1 Large Egg, Lightly Beaten
  • 1/2 Cup Butter, Melted
  • 1 Tsp Vanilla Essence
  • 1 Banana, Sliced (Optional, for garnish only)

Method
Preheat oven to 375F. In a large bowl, sift together all purpose flour, whole wheat flour, baking powder, baking soda and salt. Set aside. 

In another bowl, add mashed bananas, white sugar, brown sugar, egg, melted butter and vanilla essence and mix well. Pour banana mixture into the flour mixture, and stir well until combined. Scoop batter into pre-lined/greased standard muffin pan till about 3/4 full. Add the optional slices banana onto the muffin; one slice per muffin.

Bake in preheated oven for about 18-20 minutes. Do the toothpick test (inserting a toothpick into the muffin, and if toothpick comes out clean - muffin is done!) to determine doneness. 

Enjoy with a cup of coffee or tea... or breakfast or as a snack!

Simply June 
Friday, July 20, 2012

Jam Thumbprint Cookies

With a tea party coming up and bottles of jam at home, I wanted to make some thumbprint cookies. After googling for a recipe, I decided to go with Ina Garten's Jam Thumbprint Cookie. I've used some of Ina's recipe in the past and have always had good results with her recipes. So, using her recipe again is a no brainer!  The only change I made was adding some lemon zest (proud to say, the lemon was from my garden!!) to the cookies, and I used Blueberry and Apricot Jam for the jam filling. The cookies were delicious; the husband couldn't stop eating them! =)
Here's the recipe with my little twist..

JAM THUMBPRINT COOKIES RECIPE
Ingredients
  • 3/4 lb (3 sticks) Unsalted Butter, at room temperature
  • 1 Cup Sugar
  • 1 Tsp Vanilla Extract
  • Zest from 1 Lemon (Optional)
  • 3 1/2 Cups All Purpose Flour
  • 1/4 Tsp Kosher Salt
  • 1 Egg Beaten with 1 Tbsp water (for egg wash)
  • 7 Oz Sweetened Flaked Coconut
  • Raspberry and/or Apricot Jam (Or your Jam of choice)
Method:

Preheat the oven to 350 degrees F.

In an electric mixer fitted with the paddle attachment, cream together the butter and sugar until they are just combined and then add the vanilla (and lemon zest). Separately, sift together the flour and salt. With the mixer on low speed, add the flour mixture to the creamed butter and sugar. Mix until the dough starts to come together. Dump on a floured board and 
roll together into a flat disk. Wrap in plastic and chill for 30 minutes.

Roll the dough into 1 1/4-inch balls. (If you have a scale they should each weigh 1 ounce.) Dip each ball into the egg wash and then roll it in coconut. Place the balls on an ungreased cookiesheet and press a light indentation into the top of each with your finger. Drop 1/4 teaspoon of jam into each indentation. Bake for 20 to 25 minutes, until the coconut is a golden brown. Cool and serve.

June's Comments: I made my cookies a little smaller; they weigh between 0.7oz  and 0.8 oz. 
I made a slightly deeper indentation into the cookie, so that I can fill it with more jam! =)

Simply June 

Saturday, January 15, 2011

Italian Wedding Soup

I saw this yummy Italian Wedding Soup recipe from my Ina Garten cook book and I’ve been wanting to attempt it for the longest time but never did until one snowy day. This was also sort of semi spontaneous as I only thought of making the soup while shopping for some groceries a day before the big snow storm (we were greeted by more than 19” of fresh powdery snow!!) Having to just know the key ingredients; ground meat, sausage, spinach, pasta and chicken stock, I guessed my way through the rest of the ingredients!
I’ve never tried Italian Wedding Soups before though I’ve seen it plentiful on menus. Most of the time, the meatballs are beef and if you know me well enough, I can get very picky when it comes to beef. I never knew what were the origins of the Italian Wedding Soup either. My best guess was it might be a soup served often at an Italian Wedding? After some Googling and yes the help of Wikipedia, I found out that it’s just a soup that consist of vegetables and meat and it’s very common in Italian restaurants in US. I guess, I was totally wrong about this being a typical soup being served at a Italian wedding! Extracted from Wikipedia, “The term "wedding soup" is a mistranslation of the Italian language, minestra maritata ("married soup"), which is a reference to the fact that green vegetables and meat go well together. Some form of minestra maritata was long popular in Toledo, Spain before pasta became an affordable commodity to most Spaniards, though the modern wedding soup is quite a bit lighter than the old Spanish form, which contained a large variety of meat, rather than just the meatballs of modern Italian-American versions”
Long story short, I modified and came up with my version of Italian Wedding soup very much inspired by Ina Garten. Her Italian Wedding Soup recipe can be found HERE. This soup is a perfect for lunch (or dinner) during one of those cold wintery days!
Italian Wedding Soup1_thumb[2]
ITALIAN WEDDING SOUP RECIPE
Ingredients:
Part A (Meatballs)
  • 3 Hot/Spicy (Fresh) Italian Sausage (about 9 oz), Squeeze the meat from the casing
  • 6 oz ground pork
  • 1/4 cup Italian Bread Crumbs
  • 1 Tbsp Grated Parmesan Cheese
  • 2 Tbsp Chopped Fresh Parsley
  • 2 Tbsp Chopped Fresh Cilantro
  • 1 Tbsp Milk
  • 1 Large Egg
  • 1 Pinch of salt
  • 1/2 Tsp Black Pepper
Part B (Soup)
  • 2 Tbsp Oil
  • 2 Stalk Celery, Finely Chopped (About 1 Cup)
  • 2 Medium Onion, Finely Chopped (About 1 Cup)
  • 3-4 Cloves Garlic, Finely Chopped
  • 1 Cup Macaroni Elbows
  • 10 Cups Chicken Stock
  • 6 - 8 Oz Spinach
  • Black Pepper
  • Salt
Method:
Preheat the oven to 350 degrees F.
Mix Part A (meatballs), place the ground pork, sausage, bread crumbs, parsley, cilantro, Parmesan cheese, milk, egg, salt, and pepper in a bowl and combine gently with a fork. With a teaspoon, measure about 1tsp of meatballs, roll them and drop them onto a sheet pan lined with parchment paper. (You should have about 80 x 1 tsp size meatballs).  Bake for 20 minutes, until cooked through and lightly browned. Set aside.
Italian Wedding Soup
In the meantime, prepare part B (soup). In a pot, heat oil over medium high heat. Add garlic, onion and celery and saute until softened, 5 to 6 minutes, stirring occasionally. Add the chicken stock bring to a boil. Add the pasta to the simmering broth and cook for 6 to 8 minutes, until the pasta is tender. Add the meatballs to the soup and simmer for 1-2 minute. Season with salt and pepper to taste. Stir in the fresh spinach and cook until the spinach is just wilted. Serve immediately.
June’s comments: Feel free to omit the cilantro if you’re not a big fan of it. I love cilantro very much and try to include them in my meals whenever possible! This recipe serves 4-6.


Simply June 

Wednesday, January 12, 2011

Cranberry Apple Sauce (Jelly)

I’m sorry but for one reason or another I hate canned cranberry sauce….I think the look of the sauce when it comes out of the can turns me off. So, I never buy canned cranberry sauce and I try to avoid eating them when it’s served. =) Sorry, if I offended anyone!
Cranberry sauce is SO EASY to make, so why buy canned ones? Fresh homemade cranberry sauce might cost a little more, but hey at least you know it’s fresh and free of preservatives. The easy ones are just boiling water, cranberry and sugar all in one pot for a couple minutes. I came across this recipe from my Food and Wine magazine and added it to my thanksgiving dinner menu. It looked and sounded yummy, I just had to try it..and I love it !I enjoyed the slightly crunchy texture the apple gave…..this recipe is a keeper!
The original recipe from Food and Wine recipe is found here and knowing me, I had to modify the recipe (just a little), so my version is below.
Cranberry Apple Sauce
CRANBERRY APPLE SAUCE (JELLY) RECIPE
Ingredients
  • One 12-ounce bag fresh cranberries
  • 1 Large Fuji Apple, Diced into 1/2” Cubes
  • 3/4 Cup Sugar
  • 3/4 Cup Apple Juice
Method
Line an 8-by-4-inch loaf pan with plastic wrap and spray the plastic wrap with nonstick cooking spray.
Combine the cranberries with the apple, juice and water in a medium sauce pan. Bring to a boil and cook over moderately high heat, stirring frequently until the cranberries are completely broken down and the sauce is very thick, about 15-20 minutes. Scrape the cranberry sauce into the prepared pan, let it cool down then refrigerate until it’s chilled. Just before serving, invert the jelly onto a serving plate and remove the plastic wrap. Slice with a serrated knife before serving.

Simply June 

Sunday, January 9, 2011

Easy Fruit Tarts

This is another dessert that I put out during my Thanksgiving dinner. I always love fruit tarts/fruit flans but I did not want to sweat too much to prepare it yet still want to make a presentable yummy dessert. Making a quick and easy dessert was crucial especially since I have a lot of other dishes to prepare. Well, I couldn’t make up my mind to just make one dessert. So, I ended up making 4 kinds because I wanted to make sure every picky eater (if any) have some kind of dish/desert that they will be able to enjoy.
I always feel uncomfortable making pie crusts from scratch and will defer to the help of store bought crusts whenever possible. With the help of Pillsbury, Jello and Dole, and some what minimal preparation time, I came up with a plate of semi healthy (look at the colorful fresh fruits), individual dessert tarts.
Here are some instructions to make this dessert. I used mini tartlet tins to bake the crust. This way, there’s no fear of ruining a dessert when you cut into it. Every portion is somewhat the same (bite) size. Oh yeah, baking spray was also very helpful to enable an easy removal of the baked crust from the tin.
Fruit Tarts
EASY FRUIT TART RECIPE
Ingredients:
Method:
Preheat oven to 400F. Spray tartlet tins with baking spray. Unroll pie crust on a flat surface and using a round cookie cutter (size of cookie cutter needs to be larger than the top rim of the tartlet, sorry I do not have the exact measurements!) stamp out the pie crusts. Press each “cut” crusts into the each tartlet tins. Gently prick the base of the pie crusts so that the crust does not bubble up when you bake it. Bake the tartlets at 400F for about 10-15 minutes, or until the crusts are golden brown.
In the mean time, prepare the Vanilla Pudding per the instruction on the back on the box, set aside and let it chill. Drain your mandarin oranges and cut the strawberries into quarters. Slice the kiwi into 1/2” thick slices and cut them into quarters.
Once the pie crusts are baked, let them cool before you start to assemble the tartlets. Fill the chilled crusts with till about 3/4" full. Arrange the fruit slices as you please and serve immediately! Enjoy!!
June’s Comments: It depends how big your tartlet tins are, I think I came up with maybe 14-16 tartlets with one package of pie crust. And I think I may have used up 1-1/2 package of pie crust for my purpose. The extra fruits that you may end up with; combine them together and make them into a fruit salad. Extra vanilla pudding?..Just eat it as is, or with the fruit salad! =)
There are no restrictions to the type of fruits to use. The reason why I chose those three was for color. Feel free to use raspberries, blueberries, mangoes, peaches, etc. Let your creativity run wild and have fun!

Simply June 
Related Posts with Thumbnails