Showing posts with label Cakes. Show all posts

Friday, October 4, 2013

Cornbread (Muffin)

I'm never a big fan of cornbread as sometimes they tend to be a little on the dry side and too crumbly to eat. I like it when the cornbread is slightly moist and when there's pieces of corn in the cornbread.

I was having some friends come over for coffee and thought that it would be nice if I could serve them something else (I knew I wanted some kind of baked goods) besides coffee. As I was very low on eggs and butter and I had a large can of creamed corn staring at me, I decided to make some cornbread. I've never made cornbread before but I knew I needed a recipe that will give me a somewhat moist cornbread with the minimal ingredients I had.

After a bit of googling around, I found one recipe that appealed to me and decided to use the recipe with some changes. I also made the cornbread in a muffin pan so that I do not need to deal with cutting up the cornbread, and it just look much cuter this way!

I have to admit that I was nervous about the texture of the cornbread especially after being kept overnight.  The cornbread turned out nice and moist when I first ate it minutes after it came out from the oven. I wasn't sure how it would taste like the next day when I plan to serve it to my friends but was pleasantly surprised that it was still moist. Even my friend commented that the cornbread was moist and not as crumbly as other cornbreads she's had in the past and even requested for the recipe. Yay! The original recipe is posted here. Below is my tweaked version.


CORNBREAD (MUFFIN) RECIPE
*Makes about 15 (standard) muffins 

Ingredients
  • 1 Cup Yellow (Fine) Cornmeal
  • 1/2 Cup All Purpose Flour
  • 5 Tbsp Sugar
  • 2 Tsp Baking Powder
  • 3/4 Tsp Salt
  • 1/4 Cup Butter, Melted & Cooled
  • 1 Large Can (14.75 Oz) Creamed Corn 
  • 1 Large Egg, Lightly Beaten
  • 1/3 Cup Buttermilk 
Method

Preheat oven to 400F. Line muffin pan and set aside. Combine all the the dry ingredients (cornmeal, flour, sugar, baking powder and salt) in a bowl and stir. 

Then, add all the wet ingredients (butter, corn, egg, buttermilk) into the dry ingredients and stir until just combined. Scoop batter (with a spoon or ice cream scoop) into the muffin tins till about 3/4 cup full. 

Bake for about 15-17 minutes or until a toothpick inserted into the center of a muffin comes out clean. 

June's Notes: If you do not have buttermilk, no sweat. All you need is milk (I used 2%) and vinegar. Pour about 1/3 Cup of milk and about 1 tsp of vinegar into a small bowl and let the milk curdle before you use it.

You can also bake this in a lightly greased regular baking pan (perhaps about 8"). You may need to bake this for about 20 minutes or so, or until a toothpick inserted into the center of the pan comes out clean. 

Simply June 

Monday, May 20, 2013

Dorayaki (Japanese Pancake with Red Bean Paste Filling)

One of my favorite Japanese desserts/cake is Dorayaki. It looks like 2 silver dollar pancakes filled with sweetened red bean paste in the middle. The pancake is slightly sweet and a little more dense than the regular western pancakes. This pancake is great for dessert or for breakfast and can be very portable! 

I made a healthier version of dorayaki a few years ago. Although it tasted pretty good, this recipe that I'm sharing with you today will taste more authentic! It takes quite a bit of patience to cook this pancake so that the color is nice and even. When making this, I also realized that the pan used is very important to achieve the perfect texture and color. I think it has something to do with the heat distribution of the pan. I made the dorayakis using a crepe pan from Crate and Barrel and they turned out perfect. The color was nice and even, and the pancakes developed bubbles as they cooked (see below) which  made them slightly lighter. Upon tasting the dorayaki I made, my neighbor asked me to show her how to make it. This time, we used 2 pans to cook the dorayaki in hopes that we can finish making this quicker. Little did we know a difference in the pan used will give us different results in the dorayaki. The ones I made using the crepe pan turned out perfect. The ones my neighbor made using a regular non-stick pan was a little dense, no bubbles developed when the pancakes were cooking and the color was not as even. We eventually used my crepe pan to finish the rest of the batter and it came out perfect! 

Anyway, I turned to my now favorite Japanese food blog for a dorayaki recipe and loved the end product. It was overall quite easy to make these yummy Japanese desserts. I made my dorayakis just a tad smaller so that I can make a little more dorayakis! =) Nami's blog is excellent with step by step instructions on making dorayaki. Here's the recipe extracted from Nami's blog. 


 DORAYAKI RECIPE
*Makes about 14 (2-1/2") dorayakis

Ingredients
  • 4 Large Eggs
  • 2/3 Cup Sugar (OK to reduce to 1/2 Cup)
  • 2 Tbsp Honey
  • 1 Cup All Purpose Flour
  • 1 Tsp Baking Powder
  • 1-2 Tbsp Water
  • 1 Can/Package Sweetened Red Bean Paste (You will have some leftovers)

Method
In a large bowl, combine eggs, sugar and honey. Whisk well until mixture has a lot of bubbles and is fluffy. Sift flour and baking powder into the egg mixture and mix well. Let the mixture rest in the refrigerator for about 15 minutes. 

Stir in 1/2 tbsp of water at a time to get the right consistency. The batter should be slightly thicker than regular pancake batter. If batter is too thin, dorayaki will be too flat and not fluffy. 

Heat a large non stick frying pan (in my case, crepe pan works perfectly!) over medium low to medium heat. Dip a piece of paper towel in oil and rub the bottom of the pan with oil. The pan should be slightly oiled but shouldn't be visible. Scoop the batter with a table spoon (for a smaller dorayaki) and drop the batter from about 1" above the pan to create a 2" diameter pancake (batter will continue to slightly spread). When you see the surface of batter starts to bubble, flip over and cook the other side just till it's slightly browned. Transfer to a plate and cover up with damp towel to prevent from drying. Repeat until all batter has been used up.

Before assembling, roughly pair 2 pancakes together to ensure they "match" properly. The nicer/more even surface will be the outer layer. Scoop a heaping teaspoon of red bean paste and place it in the center of the one the pancakes. Slightly spread the red bean paste to the side, but ensuring the center is slightly higher. Sandwich with another piece of pancake, gently pieces together. Wrap each assembled dorayaki with saran wrap until ready to serve.

Serve the dorayaki with some green tea or coffee. It's great for an afternoon pick me up!

June's Notes: I ended up adding 1 tbsp of water to the batter to slightly dilute it. Oiling the pan is very important. You need to ensure that no oil is visible as this is the trick to get a nice and even color on the pancake. I also noticed that the first batch after oiling the pan will usually turn out a little ugly; though still edible. The heat is also important, too high heat you'll get a burnt (and slightly under cooked) dorayaki. Too low, the dorayaki might not develop bubbles that it needs. It literally made about 3-4 bad pancakes to learn from my mistakes and yield perfect ones after. So, don't be discourage if you had some bad pancakes in the beginning! 

Amount of red bean paste to fill is up to your personal preference. Fill more (without it spilling out from the sides) if you like more, less if not..If you're not a fan of sweet red beans (though I think you're missing out!!), fill it with some peanut butter or perhaps nutella! 

Since these dorayaki does not have any preservatives, I wouldn't keep this for more than 3 days. The husband and I had no problems finishing the dorayakis in 2 days... They are so good and convenient to eat! 


Enjoy!

Simply June 

Thursday, March 28, 2013

Madeleines

Madeleines are small cookies/cakes baked in a shape of a shell and originates from France. I've not been to France but have tasted Madeleines from various stores in the US. They are lovely cakes and goes well with tea or coffee. Not overly sweet, petite enough for me to indulge and not feel guilty.

I've been wanting to try my hands to bake Madeleines and finally got a chance when I bought a Madeleine cookie pan from TJ Maxx. After googling for a recipe, I went with the one I found on www.food.com. I didn't make any changes to the recipe and loved the result. I brought them to some very well traveled friends, and they commented that while the ones I made were very good and that they liked the texture, the ones in France are slightly fluffier than mine. Good to know, I will try to lighten it up the next time and see how they turn out. Till then, here's the Madeleine recipe:


MADELEINE RECIPE
*Makes 18-20 Madeleines

Ingredients

  • 2 Large Eggs
  • 2/3 Cup Sugar
  • 1 Tsp Vanilla Extract
  • 1/2 Tsp Grated Lemon Peel
  • 1 Pinch Salt
  • 1 Cup All-Purpose Flour
  • 10 Tbsp Unsalted Butter, Melted and Slightly Cooled
  • Powdered Sugar (Optional)
  • Extra Butter and Flour for greasing pan
Method
Preheat oven to 375F. Generously butter and flour pan for large madeleines (about 3 x 1-1/4 Inches). 

Using an electric mixer, beat eggs and sugar in a large bowl just to blend. Beat in vanilla, lemon peel and salt. Add flour, beat just until blended. Gradually add cooled melted butter in a steady stream, beating just until blended.

Spoon a little over 1 tbsp of batter into each indentation in pan (do not smoothen the batter). Bake until puffed and brown, about 12-15 minutes. Cool 5 minutes. Gently remove from pan. Repeat process, buttering and flouring pan before each batch. 

Dust cooled cookies with optional powdered sugar.

Enjoy with a cuppa tea or coffee! 

June's Notes: Depending on your oven and the kind of pan you use, the bake time will slightly differ. I needed to place my non-stick madeleine pan (darker pan) on the highest level in my electric oven, so that the madeleines do not burn. For the first batch, it took me about 14-15 minutes. Baking the second batch, with the leftover batter (did not fill all the cavity with batter) and reusing the pan, 12-13 minutes bake time were sufficient. Anything more, you'll get burnt cookies!

Simply June 

Wednesday, February 13, 2013

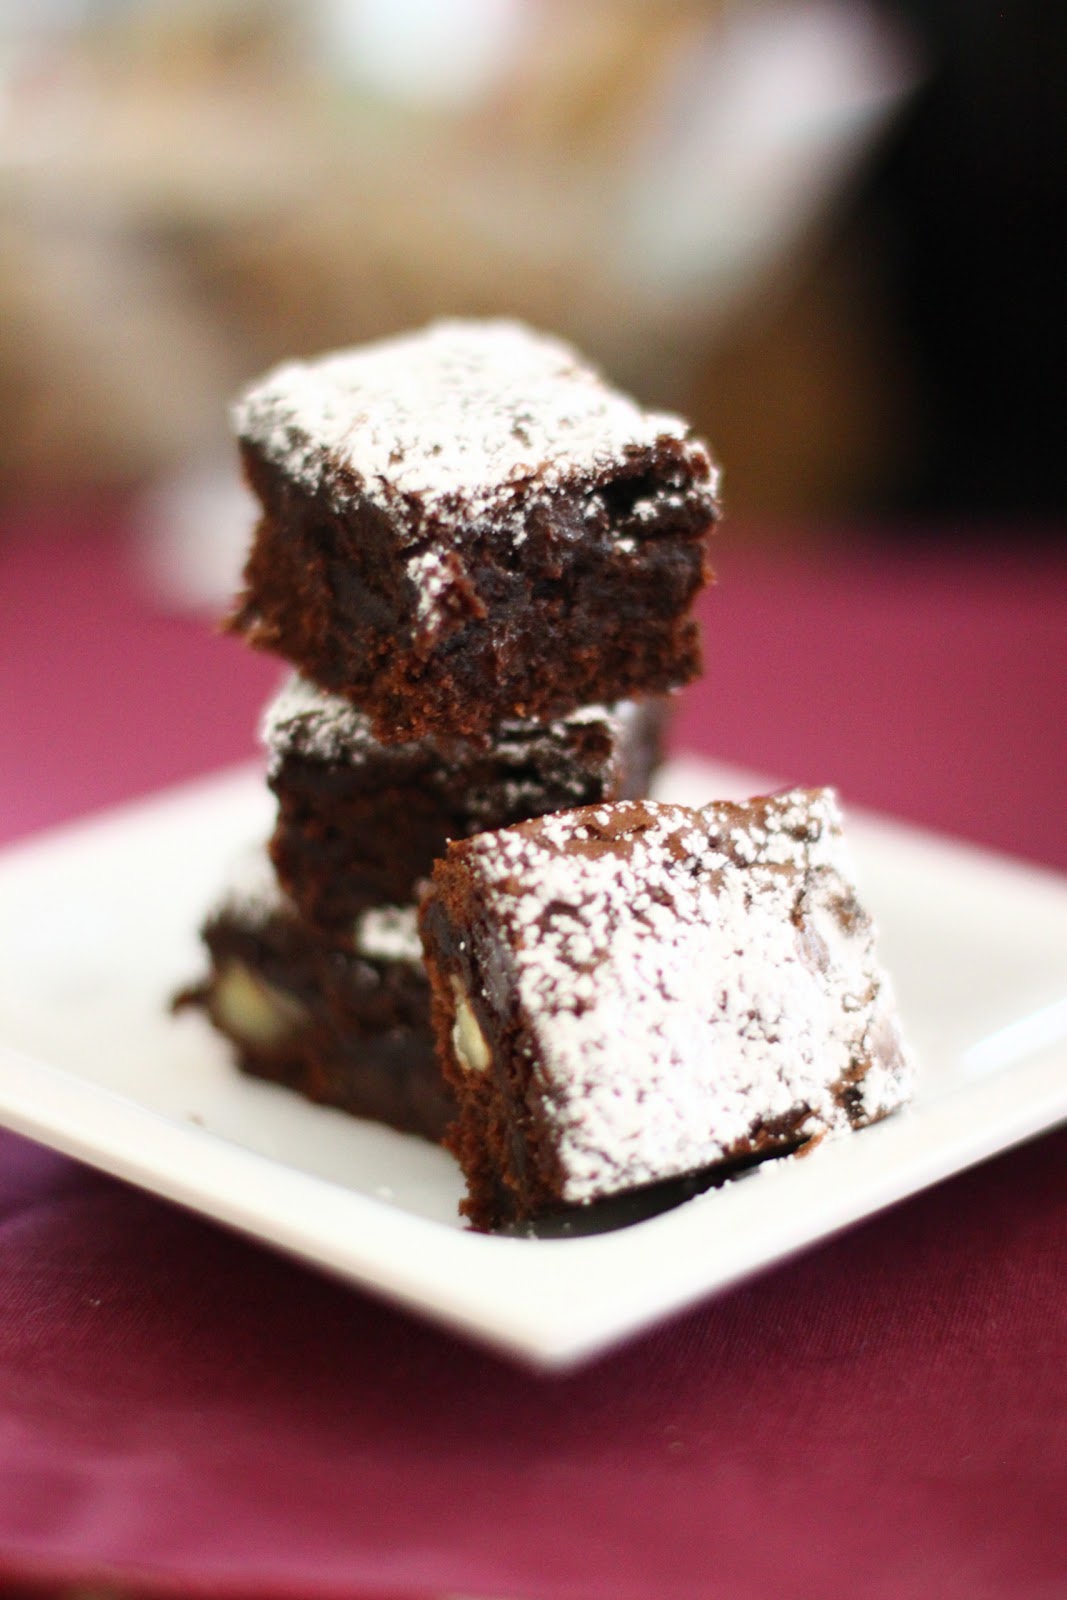
Chocolate Brownies....Nuts Optional

A couple weeks ago, the husband and I were invited to a super bowl party. It was a pot luck style, so everyone was welcome to bring something to the party. I decided to make a spinach dip as well as some brownies.

The brownies turned out very moist and pretty good. The original recipe did not ask for nuts or extra chocolate chip, which I added for some extra texture. Here's the recipe for the chocolate brownie adapted from www.chow.com.


CHOCOLATE BROWNIE RECIPE
*Makes a 8x8 pan

Ingredients

  • 6 Oz Semisweet Chocolate Chip
  • 8 Tbsp Unsalted Butter
  • 2 Large Eggs, at Room Temperature
  • 1 Cup Granulated Sugar
  • 1 Tbsp Unsweetened Cocoa Powder
  • 1 Tsp Vanilla Extract
  • 1 Tbsp Brewed Espresso
  • 1/4 Tsp Salt
  • 1 Cup All Purpose Flour
  • 1/4 Cup Pecans, Chopped (Optional)
  • 1/4 Cup Semisweet Chocolate Chip (Optional)
  • 1 Tbsp Powdered Sugar (Optional, for dusting)
Method
Preheat oven to 350F and arrange a rack in the middle. Line an 8 x 8 glass baking dish with aluminum foil (or if you use those disposable ones, that would be easier).

Combine the chocolate and butter in a medium saucepan and cook over medium low heat, stirring frequently until mixture is evenly melted. Remove from heat and let cool to room temperature.

Combine the eggs, sugar, cocoa powder, vanilla, espresso and salt in a large bowl and briefly stir until just evenly incorporated. Add the cooled chocolate mixture into the egg mixture and stir to combine. Fold in flour until just incorporated (no white steaks should remain). Gently fold in the optional pecans and additional chocolate chips. 

Transfer the batter to the prepared baking dish and for about 25-30 minutes or until it passes the toothpick test (Insert a toothpick into the center of the brownies and once it comes out clean; it's ready!). Remove from the oven and let cool completely before cutting. Dust with optional powdered sugar before serving.

June's Notes: I cut my brownie into a "1- bite" size; and got about 36 "1-bite" size pieces from this batch. 

Enjoy! 

Simply June 

Wednesday, November 7, 2012

Sweet Crust Pastry - A Paula Deen Recipe

I recently found an easy sweet crust pastry as a base for fruit tarts. This awesome recipe by Paula Deen is super easy and delicious! With only 3 ingredients and less than 30 minutes, I was able to make delicious pastry crust. All I needed to do after that is fill it with pastry cream, or in my case instant jello pudding and some fruits. 


The crust recipe is for a 12" tart pan. If you're using smaller/different tart pans like I did, you will have some leftovers dough for perhaps individual tart pans.


Let your imagination and your creativity run wild. Adorn the tart with your favorite fruits or seasonal fruit. I like the look of berries on the fruit, and the slight tartness from the berries compliment well with the sweet vanilla pudding. Here's the recipe for the sweet crust pastry only. I'll include a complete recipe for a fresh fruit tart in another post. Paula Deen's original fruit tart recipe (where I abstracted the crust recipe from) can be found HERE.


PAULA DEEN'S SWEET CRUST RECIPE
*For a 12" inch tart pan

Ingredients
  • 1/2 Cup Powdered Sugar
  • 1-1/2 Cup All Purpose Flour
  • 1-1/2 Sticks Unsalted Butter, Softened & Sliced
Method
Preheat oven to 350F.  In a food processor, combine powdered sugar, flour and butter and process until the mixture forms a ball. With your fingers, press the dough into a 12" tart pan with a removable bottom, taking care to push the crust into the indentations in the sides. Pat until the crust is even. Bake for 15-20 minutes until slightly browned. Set aside to cool and fill with your choice of cream and fruits.


June's Notes: Alternatively, you can just use your hands to mix the powdered sugar, flour and butter. That's what I did since my food processor wasn't big enough to process the dough. It works perfectly, and I've already used the recipe 2 separate times and have gotten rave reviews on them =)


Simply June 

Friday, August 10, 2012

Banana Nut Muffin

I wanted to bake something for my friends and thought that banana nut muffin would be easy, delicious and a pretty healthy for snack. I've made banana crumb muffin from www.allrecipes.com in Massachusetts and the muffin was a big hit with my colleagues. The cinnamon sugar crumb topping on the muffin was absolutely delicious. But since I'm now in the West Coast, and being in California everyone is sort of health conscious, I decided to tweak the recipe and make it a little more "California Friendly" I guess. Substituting some all purpose flour with whole wheat flour, and adding some nuts..little steps to make it semi healthy!

The original recipe with the sinful cinnamon crumb topping is found HERE. Here's my version of healthy banana nut muffin recipe:


BANANA NUT MUFFIN RECIPE
*Makes about 12 standard size muffins

Ingredients

  • 1 Cup All Purpose Flour
  • 1/2 Cup Whole Wheat Flour
  • 1 Tsp Baking Soda
  • 1 Tsp Baking Powder
  • 1/2 Tsp Salt
  • 1/3 Cup Chopped Pecans/Walnuts
  • 4 Large Ripe Bananas, Mashed 
  • 3/4 Cup White Sugar
  • 2 Tbsp Brown Sugar
  • 1 Large Egg, Lightly Beaten
  • 1/2 Cup Butter, Melted
  • 1 Tsp Vanilla Essence
  • 1 Banana, Sliced (Optional, for garnish only)

Method
Preheat oven to 375F. In a large bowl, sift together all purpose flour, whole wheat flour, baking powder, baking soda and salt. Set aside. 

In another bowl, add mashed bananas, white sugar, brown sugar, egg, melted butter and vanilla essence and mix well. Pour banana mixture into the flour mixture, and stir well until combined. Scoop batter into pre-lined/greased standard muffin pan till about 3/4 full. Add the optional slices banana onto the muffin; one slice per muffin.

Bake in preheated oven for about 18-20 minutes. Do the toothpick test (inserting a toothpick into the muffin, and if toothpick comes out clean - muffin is done!) to determine doneness. 

Enjoy with a cup of coffee or tea... or breakfast or as a snack!

Simply June 

Tuesday, August 7, 2012

Flourless Chocolate Cake

I was invited to a friend's party for her son's birthday some months ago and I offered to bring some desserts. I had only planned to bring one kind dessert; my (quite famous??) white chocolate cheesecake with fresh fruits and somehow I screwed up the recipe and instead of getting enough ingredients for 2 cheesecakes, I only had enough ingredients for one. Short of time and reluctant to head to the store again, I decided to check my pantry and worked with what I had. I didn't just want to bring brownies, I wanted to bring something a little special...especially since it was a birthday party after all. Googling and once again www.allrecipes.com saved my life as I found a delicious Flourless Chocolate Cake  recipe. The cake was a big hit! It was perfect for some one who's allergic to gluten or just want to watch their weight? =) Very very rich, so a little piece for everyone was just perfect.

Good quality chocolate is very important when you make such a chocolaty dessert. If you can afford some Valrhona or Callebaut Chocolate, go for it! The next best thing in my opinion if you can't afford the brands I've just mentioned is my all-time favorite (at affordable price); Ghiradelli Chocolates which you could easily get at most grocery stores. I've tried different chocolate brands from the grocery stores and still prefer to use Ghirardelli even though they do cost a little more than the other brands like Nestle and Hershey. =) To me it's worth the extra buck or two.

Here's the recipe for the Flourless Chocolate Cake adapted from www.allrecipes.com.


FLOURLESS CHOCOLATE CAKE
Ingredients

  • 1/2 Cup Water
  • 1/4 Tsp Salt
  • 3/4 Cup Sugar
  • 18 Oz Good Quality Bittersweet Chocolate
  • 2 Tsp Coffee Granules (Optional)
  • 1 Cup Unsalted Butter
  • 6 Eggs
  • 1/4 Cup Toasted Sliced Almonds (Optional)
  • 1/4 Cup Good Quality Cocoa Powder (Optional)

Method
Preheat oven to 300 F. Grease one 10 inch round cake pan and set aside. In a small saucepan over medium heat combine water, salt, sugar and optional coffee granules. Stir until completely dissolved and set aside. Either in the top half of a double boiler or in a microwave oven, melt the bittersweet chocolate. Pour the chocolate into the bowl of an electric mixer. Cut butter into pieces and beat the butter into the chocolate, 1 piece at a time. Beat in hot sugar mixture. Then slowly beat in eggs one at a time.

Pour the batter into the prepared pan and place in a water bath. Bake cake in the water bath at 300 F for 45-50 minutes. The center will still look wet. Chill cake overnight in the pan. To unfold, dip the bottom of the cake pan in hot water for 10 seconds and invert onto a serving plate.

If your cake does not look too appealing at this point, sift some good quality cocoa powder over the top to cover the blemishes. You can also use the sliced almonds to cover the sides.

June's Comments: I had some problem removing the cake, so I used a thin knife to quickly go around the edge of the cake and had to soak the came a little longer than 10 seconds. Don't do it too long, as you will melt the cake. The almond slices and cocoa powder came in very handy to glamorize the cake and hid some imperfections!.

Simply June 

Saturday, January 8, 2011

Pumpkin Cake

Here’s another post to start my new year and keep my new year resolution going! Yay! With busy work schedule, I don’t cook as often anymore and the laziness in me just refrained me from updating the blog! Sorry!!
So, I made this pumpkin cake back in November for Thanksgiving. This year we had a sit down dinner with about 12 guests. I should probably reserved more details on what I did for Thanksgiving dinner for another post. Ana, my friend from work and I were discussing the Thanksgiving menu and after some googling, we both made this for Thanskgiving. I think both our guests enjoyed this super moist pumpkin cake.
The original recipe extracted from www.allrecipes.com. My recipe has been modified slightly using the spices I have.
Pumpkin Cake
PUMPKIN CAKE RECIPE
Ingredients:
  • 2 Cups Granulated Sugar
  • 1 1/4 Cups Vegetable Oil
  • 1 Tsp Vanilla Extract
  • 2 Cups Pumpkin Puree
  • 4 Large Eggs
  • 2 Cups All-Purpose Flour
  • 3 Tsps Baking Powder
  • 2 Tsps Baking Soda
  • 1/4 Tsp salt
  • 2 Tsps Pumpkin Pie Spice
  • 1/2 Tsp All Spice
  • Powdered Sugar (Optional – for dusting)
Method:
Preheat oven to 350F. Grease and flour a 12x18 inch pan. Sift together the flour, baking powder, baking soda, salt and cinnamon. Set aside.
In a large bowl combine sugar and oil. Blend in vanilla and pumpkin, then beat in eggs one at a time. Gradually beat in flour mixture. Spread batter into prepared 12x18 inch pan.
Bake in the preheated oven for 30 minutes, or until a toothpick inserted into the center of the cake comes out clean. Allow to cool. Dust with some powdered sugar just before serving if desired.
June’s Comments: I like using a bundt cake pan when I’m baking a cake that will not have any frosting on it. I feel that it makes the cake look a little special, and that extra dusting of powdered sugar gives the simple cake a little “oooh-aaahhh” effect.

Simply June 

Wednesday, June 23, 2010

Baby Shower Cupcakes

BabyShowerCupcakes4
A couple weeks ago, I volunteered to make baby shower cupcakes for one of my co-workers. I was excited and nervous at the same time. I had plenty of ideas flowing, but needed one that would not take up too much time after work. Plus, I need to make enough to feed about 50 people.
A few days prior to the baby shower, I started shopping around for supplies and sort of settled with some designs. It was going to be cupcakes for sure. Figured out a game plan of how I was going to execute the project after work. The plan was to stretch the whole project into 2 days (nights to be exact).
The first night, I made the decorative part……..Kneading the fondant and mixing the white fondant, turning it into pastel colors. And then using cooker cutter and also hand shaping them into my different shapes and sizes.
The second night, it was all about the baking. Chocolate and Cherry Vanilla cupcakes to be exact, topped with a vanilla frosting and my decorative fondant!
BabyShowerCupcakes BabyShowerCupcakes1
BabyShowerCupcakes2 BabyShowerCupcakes3
The day of the baby shower, the husband helped me bring the cupcakes to work. I think the cupcakes were a success. Everyone seem to be in awe and some even had 2-3 helpings of cupcakes. Pat on the back for me! Yay! =)

Simply June 

Thursday, June 10, 2010

Clafouti

Clafouti is a baked French dessert with cherries and has a texture like flan. I made it for my French themed dinner and that was decided just hours before my dinner party. I googled for recipes and found a Clafouti recipe by Julia Child, shared by many other bloggers. Can’t go wrong when so many people are sharing the recipe!

Julia Child’s Clafouti recipe also call for Cherries. With Bing Cherries going for $3.99 – 4.99/lb, I wasn’t quite willing to get them to make dessert. Strawberries were in season and were much more affordable. So, I went with that alternative.

The clafouti honestly looked kinda ugly when it came out of the oven. But with the help of powdered sugar, fresh strawberry and mint leaves, I disguised the look and made it look fancy! =) The guests enjoyed this dessert and I was pleasantly surprised it tasted better than it looks. Next time, I will try it with other fruits instead. Maybe those will turn out better looking!

Here’s Julia Child’s (Cherry) Clafouti recipe.I would suggest not using strawberry as an alternative!

StrawberryClafouti

CLAFOUTI RECIPE

Ingredients:

  • 1-1/4 Cups Milk
  • 2/3 Cup Sugar, Divided
  • 3 Large Eggs
  • 1 Tbsp Vanilla Extract
  • 1/8 Tsp Salt
  • 1/2 Cup All-Purpose Flour
  • 3 Cups Cherry, Pitted
  • Powdered Sugar For Garnish

Method:

Preheat oven to 350 F. Using a blender, combine the milk, 1/3 cup sugar, eggs, vanilla, salt and flour, and blend.

Lightly butter an 8-cup baking dish, and pour a 1/4-inch layer of the blended mixture over the bottom. Set remaining batter aside. Place dish into the oven for about 7-10 minutes, until a film of batter sets in the pan but the mixture is not baked through. Remove from oven (but don’t turn the oven off, yet). Distribute the pitted cherries over the set batter in the pan, then sprinkle with the remaining sugar. Pour the remaining batter over the cherries and sugar.

Bake in the preheated oven for 45 to 60 minutes, until the clafouti is puffed and brown and a knife inserted into the center comes out clean. Sprinkle with powdered sugar and serve warm.

June’s Comments: If you do want to incorporate strawberries in your clafouti, I would suggest using about 2-1/2 cups of halved (or quartered) strawberries. I made my clafouti in individual 7oz ramekins. I ended up with 6 individual servings! =)

Signature

Monday, June 7, 2010

Cheesecake Brownie

Updated Oct 28, 2013 

I promised my friends from work I would bring brownies to work the following week. Brownies are pretty easy to make and this is one sinful chocolaty treat that most (not-too health-conscious) people would say yes to!

I sort of knew what kind of brownie I wanted to make; Cheesecake (Cheese) Brownie. I’ve tried a recipe by Martha Stewart once but I was in the mood to try other recipe. It was when I stumbled upon David Lebovitz’s Cheesecake Brownie that I knew I just had to try out this version! I’ve tried a few of his recipes and have no regrets trying them. They were all delectable!

After work (and dinner), I gathered the ingredients needed and started baking. I wasn’t going to wash my electrical appliances (i.e. mixer) and used a traditional whisk and my muscles to do the work of blending the ingredients into a smooth consistency!

Here’s the chocolaty sinful Cheesecake Brownie by David Lebovitz. And like usual, I like to tweak things a little; this time I sprinkled a handful of chocolate chips to the batter prior to baking. The result was a fudgy like brownie with bits of chocolate chip and random sections of cheesecake! Yums!
CheesecakeBrownie2
CHEESECAKE BROWNIE RECIPE

Ingredients:
Part A (Chocolate Batter)
  • 6 Tbsp Unsalted, Cut Into Pieces
  • 4 Oz Bittersweet / Semisweet Chocolate, Chopped
  • 2/3 Cup Granulated Sugar
  • 2 Large Eggs, At Room Temperature
  • 1/2 Cup All-Purpose Flour
  • 1 Tbsp Unsweetened Cocoa Powder
  • 1/8 Tspn salt
  • 1 Tspn Vanilla Extract
  • 1/2  Cup Chocolate Chips
Part B (Cheesecake Batter)
  • 8 Oz (1 Block) Cream Cheese, At Room Temperature
  • 1 Large Egg Yolk
  • 5 Tbsp Granulated Sugar
  • 1/8 Tsp Vanilla Extract
Method:
Line a 9-inch square pan with foil, making sure it goes up all four sides. Use two sheets if necessary. Mist with non-stick spray or grease lightly. Preheat oven to 350 degrees.

In a medium saucepan, melt the butter and chocolate over low heat, stirring until smooth. Remove from heat and beat in the 2/3 cup sugar, then the eggs. Mix in the flour, cocoa powder and salt, then the vanilla and chocolate chips. Spread evenly in the prepared pan.

In a separate bowl, beat together the cream cheese, the yolk, 5 tablespoons of sugar, and vanilla until smooth. Distribute the cream cheese mixture in eight dollops across the top of the brownie mixture, then take a dull knife or spatula and swirl the cream cheese mixture with the chocolate batter.

Bake for 35 minutes, or until the batter in the center of the pan feels just set. Let cool, then lift out the foil and peel it away. Cut the brownies into squares.

CheesecakeBrownie Cheesecake Brownie1
June’s Comments: I used salted butter instead of unsalted butter; therefore I skipped the salt in the batter. I used bittersweet chocolate (chips) throughout the recipe as I think bittersweet chocolate gives a richer chocolaty taste. Feel free to use semisweet ones.

I also sprinkled about 1/2 cups of chocolate chip after I swirled the cream cheese mixture to add more chocolaty goodness to the brownie. =). 

Oct 28, 2013 - I recently made another batch of this brownie and decided to double the chocolate batter part, but kept the cheesecake part. I like this "version" as well. 


Signature

Thursday, May 27, 2010

Excuse My French…….

My French themed (inspired might be more accurate) dinner…that is! It had been quite a whiel since I last had my usual suspects over for a home cooked meal. After Chris’ Italian themed dinner 1-2 weeks ago, I knew it had to be our turn to have people over. The main reason is to motivate us to clean up the house; big time! The second reason; for some good old company. The third; I really miss spending time in the kitchen after being in the workforce again!

I wasn’t in the mood to cook something random and French seem like a cuisine that would impose some kind of challenge to me! Plus, I really want to make some quiche. I actually did not finalize the menu until about 4 Horus before I started making dinner.  Usually I have the menu pretty much nailed down the day before. It was hard this time when it was a specific theme and I wanted something that does not cost an arm and a leg. Here’s what I did beside trying to set the table as fine dining looking as possible with my limited dinnerware set.

French

1) Cheese Platter with brie; a soft cow’s milk French cheese, whipped cream cheese with garlic and herbs, rosemary cracker, French baguette and grapes. That was like an appetizer as we drank some nicely chilled Sauvignon Blanc.

CheesePlatter

2) Lobster Bisque (Bottom Left) – Made a huge pot of creamy lobster bisque; a popular New England Soup. Lobster was in season @ $4.99 per lb. We can afford some! =) Bisque is a smooth creamy French soup with a crustacean broth as a base. The husband thought the soup could be thicker. My other guests liked  as it wasn’t too starchy and was light. I enjoyed it as well but agreed with the husband. Instead of using cognac like in many recipe, I used the cheapest wine Walmart has. $3 per bottle if you want to know how much I paid for it! =)

3) Creamy Seafood in Puff Pastry (Bottom Right) – Scallops, Tiger Prawns and Mussels were sautĂ©ed and cooked in a bĂ©chamel sauce with a splash of (Walmart) wine. Chopped chives were also stirred in before platting. I baked some puff pastry, made pockets and “stuffed” the creamy seafood into them. The result, a fine looking dish. Don’t you think? I thought it looked very fancy, and yet it wasn’t too hard to prepare. Best of all, my guests and my husband loved this!

LobsterBisque Creamy Seafood

4) Salmon & Spinach Quiche (Bottom Left) – I for some reason have been wanting to make this for quite a while. It was shut down my the husband and a friend when I offered to make quiche for dinner and both the boys wanted KFC!! I was finally able to make it for my French themed dinner. I did not mess with the crust and use pie crust instead and baked it in a tart pan. Smoked salmon and frozen spinach was the 2 key ingredients in this dish. I really liked this. It felt really healthy with all the spinach and we had plenty for lunch the next day! =)

5) Strawberry Clafouti (Bottom Right) – Clafouti is a baked French dessert with cherries and has a texture like flan. I had wanted to make a Chocolate soufflĂ©, and realized that was a lot of work and chances of the soufflĂ© failing was rather big! Strawberry clafouti has a last minute idea and I used a Julia Child’s recipe! The clafouti honestly looked kinda ugly when it came out of the oven. With the help of powdered sugar, fresh strawberry and mint leaves, I disguised the look and made it look fancy! =) The guests enjoyed this dessert and I was pleasantly surprised it tasted better than it looks. Next time, I will try it with other fruits instead. Maybe those will turn out better looking!

SalmonQuiche StrawberryClafouti

5) Ratatouille (Not pictured and no, not the movie!) – Chris made and brought this over along a bottle of yummy rosĂ©. He layered tomatoes, eggplants, zucchini, bell pepper and cheese and baked it. Awesomely delicious! =)

That’s it for my French themed dinner. Did I mention we played French music and finished about 4 bottles of French (or French grape) wine? =) I can’t wait for the next themed dinner @ Seyda and Rob’s. The theme is English! This will be interesting! I can’t wait!! Any ideas what English food should I make?

Signature

Monday, May 24, 2010

Limoncello Cake

The theme was Italian potluck and it was a get together at Chris’s to catch the Celtics vs Magic game. I usually volunteer to bring dessert, and this get together was no different. I offered to bring dessert (thought we did buy a vegetarian pizza from our favorite pizza parlor as well) and of course I had to think of something Italian. I wanted to make something different yet easy. Tucked in the corner of out little bar, was a bottle of delicious Limoncello. Limoncello Cake it is!

Limoncello is Italian Lemon Liquor mainly produced in Southern Italy. The liquor itself is sweet itself and great as shot, on rocks or as part of a cocktail. In my case, it was part of cake! =) You might think it was a waste to just pour liquor and make cake out of it, but it was worth it. The cake was indeed Limoncello-y, thanks to the glaze!

I googled for a recipe and settled for one I found on www.allrecipes.com. Here’s the recipe I followed and adapted accordingly to my preference.

LimoncelloCake

LIMONCELLO CAKE RECIPE

Ingredients:

Part A (Cake):

  • 1 Cup Plain /Lemon Yogurt
  • 2 Large Eggs
  • 1/3 Cup Canola Oil
  • 1/2 Cup Lemon Juice
  • 2 Tbsp Lemon Zest (About Zest of 3 Lemons)
  • 1-1/4 Cup Sugar
  • 1/4 cup Limoncello Liqueur
  • 2-1/4 Cups All-Purpose Flour
  • 1-3/4 Tsp Baking Powder
  • 1/2 Tsp Baking Soda
  • 1 Pinch Salt

Part B (Glaze):

  • 1/4 –1/2 Cup Powdered Sugar
  • 1/4 Cup Limoncello

Method:

Preheat oven to 350F. Prepare an 8-inch cake pan with cooking spray.

Whisk together the yogurt, eggs, canola oil, lemon juice, lemon zest, sugar, and 4 tablespoons limoncello in a large bowl. In a separate large bowl, mix the flour, baking powder, baking soda, and salt. Gently stir the dry ingredients into the wet. Do not over mix or the cake will be tough. Pour batter into prepared pan.

Bake in the preheated oven until top is golden and a toothpick inserted in the center of the cake comes out clean, about 35 minutes. Remove from oven and allow to cool slightly.

Stir Part B (Powdered Sugar and 1/4 Cup Limoncello) together in a small bowl until smooth. Poke small holes all over the top of the still-warm cake with a fork or toothpick. Spoon the glaze over the cake and spread with the back of a spoon. The glaze will seep into the cake and add moisture.

June’s comments: I used a bundt pan to give the cake a little more pattern. I should have removed the cake from the pan when I poured the glaze. Glaze on the cake that would have made the cake look a little prettier. And definitely cover any imperfections!

Signature

Tuesday, May 4, 2010

Yellow Cake with Jam Filling

Seyda was having a lunch get together and I offered to bring dessert. I told her I will be bringing her a “Presidential” cake. A cake served at the White House actually. Armed with my latest cook book, I browsed for an easy recipe and decided to try the Perfect Yellow Cake filled with Raspberry Jam recipe. This cake apparently has been served during George W. Bush’s administration at many of his afternoon activities.

Book

Although Ms. Clumsy here used the wrong flour by mistake (I used all purpose flour), the cake turned out was delicious. I trust my friends’ compliments. =) It would have been lighter if I’ve used the right kind of flour. The cake wasn’t that bad, just a little dense like pound cake, but not that oily. I used orange zest instead of lemon zest and strawberry jam instead of raspberry. A dusting of powdered sugar on the cake, covered flaws and made the cake look rustic and oh-so homemade! Here’s the recipe extracted from Roland Mesnier’s Basic To Beautiful Cakes:

YellowCake

YELLOW CAKE WITH JAM FILLING RECIPE

Ingredients:

  • 3 Cups Cake Flour
  • 2 Tsp Baking Powder
  • 1/4 Tsp Salt
  • 3/4 Cup Butter, Softened
  • 1 Cup + 3 Tbsp Sugar
  • 2 Large Egg Yolks
  • 2 Large Eggs
  • 1 Cup Milk
  • 1 Tbsp Vanilla Extract
  • 1/2 Tbsp  Grated Lemon Zest
  • 2/3 Cup Raspberry (or Strawberry Jam)
  • 2 Tbsp Powdered Sugar

Method:

Preheat the oven to 375F. Grease and flour a 10 inch round cake pan with 3 inch high sides. Sift the flour, baking powder and salt together in a medium bowl and set aside.

Beat butter and sugar until well combined but not fluffy. Add eggs, egg yolks and beat until well combined. Scrape down the bowl once or twice as necessary.

Gradually add half the flour into the mixture and stir using low mixer speed until just combined. Add half the milk, and mix until just combined. Repeat with remaining flour and milk. Stir in vanilla and lemon zest.

Transfer batter into baking pan, smooth the top and bake for about 40-45 minutes or until toothpick comes out clean when inserted into the center of the cake. Let cake sit in pan for about 5 minutes, then run a knife along the edges to loosen cake and unmold it. Let cake cool completely.

Once cool, split cake into two horizontal layers using a sharp serrated knife. Spread jam evenly over the bottom layer of the cake and top with remaining half. Sift with powdered sugar and serve. This should serve about 8-10 people.

YellowCake1

June’s comments: Did I mention that the cake wasn’t overly sweet as well?  If you like, you can always cover the cake in a ganache or some whipped cream.

Signature

Monday, April 12, 2010

Lemon Bars

Lemon Bars…Lemon Squares…whatever you call it, this is one yummilicious Lemon Bar! I’ve always enjoyed Lemon bars/squares usually from catered events. I have a thing for this tart and tangy dessert but have never made it from scratch. The first time I made some lemon bars, I used Krusteaz lemon bar mix and I remember not getting a great lemon bar. My bars did not look like the picture on the box. It was all messy I probably threw the not so great lemon bars away out of frustration.

I had some Lemon Bars at work recently and that sparked my inspiration to make my own Lemon Bars. I found a Lemon Bar recipe on www.allrecipes.com and decided to try it out with a little tweaking based on the reviews.

The result was some awesomely lemon bars. The  filling/ “curd” was SO GOOD! Tart and tangy just the way i like it. The sweet salty buttery crust was a great companion to the tart lemon filling. The bars were half crust, half filling. The lemon filling was definitely refreshing and you get “burstfuls” of fresh lemony goodness in your mouth. I brought it to work and I’m happy to say it was quite a hit!

Here’s the simple recipe. It takes just about an hour to bake the dessert, but you do need to let it cool down before cutting into it!

Lemon Bars
LEMON BARS RECIPE

Ingredients:

Part A (Crust)

  • 1 Cup Butter, Softened
  • 1/2 Cup Granulated Sugar
  • 2 Cups All-Purpose Flour

Part B (Filling)

  • 4 Large Eggs
  • 1-1/2 Cups Granulated Sugar
  • 1/3 Cup + 2 Tbsp All-Purpose Flour
  • 3 Medium Lemons, Juiced
  • Zest from 1 to 1-1/2 Lemon

Method:

Preheat oven to 350F. In a medium bowl, blend together softened butter, 2 cups flour and 1/2 cup sugar. Press into the bottom of an ungreased 9x13 inch pan. Bake for 15 to 20 minutes in the preheated oven, or until firm and golden.

In another bowl, whisk together the remaining 1/12 cups sugar and 1/4 cup flour. Whisk in the eggs and lemon juice. Lightly and randomly poke crust with a skewer/fork. Pour over the baked crust. Bake for an additional 20 minutes in the preheated oven. The bars will firm up as they cool. Cut into squares.

June’s Comments: It took me about 30 minutes to bake the crust till golden. If you’re not a big fan of tartness, reduce the juice of lemon to 2 medium lemons. If you do reduce the juice, reduce the flour to about 1/3 Cup or slightly less.  Use fresh lemons for this recipe!

PS: Mom, I think you’ll enjoy this recipe! Try it and let me know!! =)

Signature

Friday, April 9, 2010

Souvenir from DC

BookWhile visiting the American History Museum @ Smithsonian, we stumbled upon a Pastry Chef promoting his book and also of course signing it. I wasn’t that interested at first because I’m never a fan of paying full price for stuff. I’ve never paid full price for books. I usually pay at least 10-20% less or more when I can get a great deal!

I collect cook books and I tend to buy every now and then. On sale, of course. Out of curiosity, I decided to check out the book and the chef.We soon found out that Chef Roland Mesneir was the Executive Pastry Chef for the White House and has served over 5 presidents! He’s now retired from the White House but is still in the pastry business.

I just couldn’t pass up the opportunity to get my first signed book by a famous chef and had to get it! I’m thankful for the generous husband who got me the book. The book cost USD30, but a signed copy (dedicated to me!) and photo opportunity with the renown chef = PRICELESS!!!!

Watch out for the cakes I’ll be churning out! In no time, I’ll be eating cakes like the the many Mr. Presidents, their families and their special guests did! =)

Book1

Signature

Saturday, April 3, 2010

Purple..Purple..Purple..

BlackMagic Cupcakes1I made some Black Magic Cupcakes and brought it to work the other day for some colleagues’ birthday. I matched the purple cupcake liners (I received from Lilia of My Sweet Hearts Bakery) with the homemade cream cheese frosting (partially colored purple) and sprinkled some purple sugar on the frosting to bring out the colors even more. I thought they turned out nice.………simple yet elegant! And it was all about simple color coordination to create some cute cupcakes. Although they looked fairly cute, and (quite tasty, I hope!) I think the Black Magic Cupcakes go better with chocolate ganache frosting. =) It brings out the “chocolatiness” of the chocolate!

Signature

Monday, March 15, 2010

Vanilla Cupcake with Red Bean

I forgot how I came across this recipe but it was definitely sometime last year when Seyda and I had a baking craze going on. Perhaps she was the one who found this awesome recipe! Anyway, I have made these yummilicious cupcakes occasionally since then. The red bean filling is so Asian, so different and definitely my cuppa “cake”! I made them both with and without frosting, depending on weather I’m feeding other people or not. If I’m just making it for my own consumption, I usually leave the cupcakes as is; frosting free. I’m not the biggest fan of frosting. As much as I love desserts, I find frostings most of the time too sweet for my palate.

The original baker whipped out a nice exotic Date-Pineapple Frosting to go with her Mooncake Cupcake. I decided to just pair the cupcake with a plain Cream Cheese Frosting. The baker also made her red bean paste filling from scratch. I find that store bought ones (the smooth paste kind) worked like magic and saves me time!! Here’s the recipe (I cut the recipes into half) of the divinely delicious Vanilla Cupcakes with Red Bean (Mooncake Cupcakes).

VanillaCupcakes1

VANILLA CUPCAKES WITH RED BEAN RECIPE

Ingredients:

Part A (Cupcake):

  • 1/2 Cup Unsalted Butter @ Room Temperature
  • 1 Cup Sugar
  • 2 Large Eggs
  • 1- 1/4 + 2 Tbsp All-Purpose Flour
  • 3/4 Tsp Baking Powder
  • Pinch of Salt
  • 1/2 Cup Milk
  • 1/2 Tsp Vanilla Extract
  • About 1/2 Cup Smooth Red Bean Paste Filling

Part B (Optional Frosting):

  • Cream Cheese Frosting
  • Sesame Seeds (White and/or Black)

Method:

This method and recipe will give you about 24-26 small cupcakes.

Refrigerate red bean paste to firm it up and roll them into about 1 tsp balls. Place them on a parchment paper and set aside (in the fridge) until ready to use.

Preheat oven @ 350F. Beat butter on high until soft, about 30 seconds. Add sugar. Beat on medium-high until light and fluffy, about 3 minutes. Add eggs one at a time, beat for 30 seconds between each. Whisk together flour, baking powder, and salt in a bowl. Add to mixer bowl. Add the milk and vanilla. Mix to combine.

Fill each cupcake paper about 1/4 full and make a little well in the batter. Gently press in a bean paste ball. Top with more batter until about 3/4 full. Smooth with the back of a spoon. Place cupcakes on baking sheet and bake in preheated oven for about 15-20 minutes or until skewers come up clean.

Let cupcakes cool before frosting! Spread cupcakes with frosting and roll frosted cupcakes onto sesame seeds. Or just sprinkle it!

June’s comments: I baked my cupcakes in individual small soufflĂ© cups. With this baking cups, I can bake more cupcakes at once without using a cupcake pan. Feel free to use regular cupcake liners, but remember to use a cupcake pan to hold the shape!

You can make these cupcakes as regular/standard size cupcakes. This will then yield you about 12 regular cupcakes. Increase the size of the red bean paste to about 3/4” balls to get more red bean in your cupcake! Standard size cupcakes will take about 20-25 minutes to bake.

=====================================================================================

VanillaCupcakes

CREAM CHEESE FROSTING RECIPE

Ingredients:
  • 1/4 Cup Butter @ Room Temperature
  • 4 Oz Cream Cheese @ Room Temperature
  • 1 to 1-1/2 Cups Powdered Sugar
  • 1/2 Tsp Vanilla Extract
Method:

With an electric mixer, mix the butter and cream cheese together, about 3 minutes on medium speed until very smooth. Scrape down the sides and bottom of the bowl to ensure even mixing.

Add the vanilla extract and mix. Slowly add the powdered sugar. Keep adding until you get to desired sweetness and thickness.

Spread or pipe frosting onto cooled cupcakes.

June’s Comments: I hade enough frosting to spread onto my small cupcakes. Double the frosting if you need more!

Signature

Related Posts with Thumbnails