Monday, November 30, 2009

Jackfruit Cheesecake (Tart)

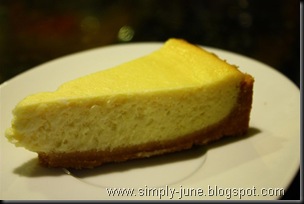
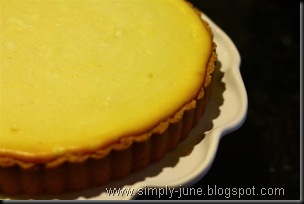
For Thanksgiving, I decided to make my Jackfruit Cheesecake. It’s perfect since I have guests over and they could help me taste and give me some feedback on this Jackfruit Cheesecake, even though it was not the first time I made it. The result, my guests loved it! It was a great success (again), and this time I’m sharing the recipe here especially for one of my reader, Jenny. Jenny emailed me last month and requested for my Jackfruit recipe I made a while back and I wanted to retry the recipe before sharing it here!

Again, I made the cheesecake in a tart pan because I like that the filling would not overwhelm me and the cheesecake surface would most likely be crack free. If you want a regular size cheesecake, just use about 8 oz of cookie crumbs with about 1/3 of melted butter. Double the filling recipe to get the regular cheesecake height. Bake it for about 1 hour or until the center is set. I read some recipe where they bake the cheesecake for 1 hour, shut the oven and leave the cheesecake in the oven overnight. That apparently will avoid the cracks on the cheesecake. Over mixing of the filling will also cause cracks on cheesecake. Since I’ve been making my cheesecakes in a shallow tart pan, I’ve never encountered the cracks. Touch on wood!

Here’s my jackfruit cheesecake recipe!

IMG_9357 (Large)

JACKFRUIT CHEESECAKE / TART RECIPE

Ingredients:

Part A (Crust):

  • 1 Box (12 Oz) Nilla Vanilla Wafers
  • 1/2 Cup Butter, Melted

Part B (Filling):

  • 2 – 8oz Cream Cheese
  • 1 Can Jackfruit (in Syrup)
  • 2 Large Eggs
  • 1/4 Cup Milk
  • 1/2 Cup Sugar
  • 1/8 Tsp Jackfruit Extract (Optional)
  • 1 Tbsp Flour

Method:

Mix Part A together until it feels like wet sand and press the mixed crumbs onto the bottom and the sides of a 9” tart pan. I use the bottom of the glass to help me press the crumbs.

Puree the jackfruit flesh (about 8.5 Oz when drained) with 2 tbsp syrup until it’s smooth. That gave me almost 1 cup of Jackfruit puree. Set aside. Preheat oven to 350F.

Cream cheese and sugar until smooth. Beat in eggs one by one and mix until smooth. Add in milk, jackfruit puree and the optional jackfruit extract. Finally sprinkle in flour and mix batter well. Pour cheese mixture into tart pan. Bake tart for about 45 minutes until the center is set. Remove and let cheese tart cool before chilling in the the refrigerator. Serve cold.

IMG_9367 (Large)

June’s comments: I forgot what brand of canned Jackfruit I used for this recipe. I thought that the jackfruits I used this time wasn’t as fragrant as I like it. I therefore added a some jackfruit extract for taste and coloring into the cheese mixture. I bought the the Jackfruit extract from an Asian store. You could probably get it in a Filipino store as the one I got was labeled “Langka”; Tagalog (Filipino) for jackfruit. The extract was actually by McCormick.

When you pour the filling into the tart pan, it will look like the filling will not fit in the pan. All the filling does fit in the pan, and will bake just fine without overflowing. The filling will poof up like a dome, which will then recede when it’s cooled. You could actually just blend the jackfruit flesh with milk, instead of the syrup if you want the filling a little less sweet.

Sunday, November 29, 2009

Finally… a DSLR!

EOS Rebel T1i EF-S 18-55mm IS Kit

I’ve been contemplating to get a DSLR camera for a year or two or three now. I came very close to getting one when Circuit City stores were closing down and they were liquidating their inventories a few months. I held back as I wasn’t sure which brand/model I REALLY wanted. NIKON or CANON?

I’ve been leaning towards a Canon DSLR, mainly coz I’ve been a Canon point and shoot camera user for years and I’ve grew fond of the Canon brand. Plus, it helps that my brother also owns a Canon DSLR. I love the pictures my current Canon Power Shot SD870 was able to produce. Almost all the pictures in my blog are taken from the SD870 which was a wedding gift from our friends; Seyda, Rob & Karan. It is definitely a great camera, but it’s also time for me to venture into a DSLR.

Darling hubby decided to get me my early X’mas pressie coz I’ve been nice all year. Contemplating between the Canon Rebel XSI and the Canon Rebel T1i and comparing their features..hubby made the executive decision to get me the newer model; Canon Rebel T1i. It was only a little more money to get the most current model. I was all smiles! I was in cloud 9. My wish to own a DSLR came true!! I will still be using the compact Canon camera though….it’s a very convenient little thing to have!! =)

Thank you, darling for my X’mas pressie! I love it and I can’t wait to (hopefully) take great pictures with it.

Merry X’mas, to me!

Saturday, November 28, 2009

Sightseeing Chianti – October 7, 2009

We decided follow a short day tour to the region of Chianti, a famous wine making region in Tuscany. Following the tour was the best way for us to get there and not get lost! The tour cost us about Euro 40 (or more) per person and took about 4-5 hours. A double decked bus chauffeured us from the heart of Florence into the cascading hills of Chianti. Our tour guide, Simone was probably one of the best tour guides I’ve had!

Unlike the Asian (Chinese) operated tours in the US, the tour or the tour guide did not ask us to pay a compulsory gratuity to the guide and the driver. I’ve taken one Chinese operated tour in the US and was forced to pay USD 6 per person per day as a gratuity to the tour guide and the bus driver. I ended up paying over USD 140 for a 6 days trip for my family. Even though their website suggest the $6 of gratuity, in reality…. they MAKE you pay!  The worst part was, it was the tour guide does not speak very good English. I struggled so much trying to understand what she was trying to say, I ended up listening to her in mandarin as it was much easier. I pity the other non-Chinese tourists who doesn’t understand Mandarin. I was not the only one who encountered the problem with the so called “suggested” gratuity. My friends who recently took a North East trip also encountered such bad business practice! Their tour guide insisted them of paying USD 6 per person for tip even though the tour guide only picked them up from the airport at night! The airport pick-up ride was supposed to be complimentary. And they also had to pay the USD 6 per day per person to a not so worthy tour guide the next couple days! Ugh!

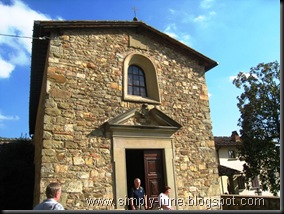
Well, back to my Chianti day trip…… the tour brought us to see a tiny church called the Church of Santa Brigida (Bottom Left). Nothing too interesting about the church, it was probably a ploy to make the whole Chinati day tour a little longer! Haha!

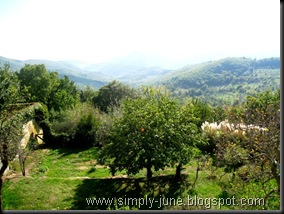
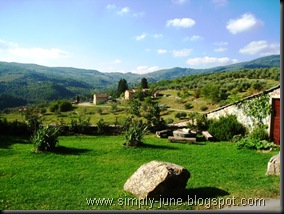
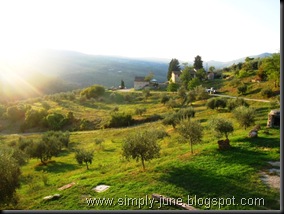
The soft rolling hills of Tuscany was definitely spectacular (Bottom Right)…….You’ll be surrounded by olive trees, vineries and other greeneries.

  Chianti1Chianti

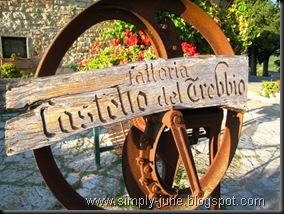
Another picture of the soft rolling hills of Tuscany (Bottom Left). This picture was taken at the Castello del Trebbio Winery which was the highlight of the trip.

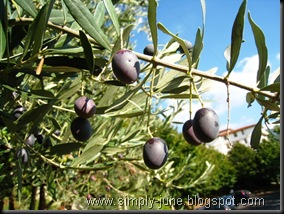
Olive tree up close (Bottom Right). I guess, those are black olives? Or are they just ripe olives? Or bad olives? =P

 Chianti3Chianti2

And another view of the Tuscan hills from the Castello del Trebbio winery (Bottom Left).

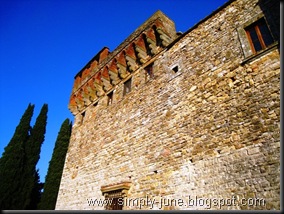
Castello del Trebbio was once a fortress built in the 12th century for the Pazzi family. It was said that this fortress was where the Pazzi family planned the Pazzi conspiracy to kill the Medici family, which then failed. In the 15th century, the fortress was confiscated by the Medici family who turned it into a villa. The current owners of Castello del Trebbio bought the place in 1968 and have since produce various kind of wine, olive oil and even saffron. 

Chianti14Chianti10

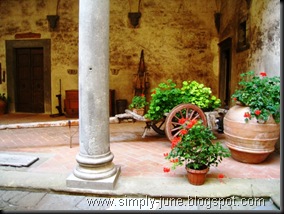
View of the castle from its garden (Bottom Left). We got a tour into parts of the castle/fortress. First stop was to the courtyard (Bottom Right). Apparently the owner of the winery still lives in this old castle. Everything was ancient looking in the building, and the rooms were big and cold. I don’t think I would want to live there…….at least not everyday! It just feels so scary!!!

Castello del Trebbio also offers villas and cottages nearby the main castle (I think) for vacation rentals and honeymoon for the newly weds. They also offer cooking class for those who’s interested in learning to cook some good Italian food, the Tuscan way.

Chianti9Chianti4

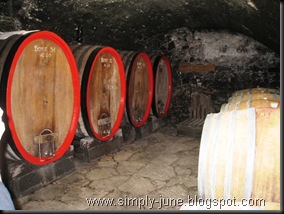
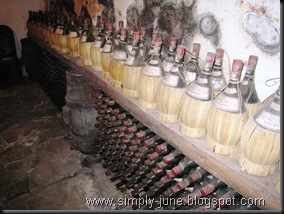
View of the wine cellar view barrels of wine are being aged (Bottom Left). And also in the wine cellar we saw bottles after bottles of Chianti, all covered in dust (Bottom Right).

Chianti5Chianti6

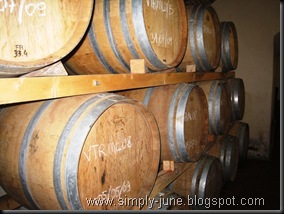
More wine being aged in different kind of barrels (Bottom Left). I forgot the names for these barrels, but I recall being told that they were costly and only have a shelf life of 3 years before it’s time to get new barrels.

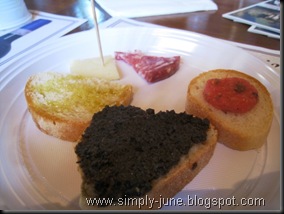
With the tour, we got a tasting of 3 – 4 different kind of white and red wines that the winery produces. We were also given light snacks (Toast with their own olive oil, olive tapanade, bruscetta, salami and cheese) to pair the wines with (Bottom Right). 

Chianti7Chianti8  

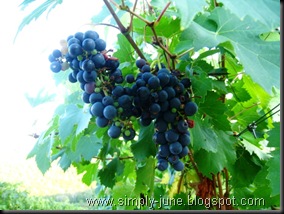
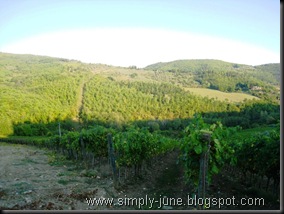
Sangiovese grapes (Bottom Left); the grapes used in Chianti wines. We strolled into the vineyard (Bottom Right) and managed to sample some of the Sangiovese grapes. They tasted pretty good. =)

Chianti11Chianti12

After a few hours, the tour bus took us back to the city. It was dinner time by the time we got home.

Friday, November 27, 2009

Serimuka

I was somehow craving for some Nonya kuihs and I really need to use up some of my glutinous rice. I bought a little way too much glutinous rice when I was doing my “Bak changs” (chinese rice dumplings). I bought 2 bags of rice, and I did not even finish a bag. Yes, I overestimated.

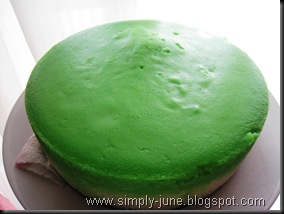
So, every now and then I’ll be looking for ways to use up the remaining 5 lbs of glutinous rice I have in my pantry. And making this kuih is an excellent way to get rid of some. Serimuka is a type of nonya kuih with glutinous rice layer on the bottom and green custard layer on the top. Here’s the Serimuka recipe adapted from Lily. It was surprisingly easy to make with the exception that the surface of my kuih wasn’t the smoothest!! But it was definitely delicious! I should have cut the kuih when it was completely cooled. I just can’t resist to taste it when it was done and cut it when it was still warm. Perhaps my kuih cutting skill was to blame. =P

Serimuka2

SERIMUKA RECIPE

Ingredients:

Part A (Rice Layer):

  • 300g Glutinous Rice, Wash & soak in water for 4 hrs.
  • 180ml Coconut Milk
  • 1 Tsp Salt
  • 1 Tbsp Sugar

Part B (Egg Custard Layer):

  • 3 Large Eggs
  • 4 Tbsp Flour
  • 4 Tbsp Rice Flour
  • 350 Ml Coconut Milk
  • 150g Sugar
  • 1/2 Tsp Pandan Paste
  • 1/4 Tsp Salt
  • Green coloring (*Optional)

Method:

Drain rice and steam on 22cm tray for 20 minutes. Remove from heat, fluff up the rice and pour in the coconut milk, sugar and salt. Mix well. Steam for another 20-25 minutes or till cooked. Using a spoon or spatula,press cooked glutinous rice firmly and use another tray to level pressed rice.

Sieve the 2 flours mixture and add them to lightly beaten eggs. Strain mixture. Add coconut milk, pandan paste, green color,salt and sugar. Cook on high in the microwave, 1 min at a time until mixture is slightly thicken.

Pour 1/2 of this egg custard over the steamed glutinous rice and steam for 10 - 15 minutes until cooked. Use a fork and scratch surface, then pour in the balance of the custard, steam further another 10 - 15 minutes until cooked. (Steaming time varies depending on the heat of steamer)
Cut kuih into serving slices when cooled.

June’s Comments: I soaked the rice overnight (about 10 hours). I only steamed the rice for 15 minutes each time. I pressed the rice into a 6 inch pan with removable base. It was easier to remove my “kuih” when it was done.SerimukaI use Koepoe Koepoe brand pandan paste which is easily found in Asian stores and sells for about $1.50-$2.00 a bottle. I use 1/2 tsp of the paste per Lily’s recipe and thought it might be a little to green for me. I might try to reduce it by a little next time or use real pandan juice?

I cooked the custard mixture over the stove instead of using the microwave. That worked out well. When steaming the custard layer, it took me a longer than 15 minutes maybe because my heat was a little too low. I was afraid that the heat was too high and that would would give me a uneven surface.

I also placed a few pieces of paper towel under my pot cover when steaming the serimuka to prevent the water from the condensation to drop into my kuih.

Thursday, November 26, 2009

Happy Thanksgiving!

Thanksgiving is traditionally a time to give thanks to the harvest and express gratitude in general (according to Wikipedia). To me it’s all about the holiday, the turkey, the food and the Black Friday Sale!

I’m not a big fan of roast turkey though I’ve made it once or twice in the past. I guess the turkey leftover scares me! This year instead of roasting a whole turkey, I’m making turkey meatballs just to stay a little within the tradition. And I’m roasting a whole duck this year for a change. And also some roast chicken just in case some of my guests do not like duck. =)

I’ll post pictures from my little Thanksgiving party where I’ve invited 6 friends as well as my brother and his gf to join hubby and I. What are you doing for thanksgiving?

HAPPY THANKSGIVING!!!

Wednesday, November 25, 2009

Banana Bread

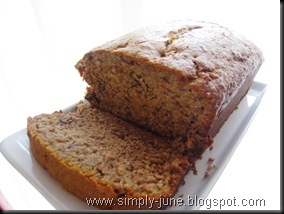
Seyda invited us over for dinner over the weekend and she whipped out a fantastic meal for 5. Dinner started with appetizers, soup, entree, salad and also dessert! We took a shot of Limoncello each right before dinner and had bottles of wine to accompany our meal. Upside down banana cake/bread was for dessert. It was so yummy, I was craving for it later that night…….. And so, I decided to make some banana bread since I have some ripe bananas laying around.

My brother and his gf, Qi asked me…Banana Cake or Bread? I did not know why except that it’s more commonly called Banana Bread than Banana Cake. Perhaps it’s because the texture is more dense than a cake? And maybe coz it’s usually baked in a loaf pan? Do you know why?

This banana bread recipe is adapted from the Food Network and is by M.S. Milliken & S. Feniger. Their original recipe can be found HERE. Reviews for this recipe overall were pretty good so I decided to try out the recipe with a slight personal touch; I added vanilla extract just because I love the vanilla flavor and also nuts to the recipe. Despite my fear that the cinnamon might be over-powering, it wasn’t that strong. The cake was dense, moist and yummy! =)

Banana Bread 

BANANA BREAD RECIPE

Ingredients:

  • 1 Cup Granulated Sugar
  • 4 Oz Unsalted Butter, Room Temperature
  • 2 Large Eggs
  • 3 Ripe Bananas
  • 1 Tbsp Milk
  • 1 Tsp Ground Cinnamon
  • 2 Cups All-Purpose Flour
  • 1 Tsp Baking Powder
  • 1 Tsp Baking Soda
  • 1 Tsp Salt
  • 1 Tsp Vanilla Extract (*Optional)
  • 1/3 Cup Chopped Walnuts/Pecans (*Optional)

Method:

Preheat the oven to 325 F. Butter a 9 x 5 x 3 inch loaf pan.

Cream the sugar and butter in a large mixing bowl until light and fluffy. Add the eggs one at a time, beating well after each addition.

In a small bowl, mash the bananas with a fork. Mix in the milk and cinnamon. In another bowl, mix together the flour, baking powder, baking soda and salt.

Add the banana mixture and vanilla extract to the creamed mixture and stir until combined. Add dry ingredients, mixing just until flour disappears. Stir in chopped walnuts or pecans if desired.

Pour batter into prepared pan and bake 1 hour to 1 hour 10 minutes, until a toothpick inserted in the center comes out clean. Set aside to cool on a rack for 15 minutes. Remove bread from pan, invert onto rack and cool completely before slicing.

June’s Comments: Feel free to leave the vanilla extract and nuts out as they were not in the original recipe. I thought the nuts gave the bread a nice texture! =) You could probably add up to 1/2 Cup of nuts but I thought 1/3 is just right.

Tuesday, November 24, 2009

Sightseeing Florence : Oct 7, 2009

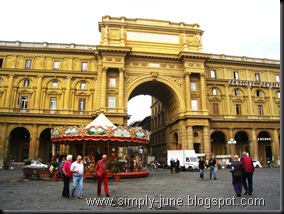
Another picture of the Duomo (Bottom Right) taken early in the morning on the second day. Piazza della Repubblica (Bottom Left) marks the center of Roman city.

FlorenceO7FlorenceO7-1

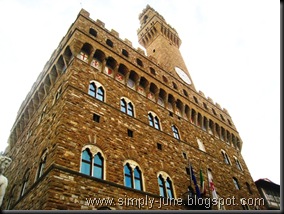
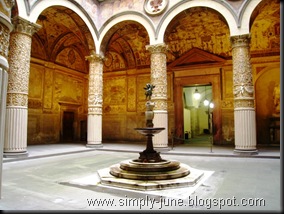
Palazzo Vecchio (Bottom Left) is now the town hall of Florence is located in Piazza della Signoria. This palace was built in the 13th- 14th century by Arnolfo di Cambio.

The courtyard (Bottom Right)  which was the first of three in the Palazzo Vecchio. This courtyard was designed in 1453 by Michelozzo. This picture was taken from the entrance of the Palazzo, just before we pass through security. Yes, you need to get your bags scanned, etc before going into the Palazzo. The palazzo is also a museum and you need to pay about Euro 6 (not too sure) to view the galleries.

FlorenceO7-3FlorenceO7-5

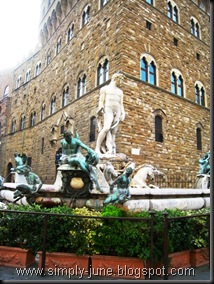
Fountain of Neptune (Bottom Left) at Piazza della Signoria, in front of the Palazzo Vecchio. The fountain was commissioned on the occasion of a Medici family wedding in 1565.

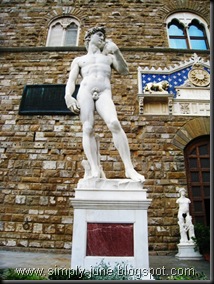
Replica of David (Bottom Right) at Piazza della Signoria also in front of the Palazzo Vecchio. I wanted to see the real David which was exhibited at the Accademia Gallery, but we decided not to pay Euro 6.50 per person just because I wanted to see the real David by Michelangelo. Plus, it was a long line to get in and all. The Replica of David is actually to scale, so that was good enough for us I guess.

                 FlorenceO7-2 FlorenceO7-4

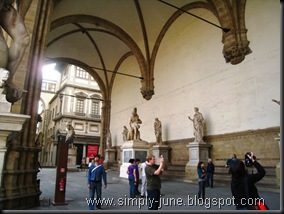
Across from the Palazzo Vecchio (and still in the same Piazza della Signoria) is the Loggia dei Lanzi (also known as Loggia della Signoria) (Bottom Left) which houses more than a dozen statues.

Uffizi Gallery (Bottom Right), which is one of the many museums/galleries in Florence. It was just behind the Pallazo Vecchio. We skipped this as well!

FlorenceO7-6FlorenceO7-7

View Ponte Vecchio (Bottom), a medieval bridge which span across the Arno River. There were many jewelry shops on the bridge. There were some painters sitting by the river and painting the bridge. Most of them are almost done painting. All so talented as the pictures were all so pretty! I personally thought the bridge looked nicer in the picture. It didn’t really impress me much when I saw it with my own eyes. But this bridge sure has gone through a whirl wind of history including being the only bridge in Florence, not destroyed by Germans (as ordered by Hitler) during their retreat in 1944 (World War II).

FlorenceO7-8FlorenceO7-9 

View of the Arno River from the Ponte Vecchio (Bottom Left).

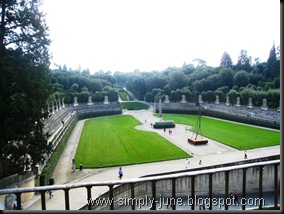
View of the Boboli Garden (Bottom Right) from the Pitti Palace. It was gonna cost us an additional fee to stroll in the garden. Since we were on a budget, and have planned for the Chianti tour, we skipped the garden. The Pitti Palace is a Renaissance palace which dates back to 1458 and was originally a residence of a wealthy and ambitious banker, Lucca Pitti. The Medici family then bought the palace in 1549 and the palace became the chief residence of the ruling families of the Grand Duchy of Tuscany.

Pitti Palace (Palazzo Pitti) is now the largest museum complex in Florence. It is home to many spectacular masterpieces from famous artist such as Raphael and Corregio. The ceiling inside the galleries were to die for. I became very obsessed with the beautiful intricate ceilings soon after! No pictures were allowed inside the gallery, so I can’t take any! Entrance to the gallery was about Euro 10 or so.

FlorenceO7-11FlorenceO7-12

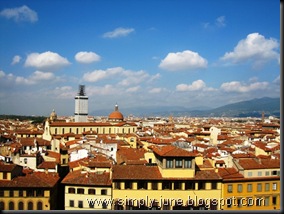
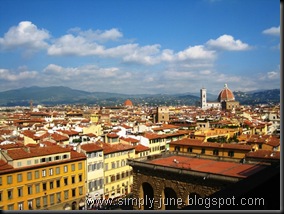
View of Florence from the Pitti Palace (Bottom). The view from the museum was spectacular, I just had to ask the guards/staff if I could take a picture of the scenery from inside the museum since we’re not allowed to take pictures of the museum exhibits. The guy I asked was so nice, he moved the curtains aside and even open the large glass doors so that I can take a better picture of beautiful Florence! Grazie!!

FlorenceO7-13FlorenceO7-14

After the visit to the Pitti Palace, we were off for our Chianti Wine Tour. Stay tuned for those pictures!

Monday, November 23, 2009

Our first NHL Game!

Hubby and I are going to our first NHL (National Hockey League) game in about 3 weeks…all thanks to hubby’s luck of winning a raffle at work. He won 2 great seats for us to see the Boston Bruins vs Toronto Maple Leafs on December 10. These 2 teams might not be the best teams, but it would be a fun experience to see an ice hockey game live! Maybe we’ll be able to see the players fight and throw some punches…etc?NHL

Sunday, November 22, 2009

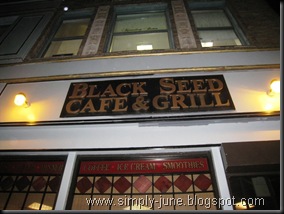
Black Seed Cafe @ Boston, MA

 BlackSeedCafeWe went to Black Seed Cafe for a quick bite 30 minutes before our Cranberries concert a few weeks ago. This cafe was within 2 minutes from the Park Street Station and within 5 minutes walk from the Orpheum Theater where the concert was held.

There weren’t much seating inside and whatever available tables were taken. We were however lucky to get a tiny table for 4 of us to squeeze into minutes after we got inside. There were a good range of sandwiches and wraps to choose from. Everything sounded very yummy…all of us had a hard time choosing what to eat for dinner! We ordered and paid at the cashier. Since it was our first time there, we weren’t sure what was the “protocol”. We weren’t given a receipt or told anything. So, we took a seat, kept our eyes at the pick up station and kept our ears open. They finally called our order and gave us the hand signal to pick up our wraps a couple minutes later.

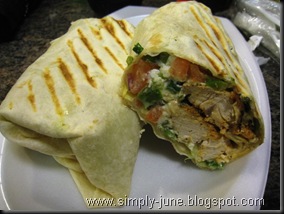
I was actually torn between a Falafel wrap and a Chicken Kebab Wrap, both priced at $6.50. In fact all, their hot wraps are priced at $6.50. I ended up with a Chicken kebab Wrap (Bottom Left) and asked the cashier if I could do a combo, with Falafel inside! He said yes and that each falafel cost $0.50. I got 2 falafels inside my Chicken Kebab Wrap.

Falafel is a middle eastern dish and is a deep fried patty made with spiced chickpeas and / or fava beans. The wrap was pretty good. The chicken was fragrant and moist. The falafels were also flavorful and just simply yummy. Honestly, the Chicken Kebab we had in Florence was still hands down better but the chicken was done differently.  But, I was surely thrilled that I was able to have both the chicken and the falafel in one wrap!!

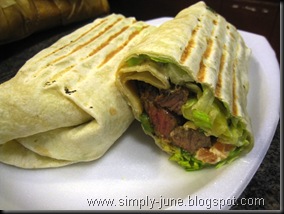
Hubby on the order hand ordered the Lamb Kebab (Bottom Right), also priced at $6.50. I did not try hubby’s wrap as I don’t take lamb. Hubby said it was good and he too thought the yummy Chicken Kebab we had in Florence, Italy a month ago was still the beset. Seriously it was so good, I think we went back there 2-3 times!!!!!
 BlackSeedCafe1BlackSeedCafe2

Well, if you’re in Boston…near the Boston Common or looking for a place for a quick bite before a show or a concert (like us), head to Black Seed Cafe for some yummy wraps.

131 Tremont St
Boston, MA 02111
(617) 338-0024

Check out their website HERE.

Saturday, November 21, 2009

Perkedel Daging (Meat & Potato Patties)

This entry is dedicated to my Indonesian roommates back in college, Mei and Nency. They were the ones who introduced me to this yummy Indonesian potato and meat patties called Perkedel. It might have been 5-6 years since I had some, I think….well at least homemade ones.

I think there are many versions of the Perkedel, based on personal preferences. Most commonly, ground beef is the meat used in the potato patties. When Mei made it for me, she used Luncheon Meat (Spam), and I just love it (she loves it too!). Luncheon meats are probably not the healthiest thing, but hey it’s yummy and plus I don’t eat it all the time! Luncheon meat reminds me of sausages…….in a square tin!

So, here’s my version of the Indonesian Perkedel Daging, inspired by my friend Mei. =)

Perkedel

MEAT & POTATO PATTIES (PERKEDEL DAGING) RECIPE

Ingredients:

  • 2 Lbs Potatoes (I use Yukon Gold)
  • 1 Can Luncheon Meat, Diced
  • 1 Cup Finely Chopped Onion
  • 3 Cloves Finely Chopped Garlic
  • 2 Large Eggs, Separated
  • 2-3 Stalk Scallions, Finely Chopped
  • 1/2 Tsp Black Pepper
  • 1/4 Tsp Salt
  • Oil

Method:

Peel and boil potatoes until fork tender. Drain potatoes and smash it. Heat about 1 tbsp of oil in a pan over medium heat. Add luncheon meat, onion and garlic. Cook until the luncheon meat is slightly golden brown. Stir mixture occasionally so that the luncheon meat will not stick to the pan. Then transfer the cooked meat into the pot of smashed potatoes. Smash the luncheon meat mixture and potatoes together. Add in chopped scallions and season with salt and pepper to taste. Add egg yolks to bind mixture together.
Shape the mixture into a ball, slightly large than a golf ball. Press the “ball” down to form a patty, about 3/4“ thick and about 2-1/4” across.Heat oil (about 1/2” deep) in a pan over medium heat. Coat each patty in egg white before frying them. Fry the first side till golden brown, and continue for the second side. Once that’s done, remove and drain off the excess oil on some paper towels before serving. Serve warm or room temperature with some chili or tomato sauce if you like!

June’s comments: To get an even size, I used a medium ice cream scoop to help me portion the patties. I ended up with about 20 potato patties. Don’t worry, hubby and I did not finish those patties up in one night. It’s part of dinner for about 3 nights (plus lunches for hubby). We ate it with rice, but feel free to serve it as an appetizer!

Perkedel1

Friday, November 20, 2009

Sightseeing Florence : Oct 6, 2009

We only got into Florence (Firenze) at about 4pm. And after hunting down our apartment and settling down there weren’t much daylight left. Most museums were already close, so we decided just to walk around Florence, to get ourselves familiarized with the city for the next day!

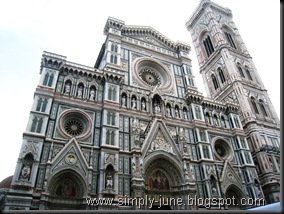
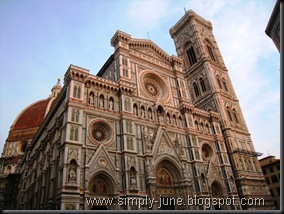
The Basilica di Santa Maria del Fiore or more commonly known as the Duomo (Bottom Left) is within minutes walk from the apartment. We passed by the Duomo everyday, during our 3 days stay in Florence. The Duomo is certainly the most impressive architecture I’ve seen in Florence. The exterior of the Duomo looks like a candy cane of green, white and red marbles. Construction of this Duomo began in 1296 and was completed structurally in 1436. The facade of the building was only completed in the 19th century. 

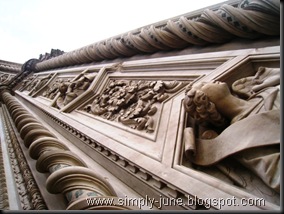
Details on the facade of the Duomo was certainly intricate (Bottom Right). That picture is the detailed carvings on the entrance to the Duomo.

 FlorenceO6 FlorenceO6-2

Lorenzo Ghiberti's Gates Of Paradise (Bottom Left) @ Battistero San Giovani which was located across from the Duomo.This is just the replica, the real thing is being exhibited in Museo dell' Opera del' Duomo.

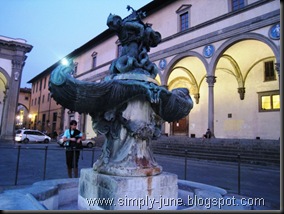
Wandering around Florence…we came across perhaps what used to be a fountain (Bottom Right) placed in some square.

FlorenceO6-1FlorenceO6-4

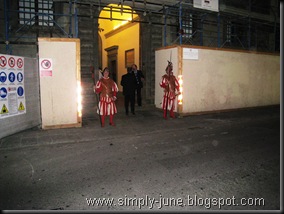
We saw a couple Italian guards dressed almost like the Swiss guards (Bottom) at an entrance of a building, with nicely dressed men going into it. We did not know what was going on there and then, and found out that it was some Florence government function of some sorts on TV later that night. I couldn’t resist those cute outfits!! Haha!

FlorenceO6-3

Thursday, November 19, 2009

Another Birthday Cake!

I think I’ve self appoint myself to be the birthday cake baker! I’ve been volunteering to bring/bake birthday cake for my friends whenever I attend their birthday celebration….provided I have the time to do so of course!

I enjoy making cakes look pretty and I do try to make them look as delectable as possible during special occasions like birthdays or holidays. I probably could make them pretty every time I bake a cake…but then those special occasion cakes won’t be that special anymore, right?

ChrisBirthday

Last week, we celebrated Chris’ XXth Birthday……. Lets not review his age here and lets just say he doesn’t look his age! I made my green tea chiffon cake (now my favorite cake!) to celebrate his birthday at Fugakyu Restaurant. I baked the chiffon cake in a regular round pan (my second time) and it turned out great again!

I sliced the cake into half and filled the middle with some freshly whipped cream and sliced fresh strawberries. I frosted the outside with more freshly whipped cream and lined the outside with some chocolate pieces. Initially, I wanted to do the lazy and quick way by getting fresh lady fingers from the store to line the outside of the cake. I couldn’t find any at the store. So, I decided to put a little more effort, melted some bittersweet chocolate, spread them onto a baking sheet lined with foil, let them harden and arranged them along the sides of the cake.

To top off the cake……. more strawberries! Luscious strawberries and dark chocolate along with a red ribbon (to hold the chocolate) around the cake surely made the cake look deliciously tempting! Yums! The birthday boy and girl (we ended up celebrating 2 birthdays that night!) enjoyed the birthday cake! Yay! It was plenty to feed 15 guests! =)

 ChrisBirthday1

Wednesday, November 18, 2009

Simple Vegetable Soup

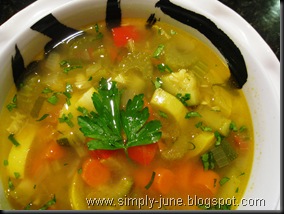
I had friends over for dinner the past weekend and hubby was in charge of making the main course!  Yes, he cooks (whenever he’s given the chance!)!! I decided to make a soup as a precursor to hubby’s main course of Chicken Chop! '

It has been raining the whole day and soup was definitely great pick-me-up during such a gloomy day. I’ve always made cream based soup but this time, I decided to make a clear and healthier soup! Vegetable Soup! Hearty Vegetable Soup! It was easy to make (despite the many cutting/chopping!) and my guests commented that it was yummy! Yay! =)

Vegetable Soup

SIMPLE VEGETABLE SOUP RECIPE

Ingredients:

  • 3 Cloves Minced Garlic
  • 2 Bay Leaves
  • 1 Cup Chopped Onions
  • 1 Cup Diced Potatoes
  • 1 Cup Sliced,Celery (1/2” thick)
  • 1 Cup Sliced Carrots (Halved and cut 1/2” thick)
  • 1-1/2 Cups Sliced Zucchini (Halved and cut 1/2” Thick)
  • 2 Cups Sliced Squashed (Halved and cut 1/2” thick)
  • 3/4 Cup Diced Tomatoes
  • 1/4 Cup Diced Red Pepper
  • 2 Tbsp Chopped Parsley
  • 4 Cups Vegetable Broth (or Chicken Broth)
  • 4 Cups Water
  • 2 Tbsp Vegetable Oil
  • 1/4 Tsp Black Pepper
  • Salt, To Taste

Method:

In a large pot, heat 2 tbsp oil over medium heat. Once oil is hot, add garlic, onion, bay leaves, a pinch of salt, black pepper and cook until onion has soften. Then add potatoes, celery, carrots, zucchini, squash, and red pepper. Stir vegetables occasionally and cook for about 10 minutes.

Add vegetable broth and water and let soup boil. Then add 1 tbsp parsley and diced tomatoes and let soup simmer over medium low heat for about 1-1/2 hour. Season soup with more salt if needed and sprinkle in remaining chopped parsley before serving. This should serve about 4 people.

June’s notes: I had some leftovers and the soup taste so much flavorful the next day! =). If you want to make this soup more filling, feel free to boil some short pasta (i.e. macaroni elbow) in the soup.

Tuesday, November 17, 2009

Finale Desserterie & Bakery @ Cambridge, MA


Finale5Finale 

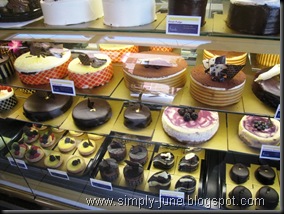
Finale was once my all time favorite dessert place! Whenever we pass by Finale, we will definitely get a piece of their tiramisu and another of their yummy desserts. I’m not sure if I’ve been there to have lunch before but I remember sitting down for some coffee and desserts at Finale’s locations in Cambridge and Natick (unfortunately, closed now). Service was impeccable. Desserts were to die for.

My recent visit to Finale in Cambridge was a little disappointing. I brought my out of town guests to my favorite dessert place for lunch. Having not been there for a sit down lunch on a weekday, I wasn’t sure how their system worked. Instead of sitting down in the dining room, and have the wait staff take your order, etc…… patrons were asked to order (and pay) lunch from their dessert takeout counter. You will then be given a number to be taken to the dining area and placed at the edge of your table for the wait staff to see. Once your food is ready, the wait staff will bring the food over.

Apparently, you would also have to request and take your own drink from the bar (just a few steps from the cashier (where you ordered lunch) and bring it to your table! Our drinks weren’t topped up, so we had to bring our empty glasses to have the bar tender fill it up for us!

Oh yea, upon finishing my lunch… I waited..and waited..and waited (since the wait staff did not remove the “number” from me) for someone to bring out my dessert which I had ordered and paid for earlier. My dessert never came even though the empty plates were cleared. I asked the wait staff only to be told that I would have to get it myself from the dessert takeout counter…….. I definitely wasn’t too pleased with the dining experience and the service. Perhaps they minimize their service during weekday lunch hours?

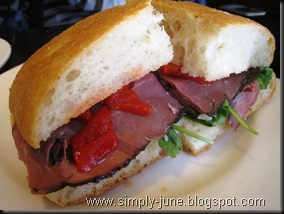
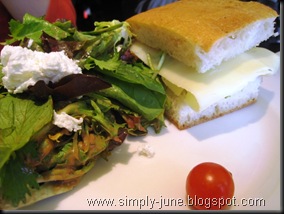
Now that I’ve shared with you my dining experience……..let me share with you what we had for lunch. Derrick ordered a Roast Beef Sandwich (Bottom left) @ $6.99. The roast beef sandwich is served with horseradish mayonnaise, cheddar cheese, arugula and roasted red peppers on foccacia bread.  I think Audrey went for a Turkey Club Sandwich and Salad Combo (Bottom Right) $8.19. Smoked Turkey served with Gruyere Cheese, Tomato, Lettuce, Bacon and Mustard Mayo on Foccacia bread. I forgot if they liked what they ordered.

  Finale3Finale2

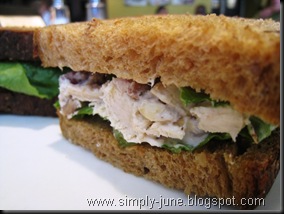
I ordered a Chicken Salad Sandwich (Bottom Left) @ $6.19. Poached chicken mixed with pecans, grapes, onion, celery and mayo served with lettuce on multigrain bread. This was good. In fact I enjoyed it very much that I replicated it at home the next day!!

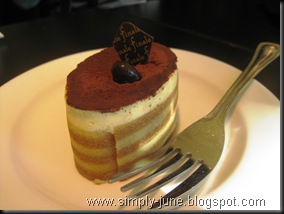
And of course, following my regular tradition…I just had to order their Tiramisu (Bottom Right) @ $5.99, I think. The tiramisu wasn’t great. It did not taste like the yummy tiramisu I’ve had in the past. The outer decorative layer was tough and chewy (perhaps stale?). Coffee flavors were hardly noticeable. It tasted like vanilla cream with cocoa powder on the top. And I don’t think they put liquor in their tiramisu. My friends who tasted the tiramisu also agreed it definitely did not taste like one. What was supposed to be the highlight of my lunch was surely a disappointment! Boo!

Finale1Finale4

I would probably drag the husband out for a date night and perhaps share a tiramisu @ Finale’s one weekend. It would be nice to be able to see how their service would be and if the tiramisu would taste better than my last visit!

Check out Finale’s locations HERE and their menu HERE.

Related Posts with Thumbnails