Showing posts with label Cookie Recipes. Show all posts

Thursday, May 23, 2013

Berry Pavlova

I've always heard about Pavlova and seen beautiful pictures of this dessert but have never gotten a chance to try it out. Pavlova is basically a meringue with a crisp crust on the outside and is pillowy soft inside. It's often topped with whipped cream and fruits.

According to wikipedia, Pavlova is named after Anna Pavlova, a Russian ballerina. Although the dessert has a Russian name, it is believed to have originated from New Zealand (or Australia) when the ballerina was there during or after one of her tours to those countries in the 1920s. The dessert is apparently a popular dish and is frequently served during celebratory and holiday meals in New Zealand and Australia.

With some egg whites sitting in my fridge, I was contemplating between making friand, french macaron  or pavlova. I decided to go with Pavlova coz it seemed to be the easiest to make and I have some fresh berries at home that I can incorporate to the dessert. Plus, I'm always curious about this dessert.

I googled for a recipe and went with one I found on Allrecipes.com making slight changes. As I fear that the dessert will be too sweet, I reduced the sugar a little. The outcome was perfect, not overly sweet and light. The meringue is indeed crisp on the outside and soft in the inside. The berries paired nicely and they added some freshness to the dessert.  This is a dessert you could definitely eat more without feeling too guilty! I brought the dessert over to my neighbor's for dinner and I think they loved it! =)  Berries are in season now and this make a perfect summery dessert!

Here's the recipe with my changes. Note to self, hull the strawberries next time =)!


BERRY PAVLOVA RECIPE
*Serves 8-10

Ingredients
  • 4 oz Egg White (About 4 Large egg whites)
  • 1 Cup Granulated Sugar
  • 1 Tsp Vanilla Extract
  • 1 Tsp Lemon Juice
  • 2 Tsp Corn Flour
  • 1 Cup Heavy Cream (Add 1/2 Cup - 1 Cup more if you want more cream)
  • 1/2 Cup - 3/4 Cup Blueberries
  • 8-10 Oz Strawberries, Halved
Method
Preheat oven to 300F. Line a baking sheet with parchment paper. Draw a 9" circle on the parchment paper.

In a large bowl, beat egg whites until stiff but not dry. Gradually add in sugar, about 1 tbsp at a time, beating well after each addition. Beat until egg white is thick and glossy. Gently fold in vanilla extract, lemon juice and corn flour. 

Spoon mixture inside the circle drawn on the parchment paper.Working from the center and spread mixture toward the outside edge, making a slight indentation in the middle and building the edge. Bake for 1 hour then cool on a wire rack. **See Note**

In a small bowl, beat heavy cream until stiff peaks form and set aside. Place the meringue on a flat serving plate. Fill the center of the meringue with whipped cream and then top it with the berries.

June's Notes: Sugar needs to be incorporated well into the meringue if not your meringue will "weep" when it bakes if the sugar is not entirely dissolved prior to baking. 

I made 2 smaller meringue instead of one big one. I placed both meringue on the same baking sheet, making them about 5 inches in diameter each with about 2-3 inches gap between the two. The pavlova will spread a little once it bakes. Since my meringue is slightly smaller, I baked it for about 50 minutes instead. 

A lot of the other recipes I saw asked for the meringue to cool down in the oven with the oven door ajar after it has baked. I read that by letting the meringue cool slowly in the oven as opposed to letting it cool at room temperature helps so that the meringue does not deflate too much.  As my meringue cooled down, the center deflated a little and created a little crater. I thought it was perfect as I could fill the "bowl" with whipped cream and fruits.  I don't know if the pavlova is supposed to deflate and crack at all once cooled or it should retain its shape right after baking.  Maybe next time, I'll cool it in the oven and compare the results.  If you're not a big fan of strawberries and/or blueberries, feel free to top it off with raspberries, kiwi, peaches, etc. 

 If you're a Pavlova connoisseur, tell me....what's a perfect Pavlova like??


Enjoy!

Simply June 

Thursday, March 28, 2013

Madeleines

Madeleines are small cookies/cakes baked in a shape of a shell and originates from France. I've not been to France but have tasted Madeleines from various stores in the US. They are lovely cakes and goes well with tea or coffee. Not overly sweet, petite enough for me to indulge and not feel guilty.

I've been wanting to try my hands to bake Madeleines and finally got a chance when I bought a Madeleine cookie pan from TJ Maxx. After googling for a recipe, I went with the one I found on www.food.com. I didn't make any changes to the recipe and loved the result. I brought them to some very well traveled friends, and they commented that while the ones I made were very good and that they liked the texture, the ones in France are slightly fluffier than mine. Good to know, I will try to lighten it up the next time and see how they turn out. Till then, here's the Madeleine recipe:


MADELEINE RECIPE
*Makes 18-20 Madeleines

Ingredients

  • 2 Large Eggs
  • 2/3 Cup Sugar
  • 1 Tsp Vanilla Extract
  • 1/2 Tsp Grated Lemon Peel
  • 1 Pinch Salt
  • 1 Cup All-Purpose Flour
  • 10 Tbsp Unsalted Butter, Melted and Slightly Cooled
  • Powdered Sugar (Optional)
  • Extra Butter and Flour for greasing pan
Method
Preheat oven to 375F. Generously butter and flour pan for large madeleines (about 3 x 1-1/4 Inches). 

Using an electric mixer, beat eggs and sugar in a large bowl just to blend. Beat in vanilla, lemon peel and salt. Add flour, beat just until blended. Gradually add cooled melted butter in a steady stream, beating just until blended.

Spoon a little over 1 tbsp of batter into each indentation in pan (do not smoothen the batter). Bake until puffed and brown, about 12-15 minutes. Cool 5 minutes. Gently remove from pan. Repeat process, buttering and flouring pan before each batch. 

Dust cooled cookies with optional powdered sugar.

Enjoy with a cuppa tea or coffee! 

June's Notes: Depending on your oven and the kind of pan you use, the bake time will slightly differ. I needed to place my non-stick madeleine pan (darker pan) on the highest level in my electric oven, so that the madeleines do not burn. For the first batch, it took me about 14-15 minutes. Baking the second batch, with the leftover batter (did not fill all the cavity with batter) and reusing the pan, 12-13 minutes bake time were sufficient. Anything more, you'll get burnt cookies!

Simply June 

Wednesday, February 13, 2013

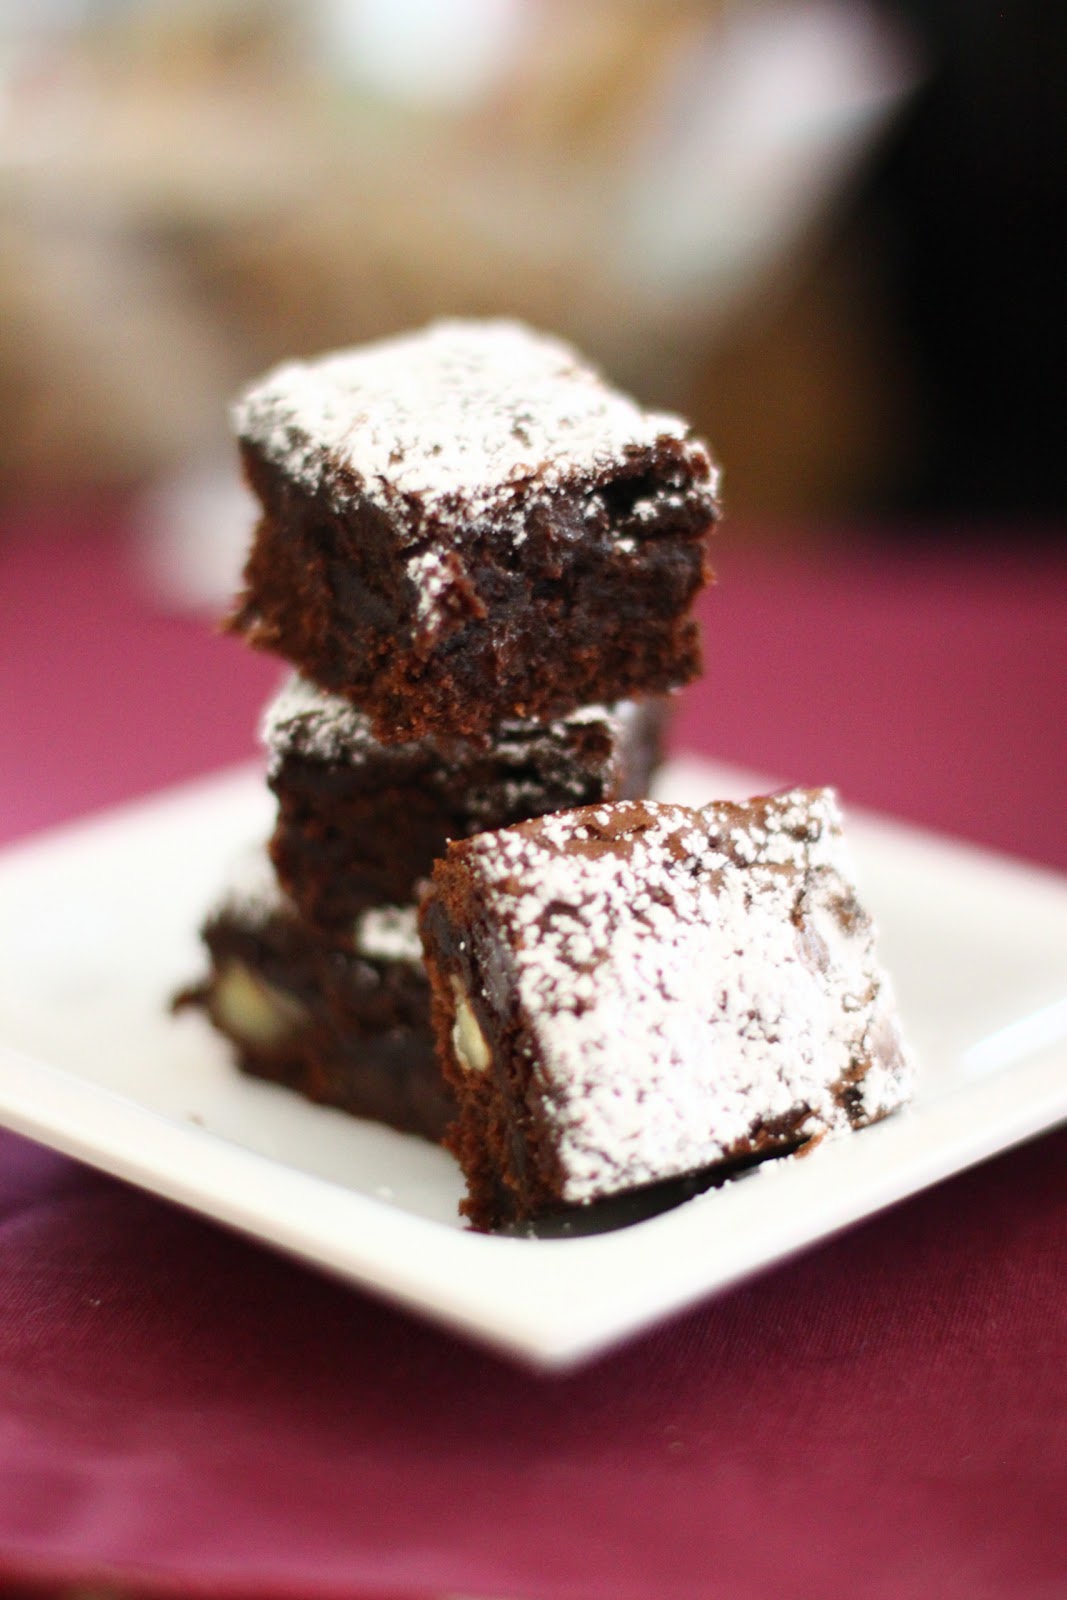
Chocolate Brownies....Nuts Optional

A couple weeks ago, the husband and I were invited to a super bowl party. It was a pot luck style, so everyone was welcome to bring something to the party. I decided to make a spinach dip as well as some brownies.

The brownies turned out very moist and pretty good. The original recipe did not ask for nuts or extra chocolate chip, which I added for some extra texture. Here's the recipe for the chocolate brownie adapted from www.chow.com.


CHOCOLATE BROWNIE RECIPE
*Makes a 8x8 pan

Ingredients

  • 6 Oz Semisweet Chocolate Chip
  • 8 Tbsp Unsalted Butter
  • 2 Large Eggs, at Room Temperature
  • 1 Cup Granulated Sugar
  • 1 Tbsp Unsweetened Cocoa Powder
  • 1 Tsp Vanilla Extract
  • 1 Tbsp Brewed Espresso
  • 1/4 Tsp Salt
  • 1 Cup All Purpose Flour
  • 1/4 Cup Pecans, Chopped (Optional)
  • 1/4 Cup Semisweet Chocolate Chip (Optional)
  • 1 Tbsp Powdered Sugar (Optional, for dusting)
Method
Preheat oven to 350F and arrange a rack in the middle. Line an 8 x 8 glass baking dish with aluminum foil (or if you use those disposable ones, that would be easier).

Combine the chocolate and butter in a medium saucepan and cook over medium low heat, stirring frequently until mixture is evenly melted. Remove from heat and let cool to room temperature.

Combine the eggs, sugar, cocoa powder, vanilla, espresso and salt in a large bowl and briefly stir until just evenly incorporated. Add the cooled chocolate mixture into the egg mixture and stir to combine. Fold in flour until just incorporated (no white steaks should remain). Gently fold in the optional pecans and additional chocolate chips. 

Transfer the batter to the prepared baking dish and for about 25-30 minutes or until it passes the toothpick test (Insert a toothpick into the center of the brownies and once it comes out clean; it's ready!). Remove from the oven and let cool completely before cutting. Dust with optional powdered sugar before serving.

June's Notes: I cut my brownie into a "1- bite" size; and got about 36 "1-bite" size pieces from this batch. 

Enjoy! 

Simply June 

Thursday, January 31, 2013

Honey Cornflakes Cup

After several months of hiatus (again), I'm back! We've been busy with travel (took a trip to India!) and family and friends visiting and I got a little lazy in between, the past few months. These days, I'm busy baking for Chinese New Year, a ritual I try to do every new year so that the husband and I and some of our friends get to snack on CNY cookies. And of course, my brother will also receive a care package of homemade cookies from me. =)

Anyway, I got a couple request for the recipe of one of the cookies I made; Honey Cornflake Cups. I've tasted them before but never thought to make it myself. But since, I had a big bag of cornflakes leftover from making the cornflake cookies, I decided to whip up a batch of these cute yummy stuff. I adapted the recipe from Charlene, made a few tweaks and I love the results and the simplicity of the recipe!  Here's the recipe if you want to make some for Chinese New Year or just for fun!


HONEY CORNFLAKES CUP RECIPE
*Makes about 70-80 super mini cups

Ingredients
  • 90g Butter
  • 2 Tbsp Granulated Sugar
  • 2 Tbsp Honey
  • 4 Cups Cornflakes, Slightly Crushed
  • 3-4 Tbsp Almond Flakes, Toasted
  • 1 Tbsp Sesame Seeds, Toasted
Method
Place the empty baking cups on a baking sheet. Preheat oven to 325F. In a pot, melt butter, sugar and honey over medium heat. Once the mixture is bubbly, turn off the heat and stir in cornflakes, almond and sesame seeds. Coat the mixture well and spoon cornflakes mixture into the mini cups. Bake the mini cups for about 12 minutes until the cornflakes are golden brown. Let the cups cool (the cornflakes will stick together when it's cool) and enjoy.

I am submitting this post to Chinese New Year Delights 2013

Simply June 

Monday, August 6, 2012

Afternoon Tea and a Cranberry Orange Scone Recipe

*Sorry for a crappy picture!

A couple weeks ago, I invited some of my Thousand Oaks friends over for some afternoon tea. Afternoon tea (according to wikipedia) is a snack eaten between 3-5pm and originated from England. Finger food like savory sandwiches and tasty desserts are served along with tea of course.

I've had afternoon tea twice in the US, but they don't compare to the ones my friends have had in Asia or other parts of the world. The spread of the afternoon tea and the trays of glorious food that was served was mouth watering and oh so tempting. So, I wanted to create that experience at my home. I baked/made a couple different items and bought a yummy petit four cake sampler from Trader Joe's to put together a spread of afternoon tea for 5 people. Here's what was served at tea; homemade Cranberry Orange Scones (recipe at the end of this post), Egg Salad Profiteroles, Salmon Cucumber Sandwich, Jam Thumbprint Cookies, Strawberry Cream Profiteroles, Trader Joe's petit four selection, Nokdujeon (Korean Savory Mung Bean Pancake) by my friend, some fresh fruits and of course tea!


How can I serve afternoon tea without scones?? So, I made some scones the day of the afternoon tea to make sure I serve the freshest batch of homemade scones to serve to my friends. As I was unable to find clotted cream/devonshire cream, I just served scones with some jam. I googled for a scone recipe and decided to go with one I found on all recipes and was utterly pleased with the results . Here's the recipe for some yummy Cranberry Orange Scones adapted from all recipes with just a minor tweak.


CRANBERRY ORANGE SCONES RECIPE
Ingredients

  • 2 Cups All Purpose Flour
  • 1/3 Cup Sugar
  • 1 Tsp Baking Powder
  • 1/4 Tsp Baking Soda
  • 1/2 Tsp Salt
  • 8 Tbsp Unsalted Butter, Frozen
  • 1/2 Cup Dried Cranberries
  • 1 Tsp Grated Orange Zest
  • 1/2 Cup Sour Cream
  • 1 Tsp Vanila
  • 2 Large Egg 
Method
Adjust oven rack to middle position and preheat at 400 degrees. In a medium bowl, mix flour, sugar, baking powder, baking soda and salt. Grate butter (using large hole box grater) into flour mixture and use your fingers to work in butter so that mixture resemble a coarse meal. Stir in cranberries and orange zest.

In a small bowl, whisk sour cream and 1 egg until smooth.  Using a fork, stir sour cream mixture into flour mixture until large dough clumps form. Use your hands to press the dough against the bowl into a ball. The dough will be sticky in places and there may not seem to be enough liquid at first, but as you press, the dough will come together.

Place dough on a lightly floured surface flight roll dough until it's about 3/4 inch thick. Using your favorite cookie cutter ( about 2-3 inch diameter), "cut" out the scones  and place on a cookie sheet (lined with parchment paper or foil) about 1 inch apart. Beat the remaining egg, and brush egg wash on the scones. Bake until golden brown for about 15-17 minutes. Cool for 5 minutes and serve warm or at room temperature.

Enjoy! And don't forget a cuppa hot tea to go with it.

Simply June 

Friday, July 20, 2012

Jam Thumbprint Cookies

With a tea party coming up and bottles of jam at home, I wanted to make some thumbprint cookies. After googling for a recipe, I decided to go with Ina Garten's Jam Thumbprint Cookie. I've used some of Ina's recipe in the past and have always had good results with her recipes. So, using her recipe again is a no brainer!  The only change I made was adding some lemon zest (proud to say, the lemon was from my garden!!) to the cookies, and I used Blueberry and Apricot Jam for the jam filling. The cookies were delicious; the husband couldn't stop eating them! =)
Here's the recipe with my little twist..

JAM THUMBPRINT COOKIES RECIPE
Ingredients
  • 3/4 lb (3 sticks) Unsalted Butter, at room temperature
  • 1 Cup Sugar
  • 1 Tsp Vanilla Extract
  • Zest from 1 Lemon (Optional)
  • 3 1/2 Cups All Purpose Flour
  • 1/4 Tsp Kosher Salt
  • 1 Egg Beaten with 1 Tbsp water (for egg wash)
  • 7 Oz Sweetened Flaked Coconut
  • Raspberry and/or Apricot Jam (Or your Jam of choice)
Method:

Preheat the oven to 350 degrees F.

In an electric mixer fitted with the paddle attachment, cream together the butter and sugar until they are just combined and then add the vanilla (and lemon zest). Separately, sift together the flour and salt. With the mixer on low speed, add the flour mixture to the creamed butter and sugar. Mix until the dough starts to come together. Dump on a floured board and 
roll together into a flat disk. Wrap in plastic and chill for 30 minutes.

Roll the dough into 1 1/4-inch balls. (If you have a scale they should each weigh 1 ounce.) Dip each ball into the egg wash and then roll it in coconut. Place the balls on an ungreased cookiesheet and press a light indentation into the top of each with your finger. Drop 1/4 teaspoon of jam into each indentation. Bake for 20 to 25 minutes, until the coconut is a golden brown. Cool and serve.

June's Comments: I made my cookies a little smaller; they weigh between 0.7oz  and 0.8 oz. 
I made a slightly deeper indentation into the cookie, so that I can fill it with more jam! =)

Simply June 

Monday, June 7, 2010

Cheesecake Brownie

Updated Oct 28, 2013 

I promised my friends from work I would bring brownies to work the following week. Brownies are pretty easy to make and this is one sinful chocolaty treat that most (not-too health-conscious) people would say yes to!

I sort of knew what kind of brownie I wanted to make; Cheesecake (Cheese) Brownie. I’ve tried a recipe by Martha Stewart once but I was in the mood to try other recipe. It was when I stumbled upon David Lebovitz’s Cheesecake Brownie that I knew I just had to try out this version! I’ve tried a few of his recipes and have no regrets trying them. They were all delectable!

After work (and dinner), I gathered the ingredients needed and started baking. I wasn’t going to wash my electrical appliances (i.e. mixer) and used a traditional whisk and my muscles to do the work of blending the ingredients into a smooth consistency!

Here’s the chocolaty sinful Cheesecake Brownie by David Lebovitz. And like usual, I like to tweak things a little; this time I sprinkled a handful of chocolate chips to the batter prior to baking. The result was a fudgy like brownie with bits of chocolate chip and random sections of cheesecake! Yums!
CheesecakeBrownie2
CHEESECAKE BROWNIE RECIPE

Ingredients:
Part A (Chocolate Batter)
  • 6 Tbsp Unsalted, Cut Into Pieces
  • 4 Oz Bittersweet / Semisweet Chocolate, Chopped
  • 2/3 Cup Granulated Sugar
  • 2 Large Eggs, At Room Temperature
  • 1/2 Cup All-Purpose Flour
  • 1 Tbsp Unsweetened Cocoa Powder
  • 1/8 Tspn salt
  • 1 Tspn Vanilla Extract
  • 1/2  Cup Chocolate Chips
Part B (Cheesecake Batter)
  • 8 Oz (1 Block) Cream Cheese, At Room Temperature
  • 1 Large Egg Yolk
  • 5 Tbsp Granulated Sugar
  • 1/8 Tsp Vanilla Extract
Method:
Line a 9-inch square pan with foil, making sure it goes up all four sides. Use two sheets if necessary. Mist with non-stick spray or grease lightly. Preheat oven to 350 degrees.

In a medium saucepan, melt the butter and chocolate over low heat, stirring until smooth. Remove from heat and beat in the 2/3 cup sugar, then the eggs. Mix in the flour, cocoa powder and salt, then the vanilla and chocolate chips. Spread evenly in the prepared pan.

In a separate bowl, beat together the cream cheese, the yolk, 5 tablespoons of sugar, and vanilla until smooth. Distribute the cream cheese mixture in eight dollops across the top of the brownie mixture, then take a dull knife or spatula and swirl the cream cheese mixture with the chocolate batter.

Bake for 35 minutes, or until the batter in the center of the pan feels just set. Let cool, then lift out the foil and peel it away. Cut the brownies into squares.

CheesecakeBrownie Cheesecake Brownie1
June’s Comments: I used salted butter instead of unsalted butter; therefore I skipped the salt in the batter. I used bittersweet chocolate (chips) throughout the recipe as I think bittersweet chocolate gives a richer chocolaty taste. Feel free to use semisweet ones.

I also sprinkled about 1/2 cups of chocolate chip after I swirled the cream cheese mixture to add more chocolaty goodness to the brownie. =). 

Oct 28, 2013 - I recently made another batch of this brownie and decided to double the chocolate batter part, but kept the cheesecake part. I like this "version" as well. 


Signature

Monday, April 12, 2010

Lemon Bars

Lemon Bars…Lemon Squares…whatever you call it, this is one yummilicious Lemon Bar! I’ve always enjoyed Lemon bars/squares usually from catered events. I have a thing for this tart and tangy dessert but have never made it from scratch. The first time I made some lemon bars, I used Krusteaz lemon bar mix and I remember not getting a great lemon bar. My bars did not look like the picture on the box. It was all messy I probably threw the not so great lemon bars away out of frustration.

I had some Lemon Bars at work recently and that sparked my inspiration to make my own Lemon Bars. I found a Lemon Bar recipe on www.allrecipes.com and decided to try it out with a little tweaking based on the reviews.

The result was some awesomely lemon bars. The  filling/ “curd” was SO GOOD! Tart and tangy just the way i like it. The sweet salty buttery crust was a great companion to the tart lemon filling. The bars were half crust, half filling. The lemon filling was definitely refreshing and you get “burstfuls” of fresh lemony goodness in your mouth. I brought it to work and I’m happy to say it was quite a hit!

Here’s the simple recipe. It takes just about an hour to bake the dessert, but you do need to let it cool down before cutting into it!

Lemon Bars
LEMON BARS RECIPE

Ingredients:

Part A (Crust)

  • 1 Cup Butter, Softened
  • 1/2 Cup Granulated Sugar
  • 2 Cups All-Purpose Flour

Part B (Filling)

  • 4 Large Eggs
  • 1-1/2 Cups Granulated Sugar
  • 1/3 Cup + 2 Tbsp All-Purpose Flour
  • 3 Medium Lemons, Juiced
  • Zest from 1 to 1-1/2 Lemon

Method:

Preheat oven to 350F. In a medium bowl, blend together softened butter, 2 cups flour and 1/2 cup sugar. Press into the bottom of an ungreased 9x13 inch pan. Bake for 15 to 20 minutes in the preheated oven, or until firm and golden.

In another bowl, whisk together the remaining 1/12 cups sugar and 1/4 cup flour. Whisk in the eggs and lemon juice. Lightly and randomly poke crust with a skewer/fork. Pour over the baked crust. Bake for an additional 20 minutes in the preheated oven. The bars will firm up as they cool. Cut into squares.

June’s Comments: It took me about 30 minutes to bake the crust till golden. If you’re not a big fan of tartness, reduce the juice of lemon to 2 medium lemons. If you do reduce the juice, reduce the flour to about 1/3 Cup or slightly less.  Use fresh lemons for this recipe!

PS: Mom, I think you’ll enjoy this recipe! Try it and let me know!! =)

Signature

Tuesday, February 23, 2010

Mocha Meringue Kisses

As much as I tried to use recipes which uses the whole egg so that I do not waste anything, most of the cookies I made for CNY call for egg yolks only. Little that I know that by the time I’m done baking a few batches of cookies, I’ll be left with quite a bit of egg whites. Hating to just wash it down the drain or cook it for breakfast, I decided to make meringues! That means another addition to my CNY cookie collection! it was truly a spontaneous thought!

Here’s the recipe….perfect in situations like mine! Or whenever u have a craving for some meringues!

MochaMeringue

MOCHA MERINGUE KISSES RECIPE

Ingredients:

  • 5 Extra Large Egg Whites
  • 1/4 Tsp Cream of Tartar
  • 1/2 Tsp Vanilla Extract
  • 1-1/3 Cup Granulated Sugar
  • 5 Tbsp Cocoa Powder
  • 2 Tsp Granulated/Instant Coffee Powder

Method:

Preheat oven to 300 F. In a bowl, combine egg whites, cream of tartar, and vanilla. Beat until the whites form soft peaks. Slowly pour in sugar a quarter at a time and beat until mixture becomes glossy and stiff peak forms. Fold in cocoa powder and coffee powder lightly incorporating them into the mixture.

Fill a pastry bag (attached with a large star piping tip) with meringue and piped baking sheet lined with parchment paper. Space them about about 1-1/2” apart. Bake for 20-25 minutes until outside is firm. Transfer to wire rack. Cookie will continue to harden as it cools. Store in air tight containers when meringues are cool.

Friday, February 19, 2010

Cheese Swirl Brownie

I decided to make some brownies as Valentine gifts for my friends who went to skiing with us @ Killington, VT. I thought it would be a nice treat for all to enjoy on Valentine’s Day. Plus, this is another reason for me to get creative!

Since I have a block of cream cheese, I wanted to incorporate that into the brownie. I googled for a recipe and found a recipe on MarthaStewart.com and decided to give it a try! The result was a very chocolaty and moist brownie with a consistency between cake and fudge! My friends commented that they were very good and definitely very chocolaty.

CheeseSwirlBrownie2

I sprinkled some extra chocolate chips on the top and baked the brownie in a 9 inch square pan. I cut them into 16 squares and packed them up in Chinese Take Out Boxes, adorned with craft paper, ribbon and a little tag. Don’t they look cute??

Here’s the recipe. Remember to use good quality chocolate!! I use Ghirardelli chocolate (the only brand I use!) in this recipe.

CheeseSwirlBrownie

CHEESE SWIRL BROWNIE RECIPE

Ingredients:

  • 10 Tbsp Unsalted Butter, cut into pieces, plus more for pan
  • 1 Cup + 2 Tbsp All-Purpose Flour
  • 1/4 Cup Unsweetened Cocoa Powder
  • 1/2 Tsp Baking Powder
  • 1/2 Tsp Salt
  • 8 Oz Semisweet or Bittersweet Chocolate Morsels/Chips
  • 4 Oz Cream Cheese, Softened @ Room Temperature
  • 1 1/2 Cups Sugar
  • 4 Large Eggs

Method:

Preheat oven to 350 degrees. Brush a 9-inch square baking pan with butter. Line bottom and two sides with a strip of parchment paper, leaving a 2-inch overhang on the two sides. Butter paper, and set pan aside. In a small bowl, whisk 1 cup flour, cocoa, baking powder, and salt; set aside.

Place 8 tablespoons (1 stick) butter and chocolate in a large heat-proof bowl set over (not in) a saucepan of gently simmering water. Heat, stirring occasionally, until smooth, 2 to 3 minutes; remove bowl from pan. Add 1 1/4 cups sugar; mix to combine. Add 3 eggs, and mix to combine. Add flour and cocoa mixture; mix just until moistened (do not overmix).

Prepare cream-cheese mixture: Whisk bar cream cheese with 2 tablespoons room-temperature butter. Whisk in 1/4 cup sugar, 1 egg, and 2 tablespoons all-purpose flour. Alternately spoon chocolate batter and cream-cheese mixture into pan; with the tip of a paring knife, swirl to marble.

Bake until a toothpick inserted in center comes out with a few moist crumbs attached, 50 to 60 minutes. Cool in pan for 30 minutes. Using paper overhang, lift brownies out of pan; transfer to a rack to cool completely (still on paper). On a cutting board, using a dampened serrated knife, cut into 16 squares. Store in an airtight container at room temperature, up to 2 days.

June’s Comments: I lined my baking pan with aluminum foil. It worked like a charm too! I used a mixture of Ghirardelli bittersweet and semi sweet chocolate chips in the brownie. I also sprinkled the extra chocolate chip on top of the brownie prior to baking!

CheeseSwirlBrownie1

Monday, February 15, 2010

Kuih Bangkit

Kuih Bangkit is one of hubby’s favorite CNY cookie! Don’t ask me why this white powdery cookie is named “Rise Cookie” (literally translated from Malay into English). This is one cookie where you’ll either love it or hate it I think. When you put it in your mouth, you get the powdery/floury texture which can be overwhelming if you pop one too many into your mouth and refrain from drinking water.

My MIL makes one of the yummiest Kuih Bangkit which crumbles and melts in your mouth! Hubby likes to describe it as “burst into powder”. Sadly, I was unable to achieve the same result when I tried out my MIL’s recipe. My MIL has many years of making and selling Kuih Bangkit under her belt. I have almost no experience in making them. The closest I came to making them was when I was younger and helped my mom mould the cookies. Well, my MIL did teach me her recipe when she came to visit and we made some together with success. Without her next to me, I was not able to get it right despite 2 separate tries a few weeks ago. =( They turn out hard as rock the first time. The second was ALMOST as hard as rock!

I found Lily’s recipe first before I tried my MIL’s recipe and was very happy with her outcome. It’s firm on the outside and melts in the mouth. Although it’s not as good as my MIL’s but that might be due to baker error……… the result was still satisfying! At least I can’t kill anyone if I hurl the Kuih Bangkit at them!! 

Lily’s recipe can be found HERE. I’m lucky to have the Kuih Bangkit mould, so I shaped mine into the mould with that instead of using a cookie cutter. Thanks, Anna for sending me this last year!! Here’s the recipe with my changes.

KuihBangkit1

KUIH BANGKIT RECIPE

Ingredients:

  • 225 gm Tapioca Fllour
  • 36 Pandan Leaves, Cut into 2 Inch
  • 30 gm Margarine
  • 65 gm Powdered Sugar
  • 1 Large Egg Yolk
  • 75 ml – 90 ml Coconut Milk
  • Pinch of Salt
  • Red food coloring (Optional)

Method:
Line a large glass microwavable bowl with greaseproof paper, microwave the flour and 1/2 Pandan Leaves on high 1 min at a time for 5 times, stirring every minute. Set aside, cool completely before using.

Heat (medium low) coconut milk with remaining Pandan Leaves for about 10-15 minutes stirring constantly until leaves have wilted. Leave pandan leaves in coconut milk and let milk cool completely before removing leaves.

Cream margarine with sugar and yolk till sugar dissolves. Add in 75ml coconut milk and mix well.
Add flour to mix till a non-sticky dough is formed. If dough is too dry, add more coconut milk but add 1 tsp at a time, otherwise, dough may be too sticky. Leave dough to rest covered with a damp cloth.

Take a quarter of the dough and roll dough on a floured table to 3/8 inch(this thickness is necessary to obtain a nice size cookie)and use cookie cutters to cut into shapes. Using a pincher to pinch desired designs. Alternatively wooden moulds can also be used and that omits rolling the dough.
Baked on lined tray in preheated oven at 350 F for 15 –20 minutes until the bottom edges of the cookie is slightly brown. Let cookies cool before dotting the cookies with red food coloring and a bamboo skewer. Store cookies gently.

June’s Comments: I left the flour to cool overnight before using this. This was one of the tip my MIL passed on to me when attempting her Kuih Bangkit.

Lily’s original recipe requires a baking time of 15 minutes at 300F. That did not work for me as I was left with raw dough in the middle. at the end of the 15 minutes. I increased the temperature instead and that worked out better. Feel free to taste a cookie (don’t burn your tongue though) to see if it’s cooked through. The middle should be dry and powdery, not damp and doughy.

KuihBangkit

Saturday, February 13, 2010

Kuih Rose

I’ve never quite knew the name of this deep-fried cookies/biscuit/snack but I know my grandma makes a freaking yummy one!! Got to make a mental note to ask grandma for her secret recipe!! =)

Anyway, my friend Anna sent me the Kuih Rose mould last year and I haven’t gotten a chance to use it until recently. My fingers were itching to try out the mould and with CNY around, I’ve got a great excuse to be adventurous! I’ve never seen how this cookie is made but I suspect it can get rather tricky. One has got steadily dip the mould in the batter and not getting the batter all around the mould. Using the right recipe is also key to achieve a light and crispy Kuih Rose. I know one of the key ingredient to get a delicious Kuih Rose is the use of Rice Flour but I don’t know what is the right or perfect proportion. I looked for recipes, decided to try my luck and settle for this recipe coz it looks pretty good. The outcome was great! Light and crunchy!

Anyway, here’s the recipe extracted from www.neckredrecipes.blogspot.com that I tried and liked, if any of you are interested! I still miss grandma’s Kuih Rose though… =) Oh yeah, I later found out from my MIL that 100% Rice Flour is used! I guess I need to look for another recipe to try and to see if there’s a difference in texture!

KuihRose

KUIH ROSE / BEEHIVE BISCUIT RECIPE

Ingredients:

  • 1 Large Egg
  • 35 gm Sugar
  • 100 ml Coconut Milk
  • 60 gm Plain Flour
  • 25 gm Rice Flour
  • 1 Tsp water

Method:

Mix all the ingredients together until the sugar is dissolved. Sieve batter and let batter rest for at least 30 minutes.

Heat your oil(medium heat) in a deep/fryer or wok or pot and place the mould in it to get it hot. Moulds must be hold enough for better to adhere to it. Remove mould from hot oil and stick it into the batter to get a coating; just on the bottom and the sides of the mould. Do not allow batter to cover the top of the mould. Hold still for a second or two to give the batter a chance to adhere to the mould.

Place the mould back into the hot oil. Hold still for a second or two and start jiggling the mould to get the biscuit to drop when the batter turns slightly golden brown . You could also use a wooden chopstick to slowly remove the batter. Deep fry until both side is golden brown. Remove and leave to cool. Repeat until all the batter is finished. Let them cool on wire racks then store in an airtight container.

Wednesday, February 10, 2010

Cornflake Cookies

With Chinese New Year just around the corner, I’ve been busy baking baking baking cookies last week. The kitchen is in total chaos and the oven had been working hard for 6 consecutive days non-stop last week! I’m mostly done with baking cookies but now I’m off to baking more Indonesian Layer Cake and perhaps a brownie. =)

Cornflake cookies is in my cookie list (again) this year. I love this cookies and I know many of my friends love this cereal-ly goodness too. It’s quite fairly easy to make these cookies and definitely a fun way to eat up those cornflakes!!

Here’s the recipe by Amy Beh @ www.kuali.com. I’ve been using this recipe for years now. =)

Cornflake Cookies

CORNFLAKE COOKIES

Ingredients:

  • 110g Butter, Softened @ Room Temperature
  • 110g Granulated Sugar
  • 1/2 Tsp Grated Orange / Lemon Rind
  • 1/2 Tsp Vanilla Extract
  • 1 Large  Egg Yolk
  • 100g Cornflakes, crushed lightly
  • 125g Self-Raising Flour
  • 1 Tbsp corn flour

    Method
    Cream butter, sugar and essence until the mixture turns light and fluffy. Beat in egg yolk and lemon rind. Fold in sifted flour and mix. Put mixture into the refrigerator to chill for half an hour until it turns slightly firm.

    Drop teaspoonfuls of mixture onto the crushed cornflakes. Shape into balls and place baking trays lined with parchment paper. Bake in preheated oven at 350F for 20—25 minutes or until lightly golden in color. Cool on wire racks before storing in airtight containers.

    June’s Comments: When I drop the batter into the cornflakes, I like to make sure there’s some cereal in the inside too. So, using the tips of my finger I will squeeze some cereal into the batter and also coat the outside with more cereal.

  • Sunday, December 27, 2009

    Gingerbread Man Cookies

    I made Gingerbread Man again! Although, I was a little late this year (baked them on X’mas eve)…..it’s their “presence” that counts! Haha.. I’ve mentioned last year that I love Gingerbread Man and I would usually get one (or two) when I see them! With my homemade Gingerbread Man cookies, I have almost unlimited supply of them! =)

    I made these yummy cookies with the recipe I extracted from www.Joyofbaking.com. The recipe can be found HERE.

    Gingerbreanman

    GINGERBREAD MAN RECIPE

    Ingredients:

    • 3 Cups All Purpose Flour
    • 1/4 Tsp Salt
    • 3/4 Tsp Baking Soda
    • 2 Tsp Ground Ginger
    • 1 Tsp Ground Cinnamon
    • 1/4 Tsp Ground Nutmeg
    • 1/4 Tsp Ground Cloves
    • 1/2 Cup Unsalted Butter, room temperature
    • 1/2 Cup Granulated Sugar
    • 1 Large Egg
    • 2/3 Cup Unsulphured Molasses

    Method:

    In a large bowl, sift or whisk together the flour, salt, baking soda, and spices. Set aside. In the bowl of your stand mixer with the paddle attachment, cream the butter and sugar until light and fluffy. Add the egg and molasses and beat until well combined. Gradually add the flour mixture beating until incorporated.

    Divide the dough in half, and wrap each half in plastic wrap and refrigerate for at least two hours or overnight.

    Preheat oven to 350 degrees F and place rack in center of oven. Line 2 baking pans with parchment paper and set aside while you roll out the dough.

    On a lightly floured surface, roll out the dough to a thickness of about 1/4 inch. Use a gingerbread cutter to cut out the cookies.  With an offset spatula lift the cut out cookies onto the baking sheet, placing the cookies about 1 inch apart. If you are hanging the cookies or using as gift tags, make a hole at the top of the cookies with a straw or end of a wooden skewer.

    Bake for about 8 - 12 minutes depending on the size of the cookies. Small ones will take about 8 minutes, larger cookies will take about 12 minutes. They are done when they are firm and the edges are just beginning to brown.

    Remove the cookies from the oven and cool on the baking sheet for about 1 minutes. When they are firm enough to move, transfer to a wire rack to cool completely.

    Let the Gingerbread Man cool completely before decorating them with some royal icing!

    June’s Comments: I did not have some of the ground spices required in the recipe. I therefore made a slight change to the grounded spices. The cookies still turned out great. Here’s what I used : 2 Tsp Ground Ginger, 1 Tsp Ground Cinnamon, and 1 Tsp Pumpkin Spice. After refrigeration, the cookie dough was tough to rolled out, so I left it at room temperature for 5 minutes or so for the cookie dough to soften a little being rolling it out flat. Cookies turned out great!!

    -----------------------------------------------------------------------------------------------------------------------

    What are Gingerbread Man without some sugary sweet white icing on it?? I did not use the frosting recipe for the Gingerbread Man as provided by www.joyofbaking.com as I did not have anymore butter at home. I used the royal icing recipe I found on www.simplyrecipes.com which I have used last year (both the cookies and the icing) to make my Gingerbread Man cookies.

    Here’s the Royal Icing recipe extracted from www.simplyrecipes.com. The original recipe can be found HERE.

    ROYAL ICING RECIPE

    Ingredients:

    • 1 Egg White
    • 1/2 Tsp Lemon Juice
    • 1 3/4 Cup Powdered Sugar

    Method:

    The traditional way to make Royal Icing is to beat egg whites and lemon juice together, adding the powdered sugar until the mixture holds stiff peaks. With modern concerns about salmonella from raw eggs, you can either use powdered egg whites or heat the egg whites first to kill any bacteria. With the heating method, mix the egg white and lemon juice with a third of the sugar, heat in a microwave until the mixture's temperature is 160°F. Then remove from microwave, and beat in the remaining sugar until stiff peaks form. Using the powdered egg whites method, combine 1 Tbsp egg white powder with 2 Tbsp water. Proceed as you would otherwise. (Raw egg white alternatives from the 2006 Joy of Cooking)

    If the icing is too runny, add more powdered sugar until you get the desired consistency. Fill a piping bag with the icing to pipe out into different shapes. (Or use a plastic sandwich bag, with the tip of one corner of the bag cut off.) Keep the icing covered while you work with it or it will dry out.

    Saturday, December 12, 2009

    Double Chocolate Chip Cookies

    I was in a mood to bake some cookies. It must be the “X’mas is just around the corner feeling” that initiated the cookie baking mood! =) I browsed through a few cook books and settled for a chocolate chip cookie recipe. This recipe is adapted from Better Homes and Gardens; The Ultimate Cookie Book.The Ultimate Cookie Book

    I adapted the recipe for the Double Chocolate Chunk Cookies and made some slight changes to it. Again, I added nuts to the recipe for some added crunch. I added 3 kinds of chocolate chip morsels; semisweet, milk and white chocolate. I love the result of the cookie as it’s not overly sweet! Here’s the recipe!

    DoubleChocolateChipCookie

    DOUBLE CHOCOLATE CHIP COOKIE RECIPE

    Ingredients:

    • 1 Cup Butter, Softened
    • 3/4 Cup Granulated Sugar
    • 3/4 cup Brown Sugar, Packed
    • 1 Tsp Baking Soda
    • 1 Tsp Vanilla Extract
    • 2 Large Eggs
    • 2 Cups Flour
    • 1/2 Cup Unsweetened Cocoa Powder
    • 12 Oz Semisweet Chocolate Morsels/Chips
    • 1/4 Cup Chopped Nuts; Pecans or Walnuts (Optional)

    Method:

    Preheat oven to 375 F. Beat butter with a mixer (preferably stand mixer) for about 30 seconds. Add granulated sugar, brown sugar and baking soda. Beat until combined, scraping sides of the bowl occasionally. Beat in vanilla extract and eggs one at a time until combined. Gradually beat in flour and cocoa powder. Stir in chocolate chips and nuts until evenly combined.

    Shape about 1 tbsp of dough into balls and place about 1-1/2” apart onto a baking sheet lined with parchment paper. Bake for about 10 minutes. Transfer to a wire rack to cool. Cookies will harden as they cool.

    June’s Comments: I actually used the hand mixer (per recipe’s / book’s instructions) to mix the first 6 ingredients and my hands when it was time to mix in the flour, chocolate chip and nuts. I had a hard time mixing the dough with the hand mixer, hence using my hands were a easier and better alternative!  I made my cookies bigger; about 2 tbsp of dough and baked them for about 15-18 minutes.

    Sunday, September 20, 2009

    Learning The Family Secret Recipe

    My MIL taught me her famous Kuih Bangkit recipe while she was here. Kuih Bangkit is a traditional cookie served in many homes during Chinese New Year. This light cookie is made from tapioca flour and will crumble and melt in your mouth!

    I will not be sharing MIL’s exact recipe as this is her secret recipe and her kuih bangkits are very sought after! I’ve read other Kuih Bangkit recipes HERE and HERE and those recipes call for margarine and powdered sugar; a lil’ different from my MIL’s version. My MIL’s Kuih Bangkit recipe uses just tapioca flour, coconut milk, pandan leaves, egg yolks and sugar.KuihBangkitI was finally able to use the Kuih Bangkit mould Anna sent me ages ago. At first, it was tough to remove the dough from the mould. So, we decided to roll and cut the cookies using cookie cutters. The cookies took a longer time to bake and cook. It took us a couple tries to make the cookies cook/bake just right. Even so, the roll and cut cookies are not as good as the ones MIL used to make using the Kuih Bangkit moulds. The cut and roll cookies were hard and crunchy.

    KuihBangkit4KuihBangkit1

    We decided to give the mould another try, dusting more flour into the mould this time for easy removal. It worked perfectly this time and after baking, we found out that it was perfect! The new “molded” cookies were just perfect, light, slightly hard on the outside yet crumble in the inside! YUMS!!! It was definitely different and better from the roll and cut cookies!

     KuihBangkit3 KuihBangkit2

    The freshly baked cookies are already running out! I would have to attempt another batch on my own soon! Again sorry, I’m not able to share this recipe. After all, it’s a family secret! =P.

    Tuesday, February 17, 2009

    Pineapple Roll Recipe

    Updated February 11, 2013

    Pineapple Rolls (Crust pattern made using grooved rolling pin)

    Pineapple Tart
    Pineapple Rolls (Crust pattern made using a chef's knife; crust was a little too thick here)

    A little birdie told me that her sister would like the recipe for the Pineapple Rolls I made for Chinese New Year….. I discovered the Pineapple Roll recipe from Lily of Lily’s Wai Sek Hong, a food blog I frequent for amazing and easy to follow recipes!

    Here’s the recipe I used to make my CNY Pineapple Rolls…...

    PINEAPPLE ROLL RECIPE

    PINEAPPLE JAM FILLING
    Ingredients 
    **Pineapple Filling/Jam (To be made one day ahead before making the rolls).
    • 4 Cans 20 ozs pineapple crushed/chunks(drain and pulse in food processor until fine)
      sugar (amount of sugar should be equal to the pineapple pulp e.g. 1 cup pineapple pulp to 1 cup sugar. 3/4 cup of sugar will be acceptable as the canned pineapples do tend to be sweeter than fresh ones)
    • 1 Tbsp of lime/lemon juice
    • 2 sticks of cinnamon bark
    • 6 Cloves
    • 1 Segment of star anise
    Method
    Put all the ingredients in a big round microwavable bowl and microwave on high. Start with 15 mins, stir well, high for another 15 mins x 2. If jam is still runny, microwave at 1 min at a time until it is thick but still wet. It will thicken and dry out when it is cooled. If jam has gone too dry, just add enough water, stir well to dilute. Jam for filling should not be too dry as it will dry further when the tarts are baking. (The timing in the microwave is for making 4 cans of pineapples, so if you intend to try making with one can only, then the time taken in the microwave should be very much shorter).

    Let the pineapple jam cool and refrigerate overnight. Roll the jam into little balls (about 3/4 tsp) and set aside use.

    June’s Notes: I cooked my jam filling in a saucepan, over medium heat stirring constantly till the pineapples turn slightly dark yellow and is no longer runny. I don’t remember how long I cooked it for though!

    CRUST RECIPE
    Ingredients 
    • 250 gm Butter 
    • 60 gm Icing(powdered) sugar
    • 440 gm All purpose flour (remove 4 tbsp and replace with corn flour)
    • 2 Egg yolks
    • 1/2 Tsp Vanilla essence
    • 1 Egg yolk + 1 tsp water for glazing
    Method
    Cream butter with icing sugar until light. Add in egg yolk and vanilla and cream until combine. Add in the flour and mix into a dough. Rest down for at least 30 minutes in the refrigerator. Roll out dough to 5mm thickness using grooved rolling pin to get a striped pattern, then roll diagonally to form checked pattern. Cut into strips (about 1" x 2-1/2"), turn pattern over, fill the middle section with pineapple jam, roll/fold each end of the pastry to cover the jam (I adjusted the jam filling (add or reducing) to make sure that the pastry can close up- just nice (to avoid gaps or overlapping of pastry). Repeat. Glaze and bake in preheated oven @ 350 F/180 C for 15 minutes.

    June’s Notes: I did not use grooved rolling pin to create the pattern. Instead, I use a chef’s knife and gently score the pastry diagonally to create the checked pattern. You do not want to cut / score the pastry too deep, as it will make it hard for you to wrap the jam later. For my pineapple rolls, I cut the scored pastries into strips of 1” x 2-1/2”. Then I filled it with about 1/2 tsp of jam in each strip and roll the pastry over to close it up. I adjust the jam filling (add or reducing) to make sure that the pastry can close up- just nice (to avoid gaps or overlapping of pastry). I believe that I doubled or tripled the crust recipe in order to use up all the jam filling!
    Good Luck! =). Please send me some when y
    Simply June ou make them! =P

    Monday, January 12, 2009

    Peanut Cookies

    I've started baking my CNY cookies, and have started with the Peanut Cookies which is one of the easiest cookies to make using the simplest & most affordable ingredients! I believe these yummy Peanut Cookies are very often available at most Chinese homes during the CNY and I'm not sure if it's because it's pretty easy & cheap to make, or if there's a significant meaning behind them!

    Anyway, I found this Peanut Cookie recipe from Lilian's Food Blog. These cookies will melt in your mouth!


    PEANUT COOKIE (FAH SANG PENG) RECIPE

    Ingredients:
    • 300 gm Skinless Peanuts, Fried/Roasted & Grounded Till Fine
    • 200 gm Granulated Sugar
    • 250 gm All-Purpose Flour
    • 150 ml Vegetable Oil( Add about 1 tbsp of extra oil at a time if you need more to bind the mixture)
    • 1 Tsp Salt
    Glaze:
    • 1 Egg Lightly Beaten

    Method:
    Preheat oven at 375F and prepare baking sheets lined with parchment paper for easy cleanup. Mix all the ingredients except oil (and the egg) in a large mixing bowl, running your fingers through them to make sure that they are crumbly and well mixed (Note: I grounded the grounded peanuts and sugar together to make sure they are super fine prior to this.). Add oil bit by bit and knead the mixture. Once you can roll up the mixture into a small ball without the surface crumbles, then don’t add anymore oil. Knead the mixture for a while to ensure that the sugar melts. It shouldn’t have speckles of shiny sugar grains but smooth texture when sugar melted. Roll the dough into small balls (size of a marble) and place them on a parchment paper and baking sheet. Use a circular tube and press gently on the top of the balls to make round indents (Note: I used the ends of a plastic cocktail stirrer to create the indentations. You could also use the ends of a chopsticks). Lightly glaze cookies with egg before baking. Bake cookies at 375F for 15-17 minutes until lightly brown.

    June's Comments: I bought the skinless peanuts from a Chinese grocery store. I roasted the peanuts @ 350F for about 25-30 minutes until they are golden brown. I like my peanuts darker. If you prefer a lighter shade for the peanuts, 20 minutes in the oven might be sufficient. Remember to occasionally stir peanuts!

    -----------------------------------------------------------------------------------------------------
    These cookies are made for my darling husband who absolutely love Peanut Cookies. I think he will conveniently finish them up before CNY and have me bake more!

    Related Posts with Thumbnails