Showing posts with label Seafood. Show all posts

Thursday, May 2, 2013

Salmon Teriyaki

I recently stumbled upon this lovely Japanese cooking blog and have since fell in love with it. The recipes posted are easy and the dished come out delicious! I have since tried a few other Japanese recipes from her blog with delicious results.

With a piece of salmon I got on sale, I decided to cook up some teriyaki salmon for the husband and I. Right away, I knew I had to look up Nami's blog: Just One Cook Book for this dish and was delighted to see that she has a recipe for it. I had most of the ingredients in the pantry and was able to make salmon teriyaki as planned.

Unfortunately, I did not have sake in my pantry but was able to use dry sherry as a substitute. I cut my piece of salmon fillet to larger pieces than what the recipe asked for; so cooking time was slightly longer. Result was a very delicious piece of teriyaki salmon; one each for the husband and I and extra for my neighbor. We served the salmon teriyaki with some steam rice with furikake and clam miso soup. Dinner that day was super yums!

Here's the recipe adapted from Nami's blog. The instructions on her blog are clear with step by step pictures.


SALMON TERIYAKI RECIPE
*Serves 2

Ingredients

  • 2 Salmon Fillets, Skin On (About 3/4" thick - the skin will hold the flesh together when cooking)
  • Salt
  • Freshly Ground Black pepper
  • 1 Tbsp All Purpose Flour
  • 1/2 Tbsp Olive Oil
  • 1 Tbsp Butter
  • 1 Tbsp Dry Sherry ( or Sake)
  • 1/4 Tsp Toasted Sesame Seed (Optional)
  • 1 Tbsp Chopped Green Onion (Optional)
Sauce Ingredients
  • 1 Tbsp Dry Sherry ( or Sake)
  • 1 Tbsp Mirin (or 1 Tbsp Sake + 1 Tsp Sugar)
  • 1 Tbsp Sugar
  • 2 Tbsp Soy Sauce 
Method

Combine the sauce ingredients and mix well until sugar is mostly dissolved. 

Rinse salmon and pat dry with paper towel. Season both sides of the salmon with salt and black pepper. Then sprinkle 1/2 tbsp of flour on one side of the salmon and spread evenly. Flip over and do the same to the other side. Gently remove the excess flour. 

In a frying pan, heat olive oil and butter over medium heat. Do not burn butter and if the pan gets too hot, reduce heat or remove from heat temporarily. Add salmon fillets, skin side down and cook the salmon for about 3 minutes or until the skin is nicely browned and crisp. 

Add dry sherry and cover with lid. Steam the salmon for 3 minutes or until it's cooked through. Transfer the salmon to a plate. Then, add sauce ingredients to the pan and heat it up. When the sauce starts to boil, add salmon back in the pan and spoon sauce over the salmon. When the sauce thickens, turn off the heat. Transfer salmon and sauce onto a serving plate. Sprinkle with optional sesame seeds and green onions and serve immediately with some warm rice.

June's Notes: As the piece of salmon I used was big, I seared both sides of the fish (starting with the skin side first) for a couple minutes to ensure it's cooked through. 


Enjoy!

Simply June 

Wednesday, March 6, 2013

BAGNA CAUDA.........Love It!


We've been blessed to have friends from different parts of the world and generous to share their culture with us. Often, sharing their culture/tradition involves eating.... and the husband and I cannot say no to food! =)  A couple months ago, our Italian friends C&A invited us over for a traditional Italian meal; Bagna Cauda which originates from their town. According to C & A, their family always have it over winter and share the meal with family and friends. After I tried this delicious dip/meal, I was totally hooked!!

According to Wikipedia, Bagna Cauda is a warm dip typical of Piedmont, Italy and is served and consumed in a manner similar to fondue. The dip is made with garlic, anchovies, olive oil, butter and sometimes cream. Therefore, you must like fish or in this case anchovies to enjoy this dip. The dish is eaten by dipping raw, boiled or roasted vegetables and even bread. Traditional, the Bagna Cauda is placed in a big pan in the center of the table for communal sharing. Now, it is usually served in individual pots.

C & A was generous to haul 2 (or 3) large cans of anchovies back from Italy during their last trip. It took them several days to clean the salt cured anchovies and prepare some of the vegetables for dipping. We were greeted with a melange of steamed, boiled, and raw vegetables (raw beets, boiled cabbage, boiled potatoes, raw radish, steamed cauliflower, steamed asparagus, raw fennel, steamed carrots, boiled mini onions, etc) C prepared the quick yet delicious anchovy dip in front of us, so I had a first hand look of how it's being made. Super easy, just make sure you have some canned anchovies at home. Since I could not find salt cured anchovies, I used anchovies soaked in oil instead. The result is still as good.  It's definitely a good way to load up on a lot of vegetables. Some vegetables was surely an excellent match for the dip, some was just ok... but overall it's a personal preference thing as there's no one vegetable that I dislike after dipping it in the bagna cauda! Here's the recipe!


BAGNA CAUDA RECIPE
*Serves 1-2

Ingredients
  • 1 Small (2 Oz) Can Anchovies (in oil), Drained
  • 3 Tbsp Olive Oil
  • 4-5 Cloves Garlic, Grated
  • 2 Tbsp Heavy Cream
  • Dash of Ground Black Pepper, Optional
Method
In a small pot, heat oil over medium heat. Then, add grated garlic and anchovies and let the mixture cook over medium low heat until the anchovies melt. Stir occasionally to help melt the anchovies. Finally, add in heavy cream and let the mixture warm up. Transfer bagna cauda to a small porcelain bowl and add some fresh cracked black pepper. Serve the warm dip with your favorite steamed or raw vegetables. Bread also goes well with this dip.

June's Notes: With the bagna cauda sauce I made, I decided to steam some asparagus till slightly tender and poached and egg. I poured about 2 tbsp of the bagna cause sauce over the asparagus and poached egg platter and loved the combination of the runny yolks and the bagna cauda sauce! 


To learn how to poach an egg, check out Alton Brown's tips. 

Simply June 

Thursday, September 6, 2012

Sambal Lady Fingers

The MIL and I were discussing what vegetable dish to make for dinner. After going through the vegetables I had in my fridge, we decided to cook okra / lady fingers. I usually cook my okra/lady fingers the only way I know it's yummy.....in fish curry.  MIL was thinking about a stir fry... However, we ended up making the sambal okra / lady fingers after seeing a mouthwatering picture of sambal lady fingers in one of my nonya cookbook. We used that picture and recipe as an inspiration to make this dish!

My MIL was kind enough to cook us a big batch of "Dried Shrimp Sambal" or more fondly known in Hokkien as "Sambal Hae Bee. We used that as part of the ingredients for this recipe; instead of using regular dried shrimp. So, if you happen to have some delicious homemade (or store-bought) "sambal hae bee", give this recipe a try!!!  Mixing all the ingredients needed for the sambal, I couldn't wait to dig in... The sambal tasted sooo good!!!! The amount of sugar and lime in the recipe is totally up to your personal preference. The hint of minced kaffir lime leaves and roasted belacan powder gives it a nice aroma. The spicy, sweet, sour and fragrant sambal reminded me of tom yam! I had plenty of rice that day... and happily cleaned the plate of leftover sambal. It's so addictive and appetizing, I could eat another plate of it! Here's the recipe..... I hope you like it as much as I do! Nom..Nom..Nom..!

SAMBAL OKRA / LADY FINGERS RECIPE
Ingredients
  • 15-16 Lady Fingers / Okra, Top and Tip Trimmed
  • 2 Tsp Oil 
Sauce Ingredients
  • 3 Tbsp Sambal Oelek
  • 2 Tsp Belacan Powder
  • 3 Tbsp Homemade Dried Shrimp Sambal 
  • Juice from 1 Lime
  • 3-4 Kaffir Lime Leaves, Finely Minced
  • 2-3 Cloves Garlic, Finely Minced
  • 3-4 Tsp Sugar (Adjust accordingly)
  • Pinch of Salt
  • 2 Tsp Fried Shallots (Optional) 

Method
In a wok, heat some water over medium high heat and place a rack in the wok. Arrange the okra/lady fingers in a single layer in a shallow bowl and drizzle with some oil. Once, the water in the wok starts to boil, place the bowl of okra / lady fingers and cover the wok. Let the okra / lady fingers steam for about 5-7 minutes until tender. The okra / lady finger will turn a darker shade of green.

While the okra / lady fingers are steaming, mix all the sauce ingredients in a bowl. Adjust the sugar and lime accordingly to get your preferred level of sourness and sweetness. I like my "sambal" to be a little sour, so I use about 3-4 tsp of sugar to mix with the juice from the huge lime I used.

Once the okra / lady fingers are cooked, pour the sambal mixture onto the steamed okra / lady fingers. For optimum flavor, gently cut a small vertical slid in the middle of steamed okra, gently pry it open with a small teaspoon and stuff some of the sambal into the okra / lady fingers. Pour remaining extra samba over the okra / lady fingers and sprinkle with optional fried shallots. Serve with plenty of warm white rice!!Enjoy!

June's Notes: If you do not have "sambal hae bee" at home, I think you could probably use some toasted chopped dried shrimp. The flavors might not be as intense, but shouldn't be too bad. I'll have to try this version and let you know the results! =)
Looking at the picture of sambal lady fingers again, make me really hungry!!! Maybe I'll make another batch today.....Slurp! 

Simply June 

Wednesday, June 9, 2010
Shrimp Mayo (II)

Husband and I love Mayo Shrimp and I’ve made it once before. We recently ordered take out from a restaurant near our place and just couldn’t resist what we saw on the menu; Jumbo Shrimp Mayo. Just had to order it!

The Shrimp Mayo was slightly different from what’ve we’ve had before but it was still good. I recognized immediately that they used coconut milk in the sauce. Mmmm….

So, a few weeks later I attempted to recreate what we had  I tweaked the recipe I used before and was pleased with the result. It tasted like our take out dinner the other day!

MayoShrimp

MAYO SHRIMP RECIPE

Method:

Part A (Fried Shrimp):

  • 1/2 Lb Shrimp, Peeled & Deveined
  • 1 Large Egg White
  • 1/4 Cup Corn Flour
  • 1/4 Tsp Baking Soda
  • 1/8 Tsp Salt
  • 1/3 Cup + 1 Tsp Oil

Part B (Sauce):

  • 2 Tbsp Mayonnaise
  • 2 Tbsp Condensed Milk
  • 1-1/2 Tbsp Coconut Milk
  • 2 Tsp Lemon Juice

Method:

Mix egg white, corn flour, baking soda, salt and 1 tsp oil in a bowl until you get a smooth paste. Pat dry the shrimp and mix them into the paste/batter. Make sure shrimp is well coated with the batter.

Heat 1/3 cup oil in a small pan over medium heat and slowly drop the nicely coated shrimp one at a time into the hot oil. You do want to make sure the oil is at least 1/2” deep. Add more oil if your pan is bigger. Do not overcrowd the pan with the shrimp. Fry the first side of the shrimp until it’s golden brown before flipping them over to fry the second side. This shouldn’t take too long as the shrimp cooks very quickly.

While the shrimp is cooking, prepare the sauce part by mixing Part B in a bowl until well combined. Set it aside. Remove fried shrimp, drain oil and place them in a bowl. Pour sauce over the shrimp and coat well before transferring onto a serving platter. Serve immediately with some white rice. You could also place the sauce on the side instead of coating the shrimp in them!

Signature

Thursday, June 3, 2010

Salmon & Spinach Quiche

Quiche for my French themed dinner! It was easier than expected especially when I use store bought crust. Here’s an easy recipe for either breakfast, lunch or dinner (like what I did!)! I did not fuss with the crust for my version of quiche and just used a store bought pie crust for it. I thought it turned out pretty well. The quiche although has cream and eggs was kinda light.

SalmonQuiche

SALMON & SPINACH QUICHE RECIPE

Ingredients:

  • 1 Pillsbury Pie Crust, Defrosted
  • 6-7 Oz Smoked Salmon, Chopped
  • 1 – 10 oz Packaged Frozen Spinach, Defrosted and Drained
  • 3/4 Cup Cream
  • 4 Large Eggs
  • 1/2 Medium Onion, Chopped
  • 2 Cloves Garlic
  • 1 Tbsp Butter
  • Salt & Pepper

Method:

Preheat oven to 350F. Melt butter in a pan, add garlic and onion. Sauté until garlic is lightly brown and set aside. In a medium bowl, beat eggs and cream. Add chopped smoked salmon, spinach (with all juice squeezed out), onion mixture. Season with salt and pepper and set aside. Line a 9 inch tart pan with the pie crust, trimming excess crust. Lightly pierce the crust with a fork, then pour in egg mixture.

Bake quiche for 30-40 minutes or until the center is set. Serve either warm or even at room temperature! Enjoy!

Psst…Mom..you gotta try this recipe! =)

Signature

Thursday, May 27, 2010

Excuse My French…….

My French themed (inspired might be more accurate) dinner…that is! It had been quite a whiel since I last had my usual suspects over for a home cooked meal. After Chris’ Italian themed dinner 1-2 weeks ago, I knew it had to be our turn to have people over. The main reason is to motivate us to clean up the house; big time! The second reason; for some good old company. The third; I really miss spending time in the kitchen after being in the workforce again!

I wasn’t in the mood to cook something random and French seem like a cuisine that would impose some kind of challenge to me! Plus, I really want to make some quiche. I actually did not finalize the menu until about 4 Horus before I started making dinner.  Usually I have the menu pretty much nailed down the day before. It was hard this time when it was a specific theme and I wanted something that does not cost an arm and a leg. Here’s what I did beside trying to set the table as fine dining looking as possible with my limited dinnerware set.

French

1) Cheese Platter with brie; a soft cow’s milk French cheese, whipped cream cheese with garlic and herbs, rosemary cracker, French baguette and grapes. That was like an appetizer as we drank some nicely chilled Sauvignon Blanc.

CheesePlatter

2) Lobster Bisque (Bottom Left) – Made a huge pot of creamy lobster bisque; a popular New England Soup. Lobster was in season @ $4.99 per lb. We can afford some! =) Bisque is a smooth creamy French soup with a crustacean broth as a base. The husband thought the soup could be thicker. My other guests liked  as it wasn’t too starchy and was light. I enjoyed it as well but agreed with the husband. Instead of using cognac like in many recipe, I used the cheapest wine Walmart has. $3 per bottle if you want to know how much I paid for it! =)

3) Creamy Seafood in Puff Pastry (Bottom Right) – Scallops, Tiger Prawns and Mussels were sautéed and cooked in a béchamel sauce with a splash of (Walmart) wine. Chopped chives were also stirred in before platting. I baked some puff pastry, made pockets and “stuffed” the creamy seafood into them. The result, a fine looking dish. Don’t you think? I thought it looked very fancy, and yet it wasn’t too hard to prepare. Best of all, my guests and my husband loved this!

LobsterBisque Creamy Seafood

4) Salmon & Spinach Quiche (Bottom Left) – I for some reason have been wanting to make this for quite a while. It was shut down my the husband and a friend when I offered to make quiche for dinner and both the boys wanted KFC!! I was finally able to make it for my French themed dinner. I did not mess with the crust and use pie crust instead and baked it in a tart pan. Smoked salmon and frozen spinach was the 2 key ingredients in this dish. I really liked this. It felt really healthy with all the spinach and we had plenty for lunch the next day! =)

5) Strawberry Clafouti (Bottom Right) – Clafouti is a baked French dessert with cherries and has a texture like flan. I had wanted to make a Chocolate soufflé, and realized that was a lot of work and chances of the soufflé failing was rather big! Strawberry clafouti has a last minute idea and I used a Julia Child’s recipe! The clafouti honestly looked kinda ugly when it came out of the oven. With the help of powdered sugar, fresh strawberry and mint leaves, I disguised the look and made it look fancy! =) The guests enjoyed this dessert and I was pleasantly surprised it tasted better than it looks. Next time, I will try it with other fruits instead. Maybe those will turn out better looking!

SalmonQuiche StrawberryClafouti

5) Ratatouille (Not pictured and no, not the movie!) – Chris made and brought this over along a bottle of yummy rosé. He layered tomatoes, eggplants, zucchini, bell pepper and cheese and baked it. Awesomely delicious! =)

That’s it for my French themed dinner. Did I mention we played French music and finished about 4 bottles of French (or French grape) wine? =) I can’t wait for the next themed dinner @ Seyda and Rob’s. The theme is English! This will be interesting! I can’t wait!! Any ideas what English food should I make?

Signature

Tuesday, April 6, 2010

Stuffed Mussels

With a package of frozen cooked New Zealand mussels I have in the freezer, I decided to do something with it for my Tapas Party. I’m not a huge fan of those plump mussels (or any similar shellfish), but I don’t mind them when they are chopped. I decided to google for a stuffed mussels recipe and found one on my favorite online food sites; Tastespotting. I found a recipe here and extracted bits and pieces from it.

The mussels can definitely be prepped / stuffed ahead and baked about 15-20 minutes prior to serving. You do want to make sure to cover and store the stuffed mussels in the fridge if you do not plan to bake it right away.

Tapas

STUFFED MUSSELS RECIPE

Ingredients:

  • 10 Cooked Mussels, On Half Shell
  • 2 Tbsp Chopped Onion
  • 2 Tbsp Chopped Bell Pepper
  • 2 Clove Garlic, Minced
  • 2 Tbsp Flour
  • 6 Tbsp Milk
  • 1 Tbsp Butter
  • Salt & Pepper
  • 2 Tbsp Bread Crumbs
  • 1-2 Tbsp Grated Parmesan

Method:

Preheat oven to 400 F. Carefully remove mussels from shells and chop them. Set shells aside for stuffing. Set chopped mussels aside.

Heat butter in a pan over medium high heat. Add onion, bell pepper and garlic. Sauté until bell pepper is soft. Stir in flour and cook for a few minutes to make a roux. Gradually, stir in milk to achieve the béchamel sauce. Season with salt and pepper. Once sauce thickens, remove pan from heat.

Stir in chopped mussels and evenly stuff them into the mussel shells. Sprinkle some bread crumbs and parmesan cheese over the stuffed mussels. Placed them on a baking pan lined with some foil and baked them for about 15 minutes or when the crumbs turn slightly brown. Let mussels cool slightly before serving.

Signature

Saturday, March 20, 2010

Tapas Party @ Home

Last weekend, the hubby and I had a somewhat spontaneous party and invited some friends over. Having a party motivates the both of us to clean up the house and making it guest worthy! I will usually take charge of the kitchen and cooking, while hubby has the whole house to himself…to clean that is!

Tapas7

We made everything about 3-4 hours before the guests arrived. The only thing I made the night before was the flan, which took FOREVER to cook (about 2 hours), thanks cooking the custard in a big and deep container!

Here’s what we served our guests:

1) Sangria (Bottom Left) -  What is a Tapas Party without some Sangria?  This was a concoction of merlot, syrup, orange juice and slices of lemon, lime and orange. I think all of us enjoyed this bowl of Sangria….not a drop left at the end of dinner! =)

2) Edamame Spread (Bottom Right) – Inspired by the ones served @ Solea’s, I made my own version. Pureed edamame, peppers, cheese, olive oil and seasoning. Served this with slices of baguette.

Tapas3EdamameSpread2

3) Stuffed Mussels (Bottom Left) – Chopped mussels with onion, pepper and seasoning in a béchamel sauce, topped with parmesan cheese and breadcrumbs.

4) Garlic Mushrooms (Bottom Right) – Sautéed cremini mushrooms with garlic, olive oil and a squeeze of lemon juice.

TapasTapas1

5) Roasted Asparagus with Red Pepper Sauce (Bottom Left) – Asparagus doused with some salt, pepper and olive oil and roasted till tender. Sauce was red pepper pureed with a splash of red wine vinegar for some zing.

6) Tortilla Espanola (Bottom Right) – Spanish Potato Omelet. One of my favorite Spanish Tapas!

Tapas2 Tapas4

7) Hooters Style Chicken Wings (Bottom Left) – Deep fried wings coated with hot sauce and butter. This has become hubby’s signature dish. =)

8) Garlic Shrimp (Bottom Right) – Succulent shrimp sauteed in olive oil, butter, garlic and a sprinkle of chili flakes for a little kick!

Tapas5 Tapas6 

9) Spanish Flan (Bottom) – Custard cooked in a water bath. This is one of the easiest and yummiest desserts to make! Mental note to myself, bake the custard in smaller ramekins instead of a big container. Baking the custard in a big container took the custard about 2 hours to cook and set!! Ramekins only took about 1 hour or less.

Tapas8

On top of Sangria, we also had some yummy and somewhat pricey wine that our friends brought over! Good food, great wine, awesome company….it was a great way to end the week and lI guess look forward to the Monday blues? =p Will be posting recipes to the stuff I made at the party soon! =)

Signature

Friday, March 12, 2010

Salmon Cakes

I have a can of red salmon (what ever that is) sitting in my pantry. I think my inlaws got them when they were here and yes they’ve been sitting a while in my always very packed pantry. I can never go hungry if I’m stuck at home!! =)

Having never seen, heard and let alone use canned salmon, I had to think of a quick way to use it. Making cakes/croquettes was a brilliant idea to use up canned fish. I held my breath as I opened the can and dump the contents into a bowl. I don’t know what to expect. The canned salmon was actually a portion of a cut up salmon, cooked till bones are tender (skin still intact) and squashed into a can! Other than that, it looked any boiled salmon I guess…

Japanese Breadcrumbs (Panko) gives the cakes a nice little crunch! Ground cumin in the salmon cakes was a nice little spice spruce me up and gave the cakes a little different flavor. Here’s the recipe for the Salmon Cakes.

SalmonCakes

SALMON CAKES RECIPE

Ingredients:

  • 1 Can Red Salmon (14-2/4Oz can)
  • 2 Ribs Celery, Diced (About 1 Cup)
  • 1 Medium Onion, Diced (About 1 Cup)
  • 2 Cloves Garlic , Minced
  • 4 Tsp Dijon Mustard
  • 1 Tsp Chopped Parsley
  • 1 Tsp Lemon Juice
  • 1 Tsp Ground Cumin
  • 2 Large Eggs
  • 2 Tbsp Butter
  • Salt & Pepper
  • 1 Cup Panko
  • Oil

Method:

Drain juice from salmon and remove skin and as many bones (bones are edible, but I like to remove them) as you can. I ended up with about 9 oz of salmon. Mash the salmon and set aside.

In a pan, melt butter over medium high heat. Once butter has melted, add onion, celery and garlic. Saute mixture until onion is soft. If you prefer, you can also cook until the celery is soft. I personally prefer a little crunch to the celery.

Once that is done, set the mixture aside and let it cool. Add celery & onion mixture, cumin, lemon juice, dijon mustard, salt and pepper add one beaten egg into the mashed salmon. Mix well and use a ice cream scoop (or not) to scoop them and shape them into discs/patties (About 2-1/2” x 3/4”). Beat an egg. Gently dipped the salmon patties/cakes into the the beaten egg mixture and coat patties well in Panko crumbs.

Heat a pan with oil (to cover at least half the height of the salmon cakes) over medium high heat. Fry the Panko coated salmon cakes until golden brown on the first side and continue the same for the second side. This will give you about 9-10 pretty delicious salmon cakes!

SalmonCakes1

June’s Comments: The Salmon Cakes can be quite fragile but will firm up after you cook them. I love to serve anything fried with a concoction of mayonnaise (my favorite dipping condiment!!), ketchup and chili sauce. Serve the Salmon Cakes as is, with some salad or sandwiched between bread! =)

Signature

Friday, February 26, 2010

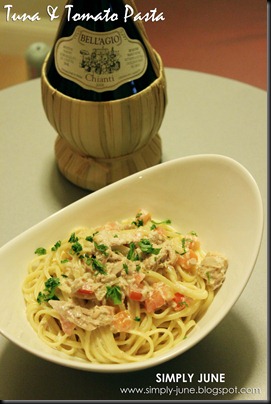
Creamy Tuna & Tomato Pasta

I believe my aunt taught my mom this recipe and my mom passed it down to me when I saw her make this unbelievable quick and delicious pasta. A French lady or someone who’s lived in France taught my aunt this amazing creamy tuna and tomato pasta which is now one of my favorite comfort food.

Making and eating this pasta reminds me of home somehow. I’m truly lucky that my mom enjoys cooking and trying out various recipes from different parts of the world. I’m proud to say my passion for cooking and baking has its roots; my mom.

TunaPasta

In this recipe, use SOLID canned tuna either packed in oil or water. I personally prefer the ones packed in oil as I think they are a little more flavorful. Solid Tuna as shown in picture above (left) will definitely give you chunkier, meaty tuna pieces. Yes, it does cost more, maybe double the price of the Chunk Tuna as shown in picture above (right) but the investment is worth it. Chunk Tuna pieces will disintegrate into unappetizing mushy little pieces. It taste better to able to bite into large chunks of tuna. Leave that mushy mess for your tuna salad sandwich! =P

TunaPasta1

CREAMY TUNA & TOMATO PASTA RECIPE

Ingredients:

  • 2 Cans Solid Tuna in Oil (or Water)
  • 1-2 Plump Tomatoes, Diced
  • 2 Clove Garlic, Minced
  • 1 Tbsp Olive Oil
  • 1 Cup Heavy Cream
  • 1-1/2 Tbsp Chopped Parsley
  • Salt & Pepper
  • 1/2 Lb Spaghetti or Linguine

Method:

Boil pasta in seasoned water (oil + salt) until al dente. Drain and set aside. Heat oil over medium heat and stir fry garlic until fragrant, not burnt. Then add cream, tuna and let mixture come to a boil. Once it starts boiling, add cooked pasta and seasoned with salt and pepper. Toss in tomatoes and half of chopped parsley. Transfer to serving bowls and sprinkle with more parsley. Serve immediately. This should serve 2-3 people.

Signature

Monday, February 22, 2010

Dinner for 2 for <$25

………And that includes a bottle of yummy Pinot Grigio! Eating at home is always a great way to save money. Plus you know what you put into your food, you know that it’s going to be fresh (and clean) and yes PRETTY DARN GOOD!

Dinner1

Last weekend, I decided to make hubby and I a simple yet satisfying seafood dinner…all under $25.  Heck it might be under $20 coz I forgot how much we paid for the bottle of wine. Definitely no more than $10. Basically, I worked with whatever I had in my pantry and freezer.

The menu was Doenjang (Korean Bean Paste) Glazed Chilean Sea Bass & Tiger Prawns over Wilted Spinach! Everything was YUM-O! Fish and prawns which was a little on the sweet side paired so well with the tangy wilted salad!  Perhaps I could do a little better with the food presentation. The best satisfaction was eating my favorite fish; Chilean Sea Bass which usually cost $20 and up per entree.

Dinner2

Here’s the rough breakdown and my best guestimate!

  • 2 Chilean Sea Bass Fillet @ $5.00
  • 4 Jumbo Tiger Prawns @ $3.00
  • 1 Bunch Watercress @ $1.50
  • 4 Strips Bacon @$0.50
  • 1 Onion @ $0.20
  • Miscellaneous paste, sauce, spices @ $2.50
  • 1 Bottle of Pinot Grigio @ $10.00

TOTAL = $22.70

I even brought out some accessories to enhance the place setting! Chargers, napkins and even napkin holders!

Dinner

What are you waiting for? Go get some groceries and start cooking a luxurious or simple meal for you and your loved one! This is luxury on a budget! =)

Sunday, January 3, 2010

NYE Dinner

It’s been too long since hubby and I are out counting down to the New Years. The biggest New Year countdown event we did was about 7 years ago. We count down to the 2003 at Times Square, NYC. It was fun yet torturous coz it was freaking cold that night. We got into the highly secured Times Square vicinity at about 6-7pm and waited all night for the Countdown Ball to drop and to usher the New Years along with hundred thousands of people from all over walks of life! We’re proud that we did it once and vowed never again to go back! Just imagine holding your pee for hours, in the cold. No public washrooms are available, unless you’re dining at a nearby restaurants!!

For years now…we only celebrate New Years at home. Just us and/or with family and close friends. No NYE dinner at a fancy restaurant where prices are hiked up..….just a fancy home cooked meal at home! =) This year, like many others…it’s another at home celebration with great company, yummy food and bubbly champagne.

We invited Chris over for dinner along with my brother and his gf who are still in town. =). Dinner was easier this time as the oven does most of the work. I baked some mini frozen ham and cheese puffs from Trader Joe’s ($4.99 for 12). These were delicious and saved me time from making some on my own! =)

NYE-DinnerNYE-HamCheesePuffs

Don’t get me wrong…I did make my own appetizers too =). Inspired by bacon wrapped scallops and the Japanese Beef Enoki wraps, I came up with Bacon Enoki (Bottom Left) which was easy to make and was quite delicious! Enoki is a kind of long thin mushrooms often used in Asian cuisines. You can get them canned or fresh in bags in most Asian stores. For this dish, fresh Enoki mushrooms were used.

Bruschetta (Bottom Right); chopped tomatoes over toasted French loaf. Bruschetta is an Italian snack now very commonly found in restaurants and is served as an appetizer. There are many variations out there, but the basic idea is chopped tomatoes over toasted (oiled with garlic rub)French loaf slices. I made mine using some quartered grape tomatoes, balsamic vinegar, garlic, basil leaves, salt and pepper and served it over slices of toasted French loafs. I actually enjoyed eating them, which was unusual since I’m not a big fan of eating raw tomatoes. 

NYE-BaconEnokiNYE-Bruschetta

I made some Stuffed Mushrooms (Bottom Left) using a recipe I found on www.allrecipes.com and modified it a little. The mushrooms were gigantic, cheesy and were delightful. It was a tad spicy, so I would probably reduce the cayenne pepper next time.

For entree, it was huge stuffed Tiger Prawns (from Costco). I used a recipe I found HERE and again modified it a little and added some crab meat to the mixture. I topped the baked Stuffed Tiger Prawns with some homemade Spicy Mayonnaise and served them with some Garlic Asparagus. YUMS!

NYE-StuffedMushroomsNYE-StuffedTigerPrawns

And what is a countdown without some bubbly champagne. Sparking wine (Asti Spumante) to be exact since this bottle of bubbly is from Italy and not the region of Chamgpane, France best known for sparking wine that bears its name; Champagne. Chris was generous to bring a huger 1.5L bottle of bubbly over to go with our meal. We had a great time finishing that bottle, plus another 1.5L of Muscato among the 5 of us! Thanks, Chris for the bubbly sparkling wine!!

NYE-Dinner1

And when I organize a dinner party, I try to include dessert(s) to complete the meal/party. It was a trio of desserts; 2 of them French origin. I stumbled upon some French Macarons from Trader Joe’s ($4.99 (I think) for 12) and just had to get them!! Especially, since I had 2 failed French Macarons baking attempts. Boo! The French Macarons were delicate, light and delectable. It was my first time eating store bought ones and I’m quite pleased. Now, all I need to do is replicate them at home – successfully!!!!

Raspberry Napoleon (Bottom Right) was the next French origin dessert. It was baked puff pastry, layered with raspberry flavored Cool Whip, topped with a fresh raspberry and a dusting of powdered sugar. This was my first time using Cool Whip. Though, it may not be the healthiest product, Cool Whip is my new best friend. =)

And sticking to something truly Malaysian was a slice of “Pulut Tekan” (Pressed Glutinous Rice) served with Kaya (Coconut Egg Jam). Recipe to make this Malaysian “Kuih” will be posted!

   NYE-DessertsNYE-RaspberryNapoleon

We spent the rest of the night watching movies past midnight….and actually FORGOT to countdown!! It was 12.30am or so, when we actually wished each other “Happy New Year!”. Well, at least we had great company and loved ones by our side. Isn’t that most important of all? =)

Hope your New Years was fun!

PS: What’s your New Year resolution?????

Related Posts with Thumbnails